Add a Map layer to overlay a PDF, image, or KML/KMZ file on the map in Unearth.
PDF, KML, or image layers allow users to keep track of blueprints, hand-drawn maps, previous work done, and other data. Unearth gives users an easy workflow to upload these documents as an overlay on the map.
In this article, you will learn how to use QuickMap Overlay for PDF or image files, how to overlay a KML or Shapefile, and how to navigate the map layers menu.
Add a PDF or image using QuickMap Overlay
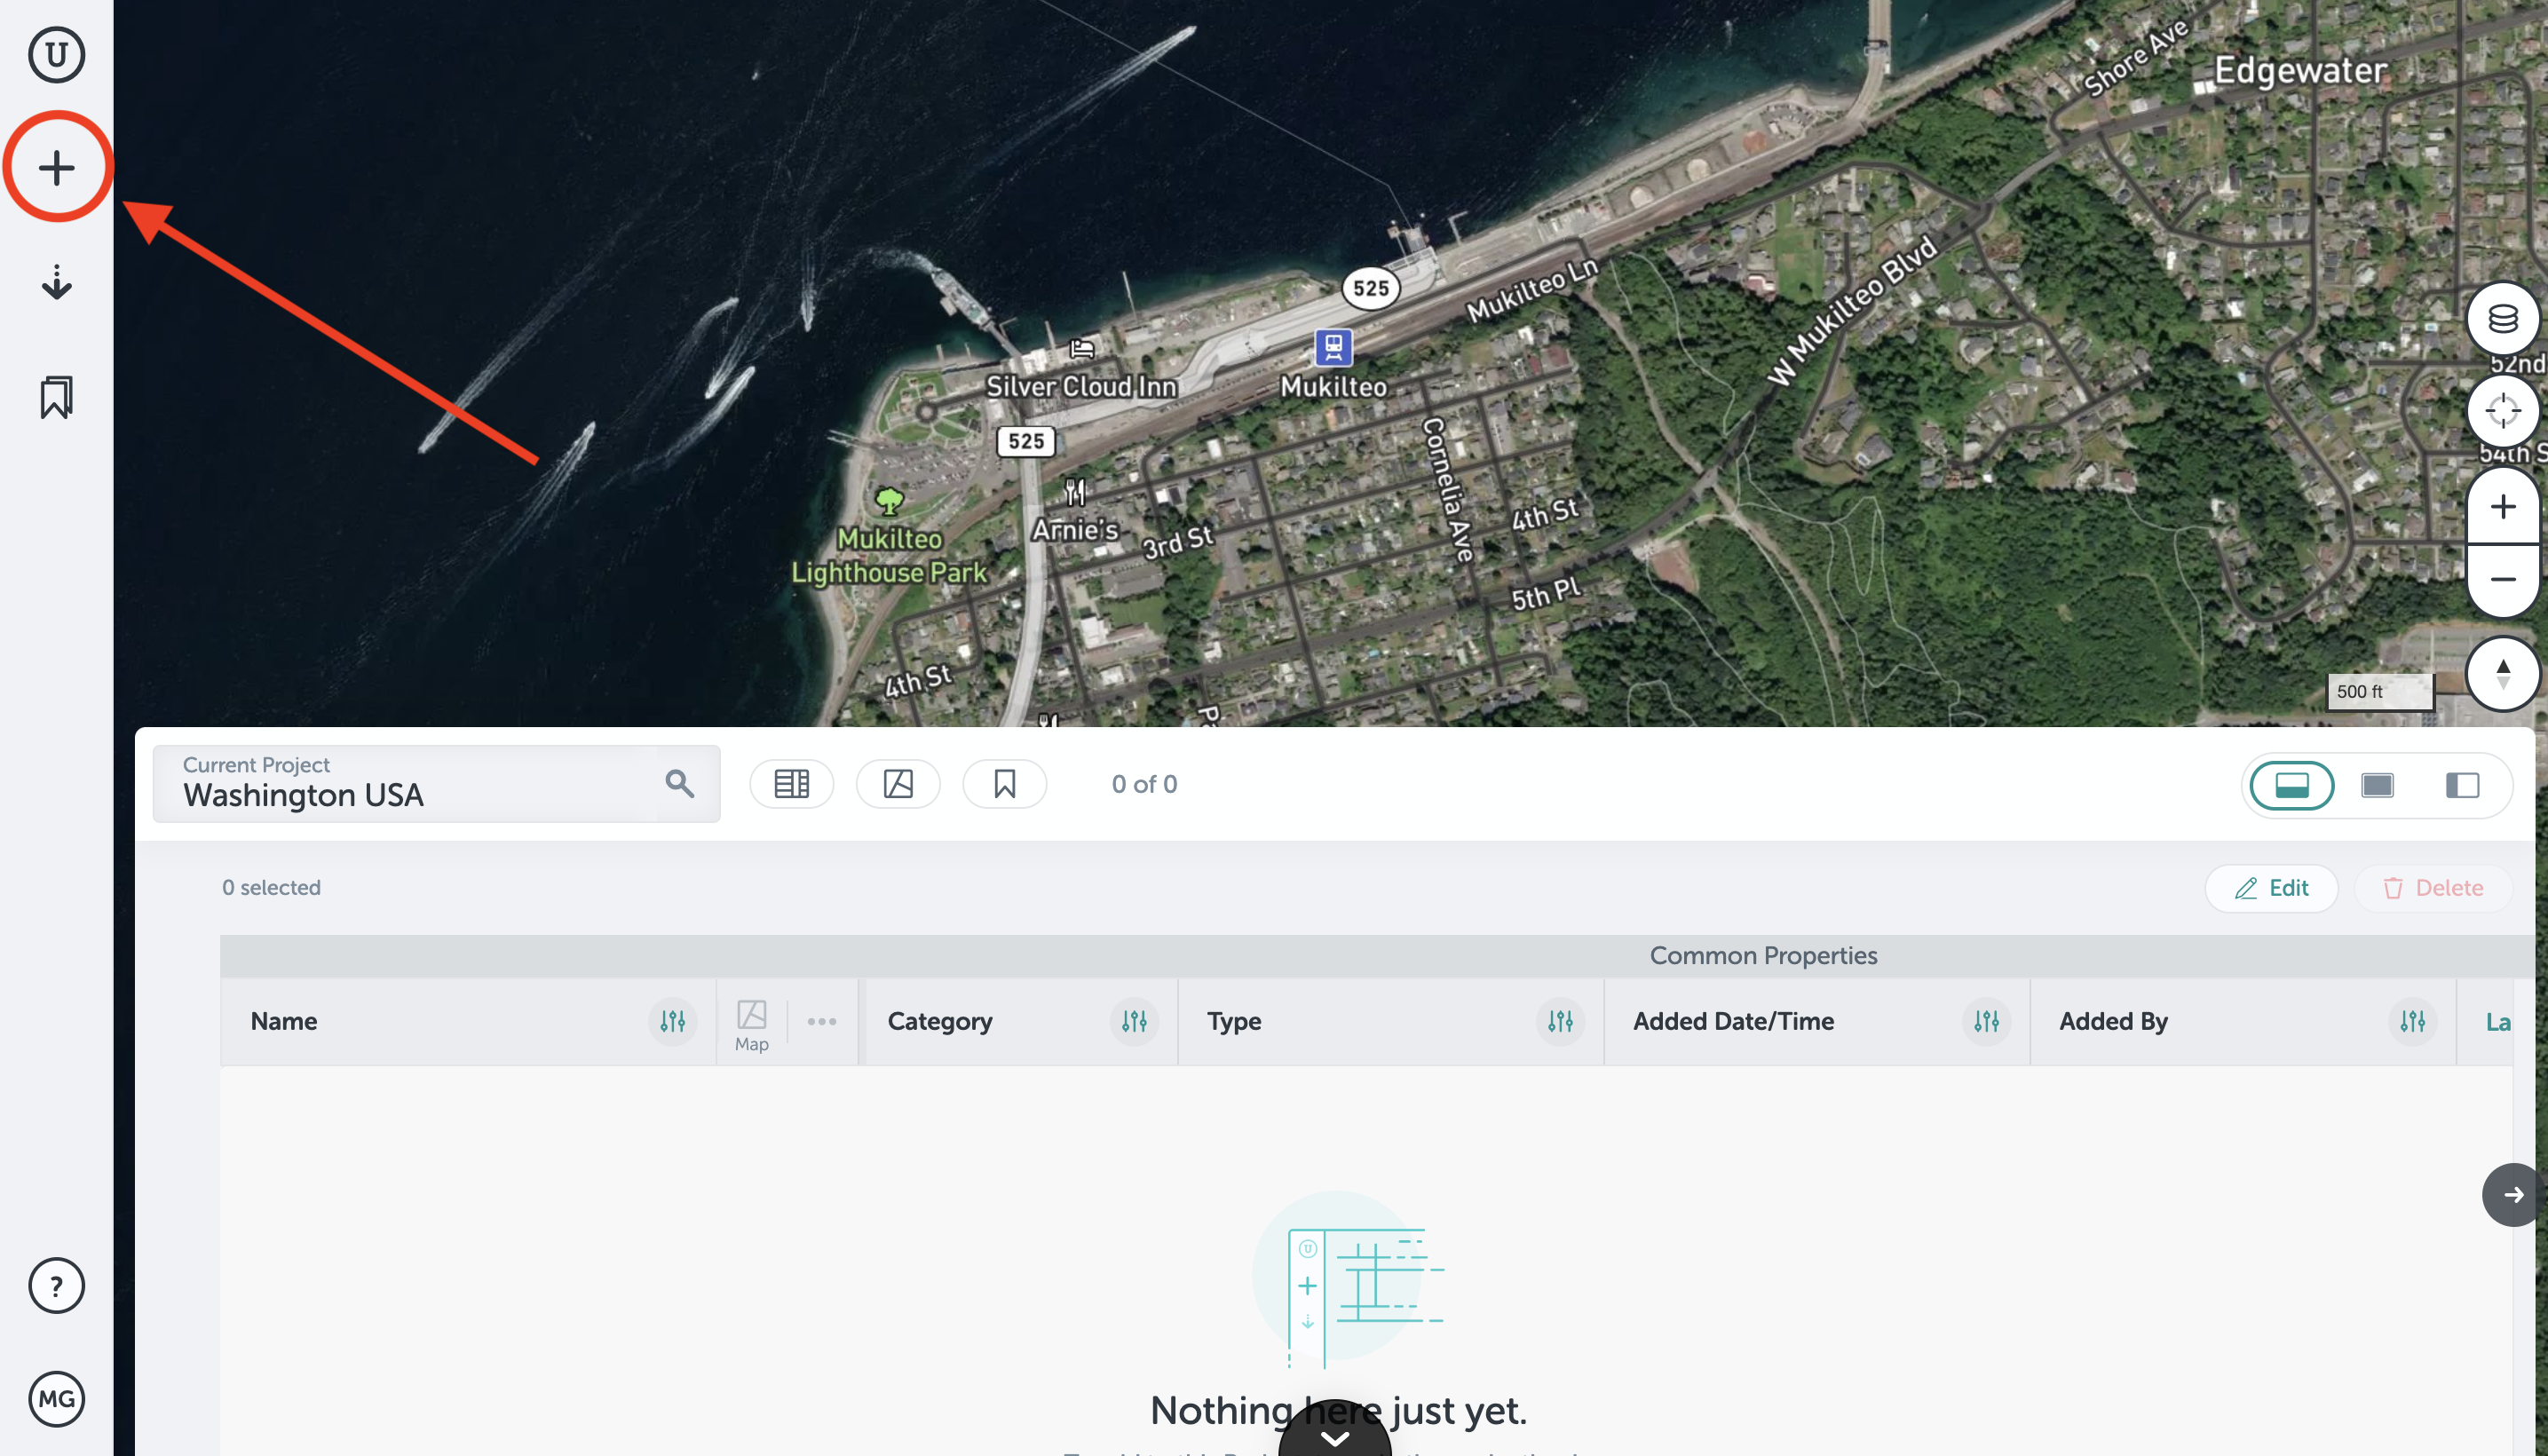
- Click to the "+" button on the left to open the toolkit.
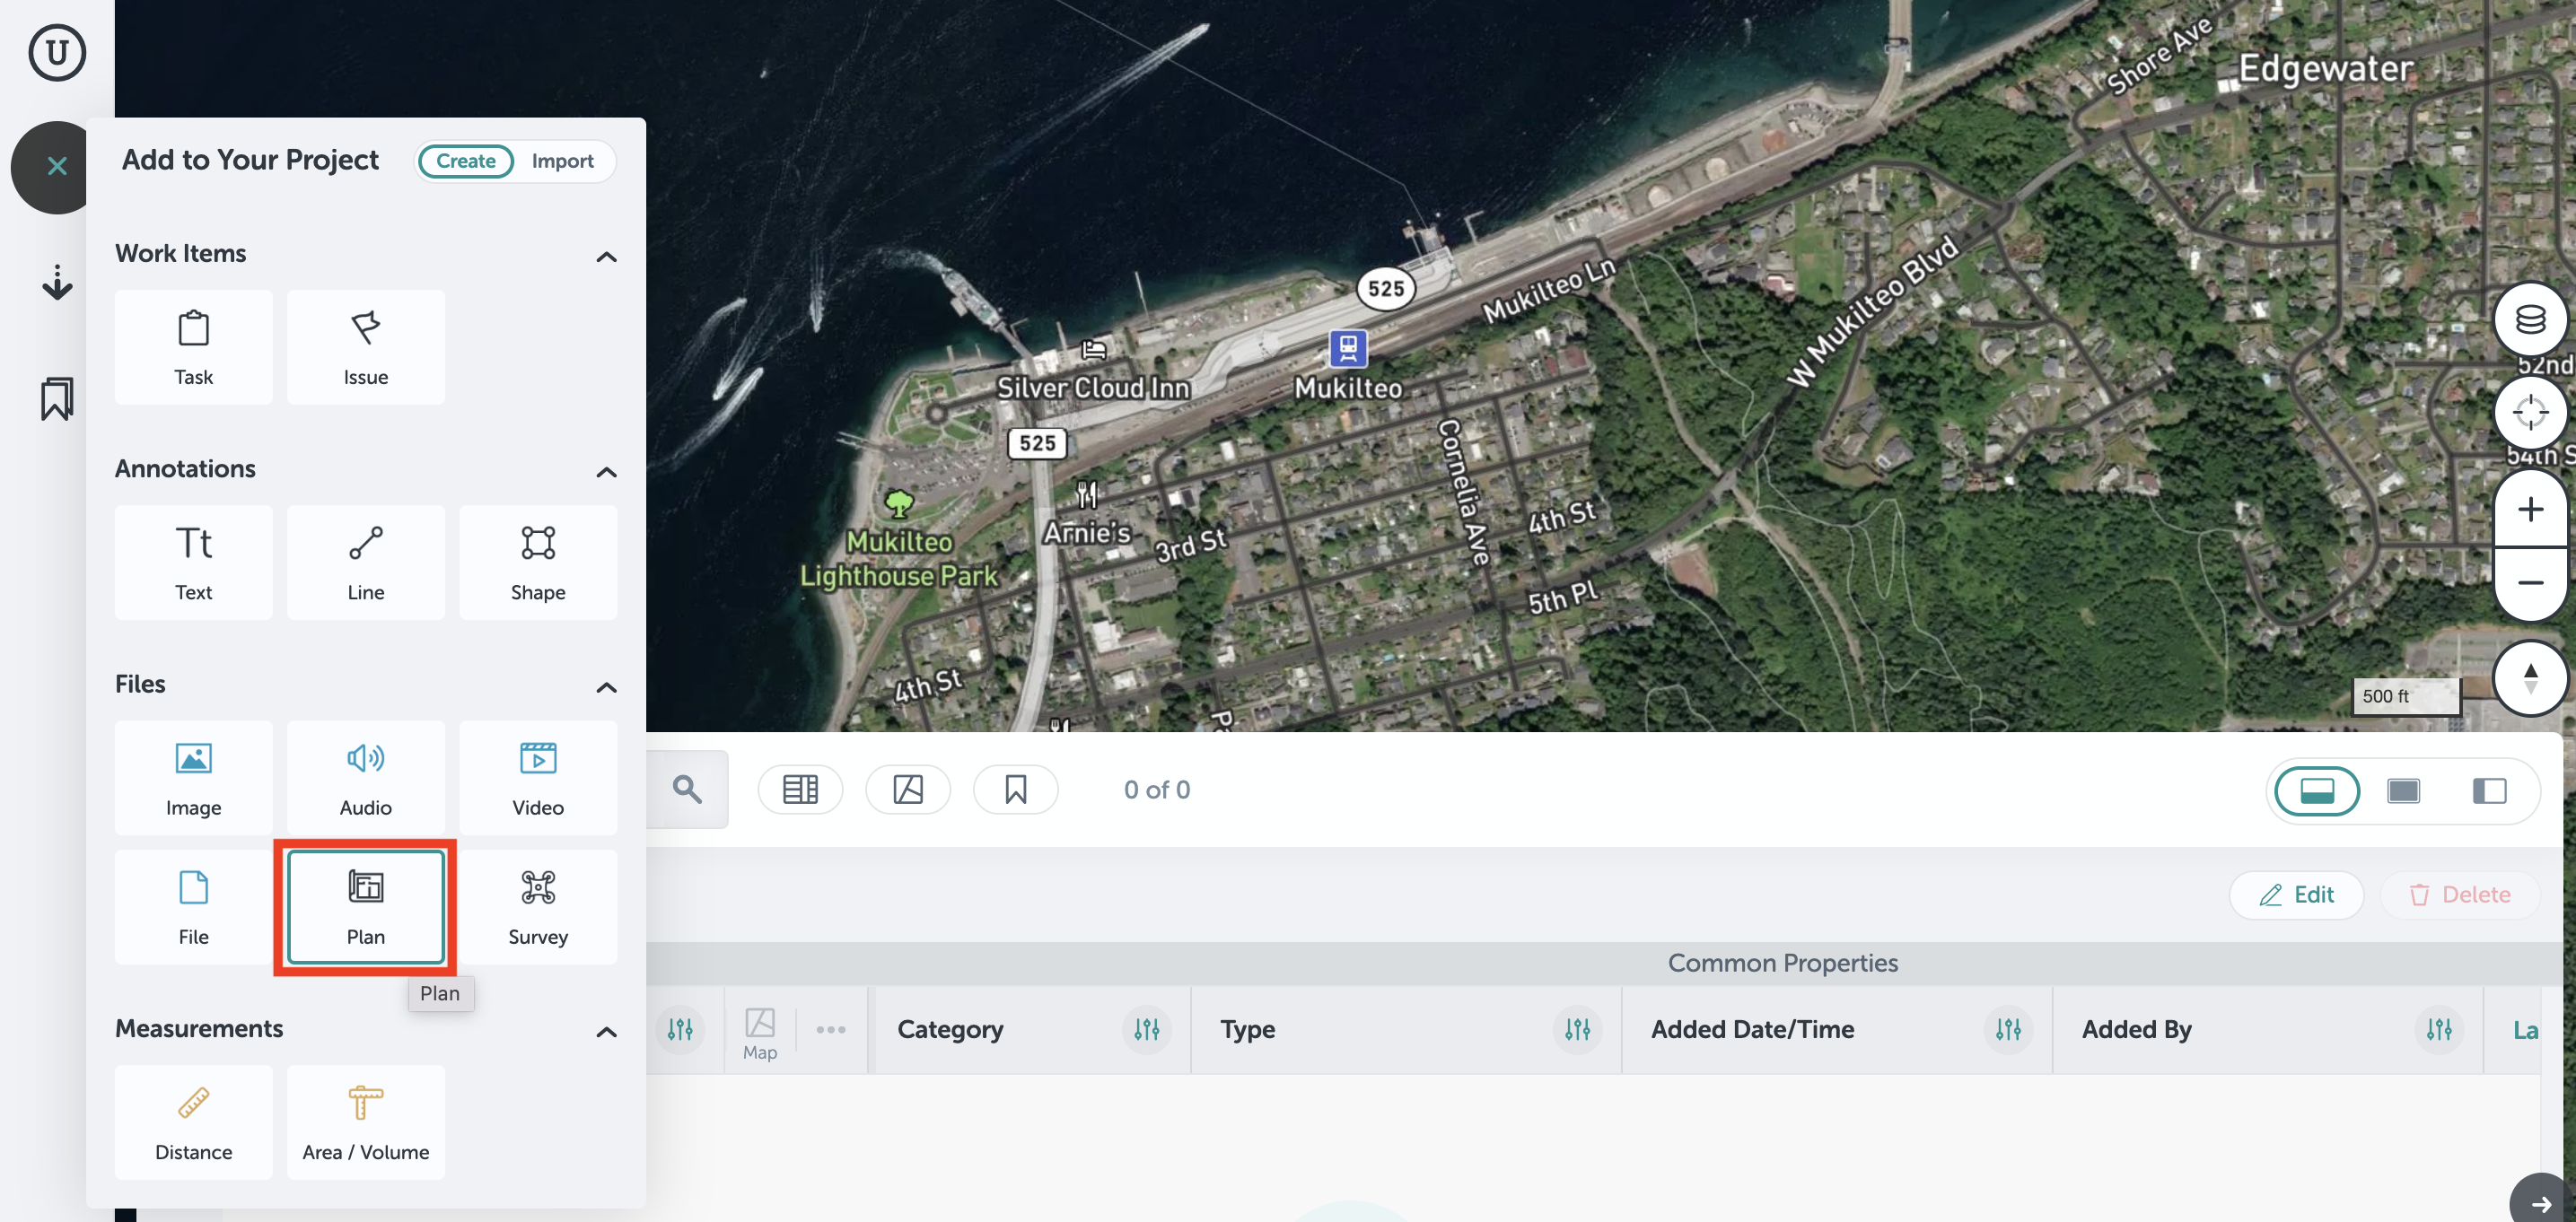
- Scroll to the "Files" section, and click the desired "Plan" tool - some toolkits may have multiple versions of the plan tool, just pick the one that best matches your file.
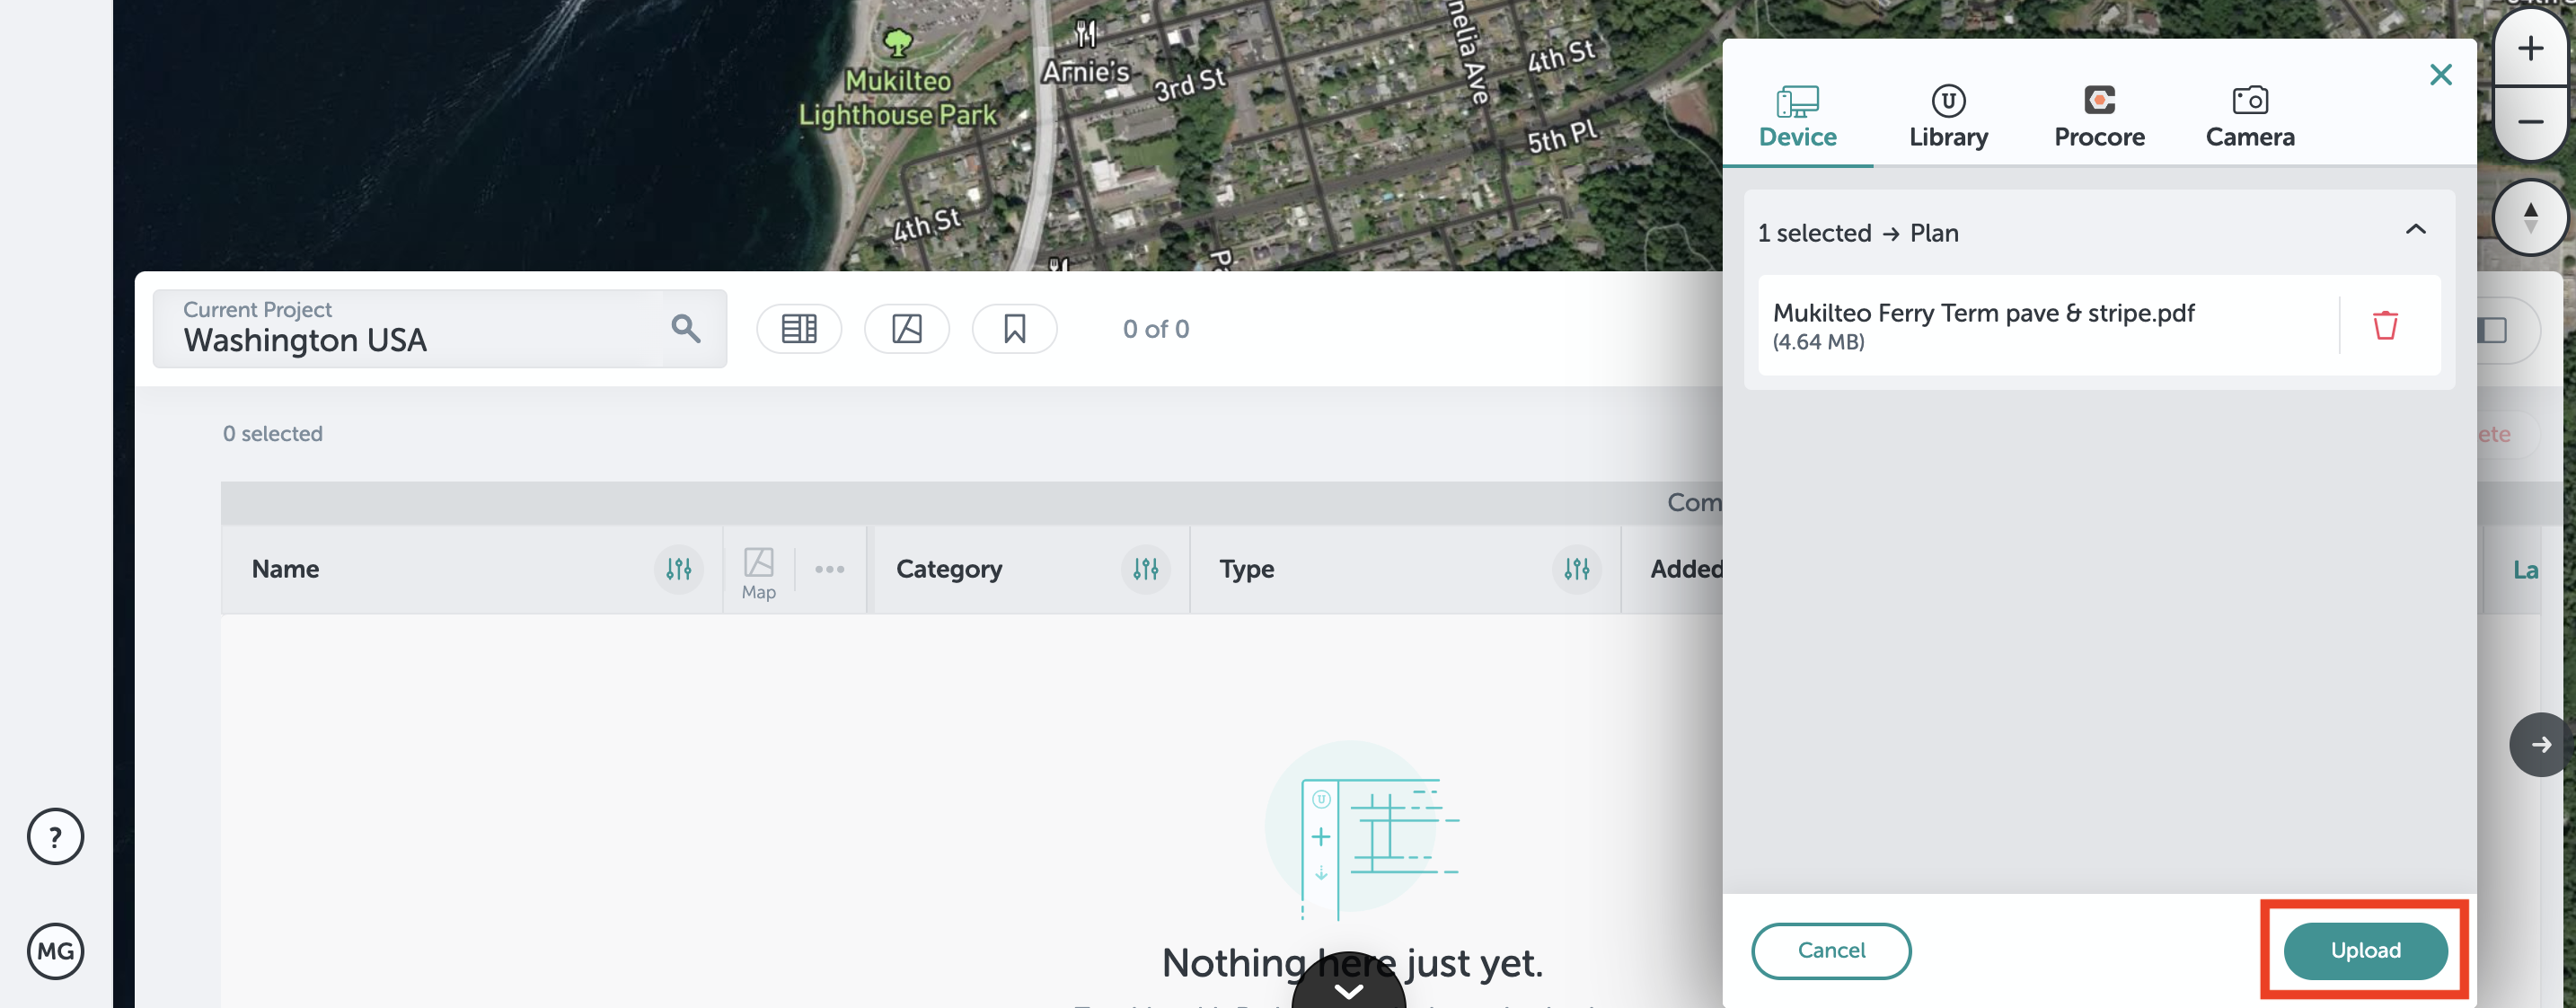
- Choose which PDF, PNG, or JPEG you want to use to create an overlay. Then, click "Upload."
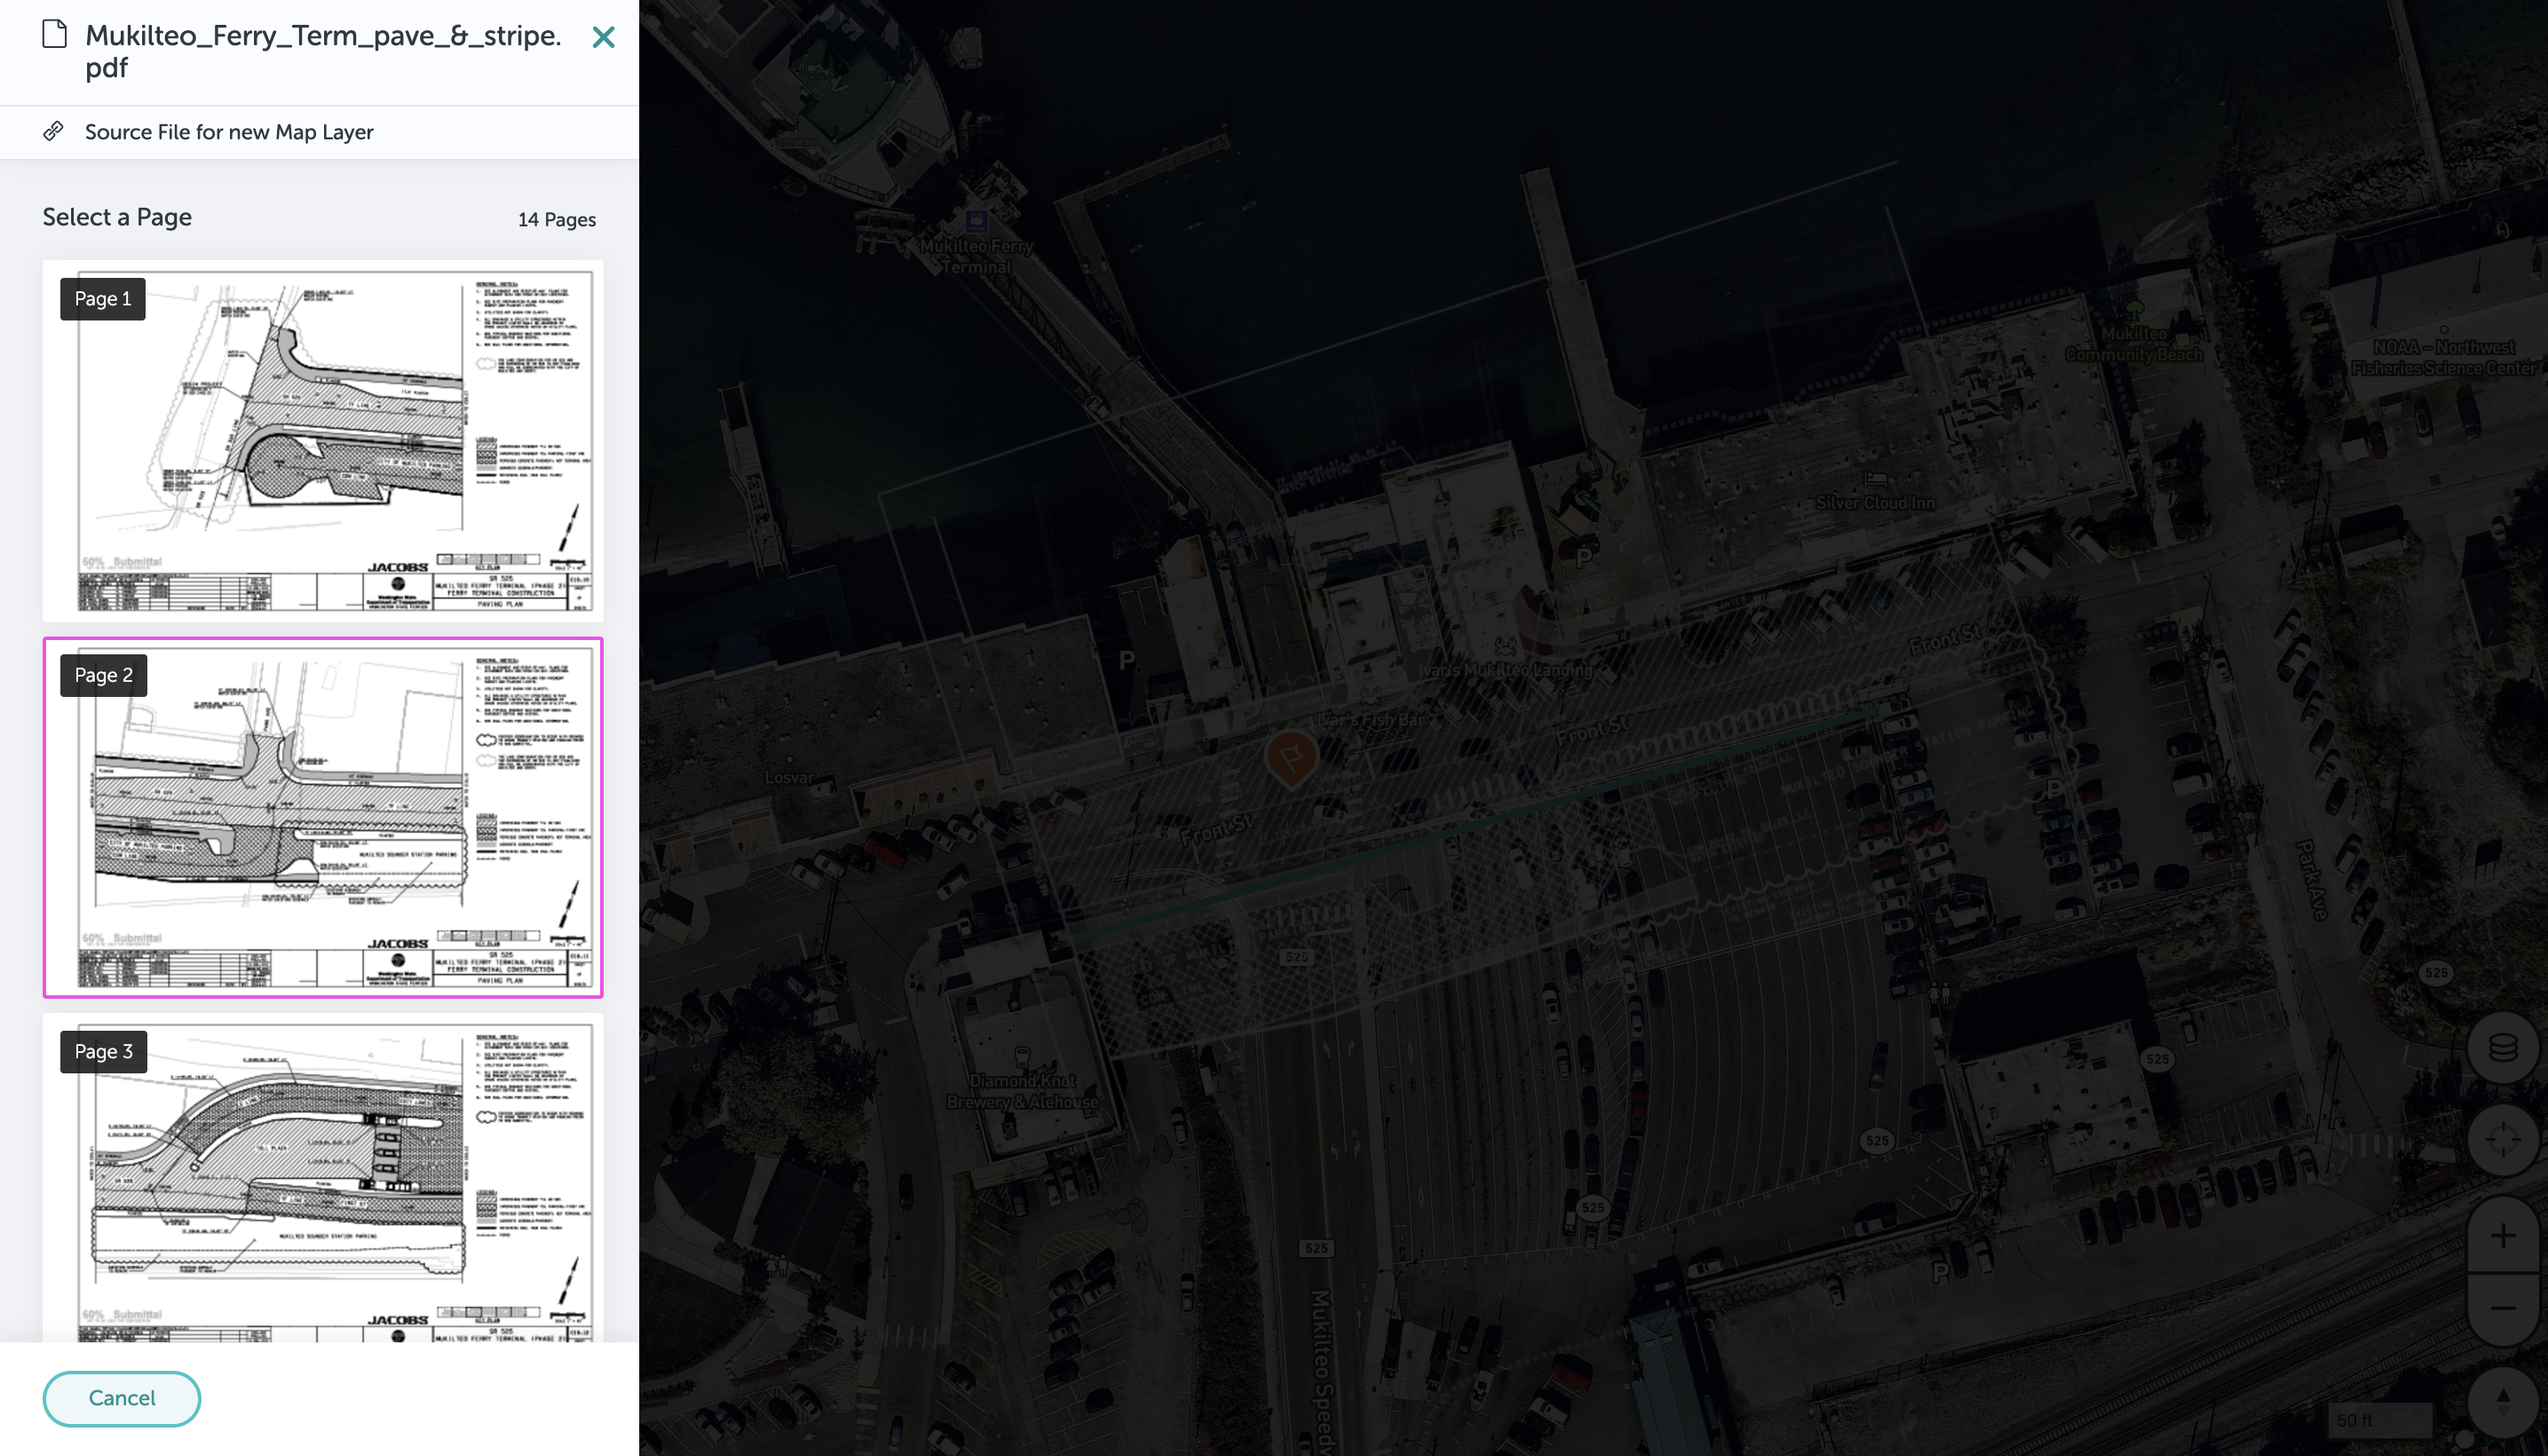
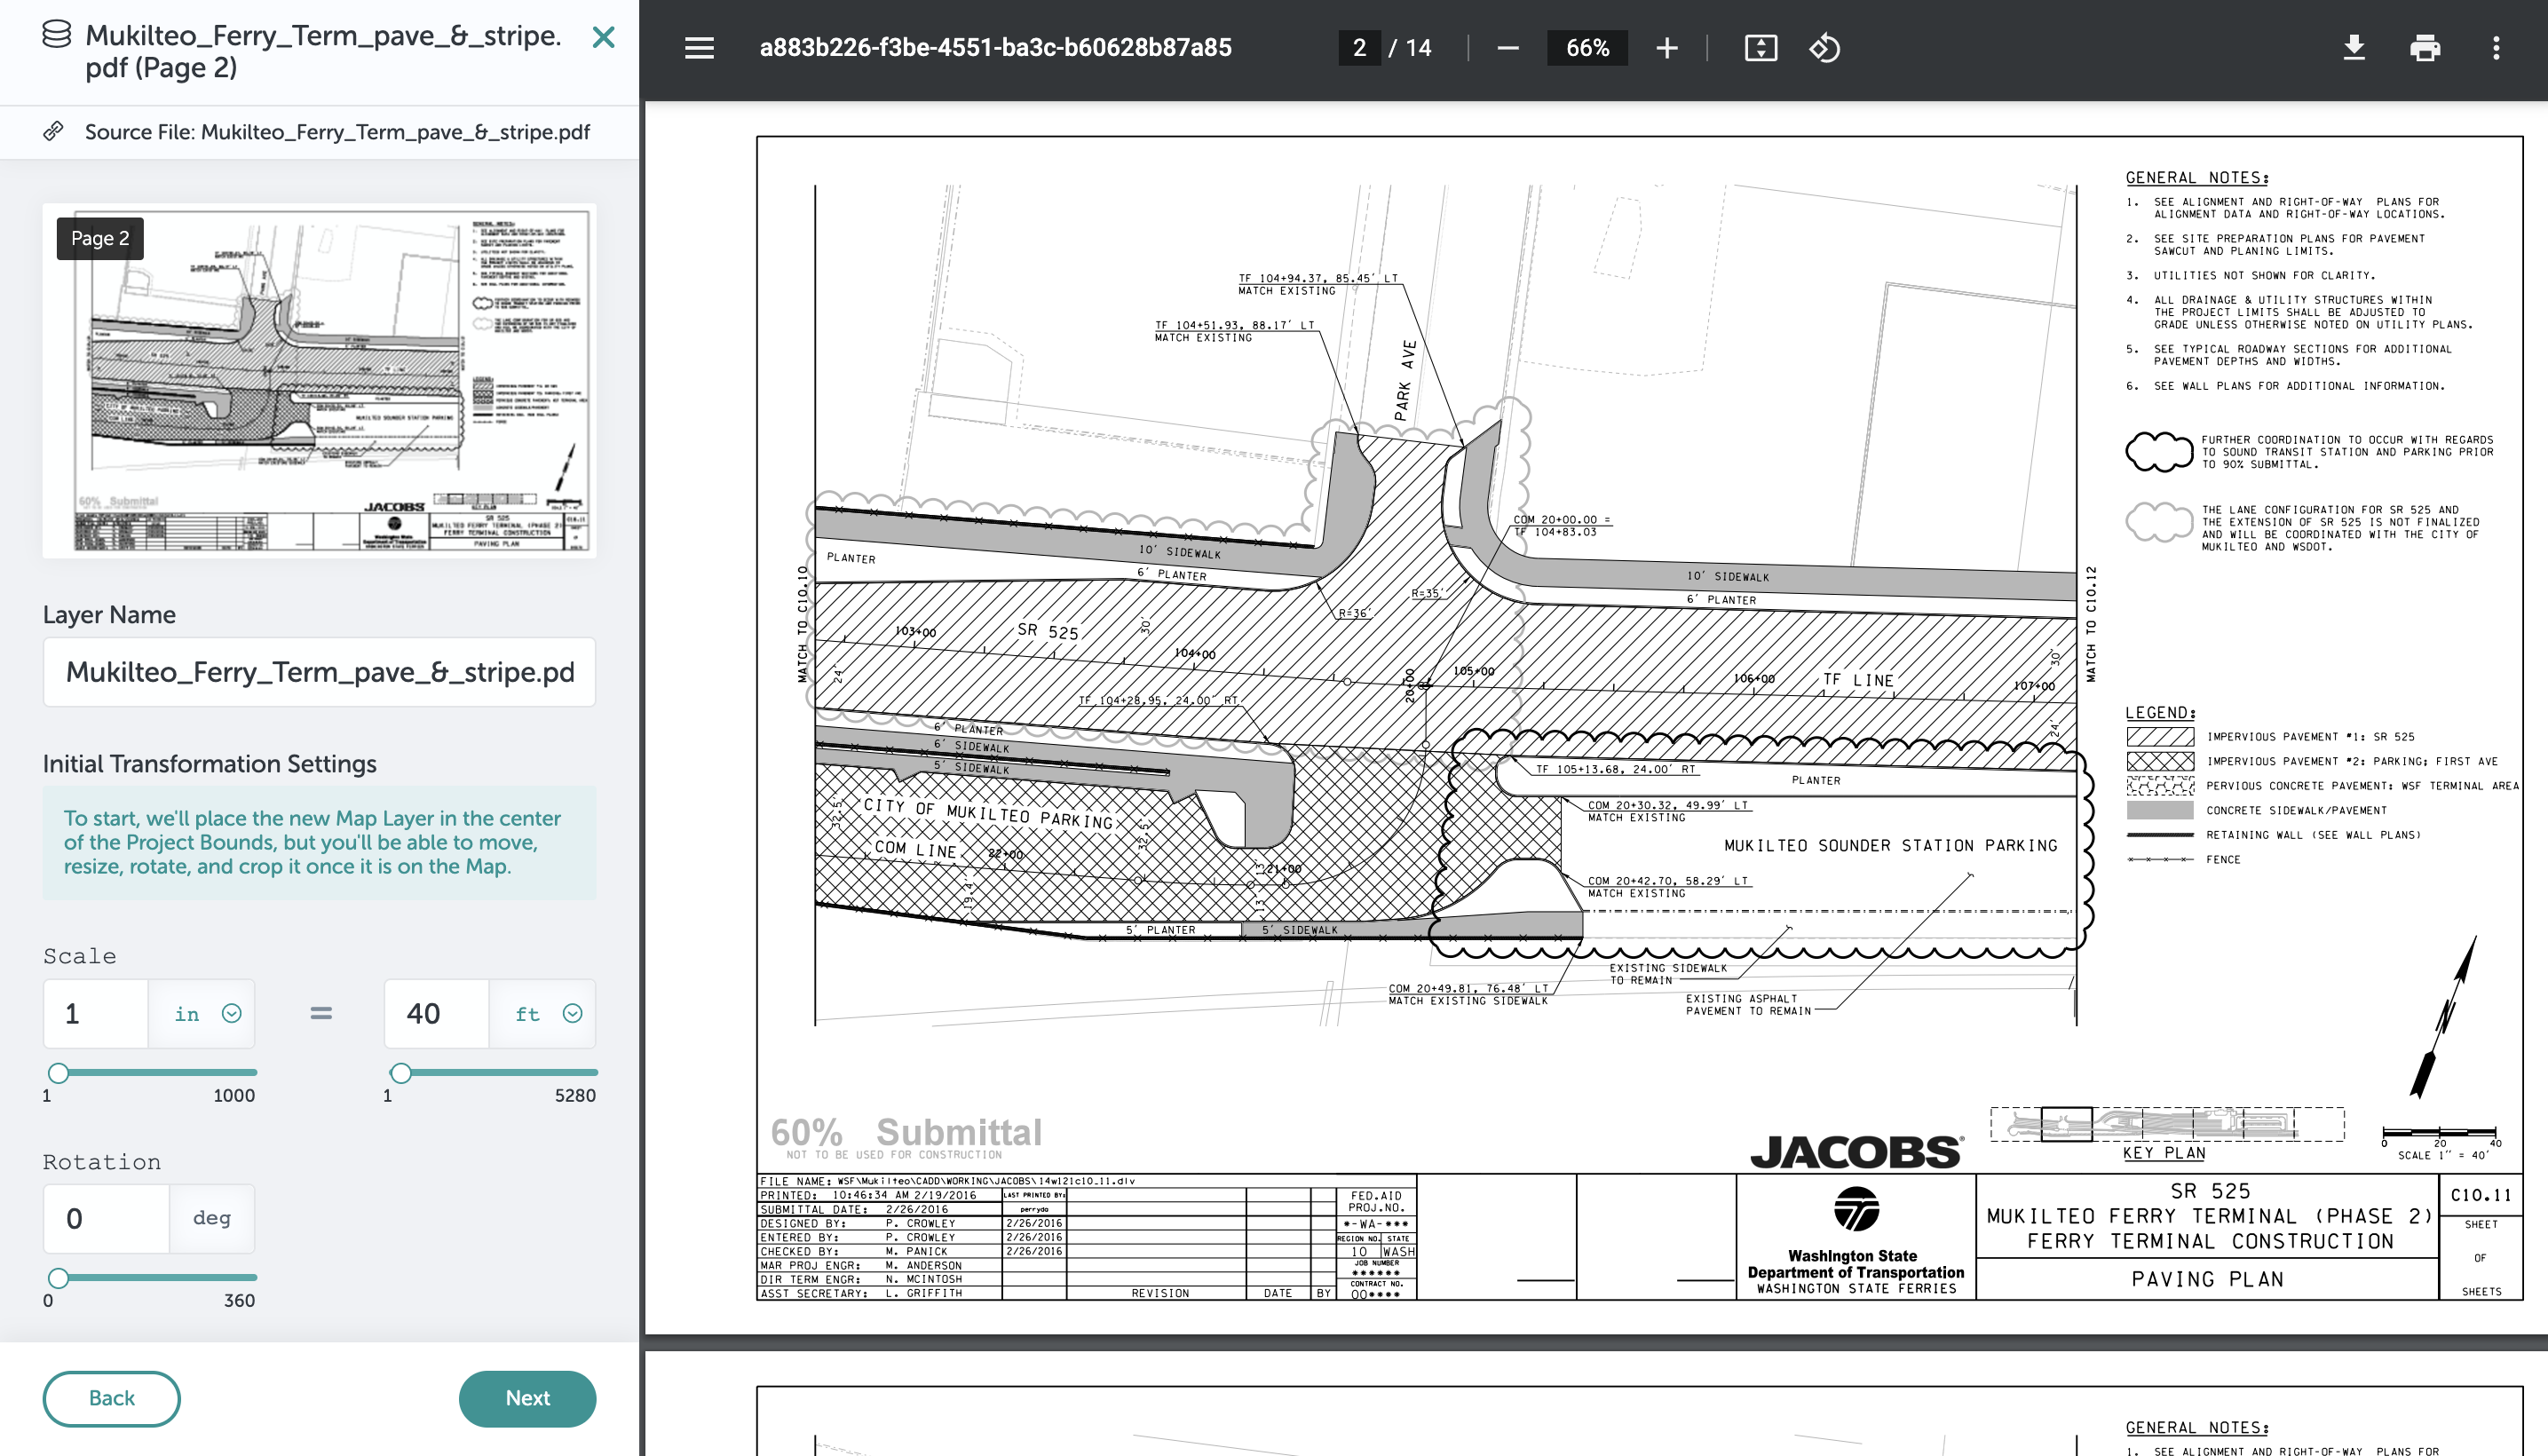
- Once the file has completed uploading, you will be shown a preview of the file. For PDF files with more than one page, choose which page you'd like to overlay on the map.
- You can then set the layer name, scale and/or rotation - For PDFs that have a scale indicator, the QuickMap Overlay feature matches to the scale indicated on the PDF. This information can also manually be entered if it's known, or adjusted in the next step. Click "Next" when you're ready to proceed.
- The QuickMap Overlay will now generate your map feature, and will automatically place it in the center of your project bounds. You can then move the overlay close to the correct location by clicking and dragging on the center of the overlay.
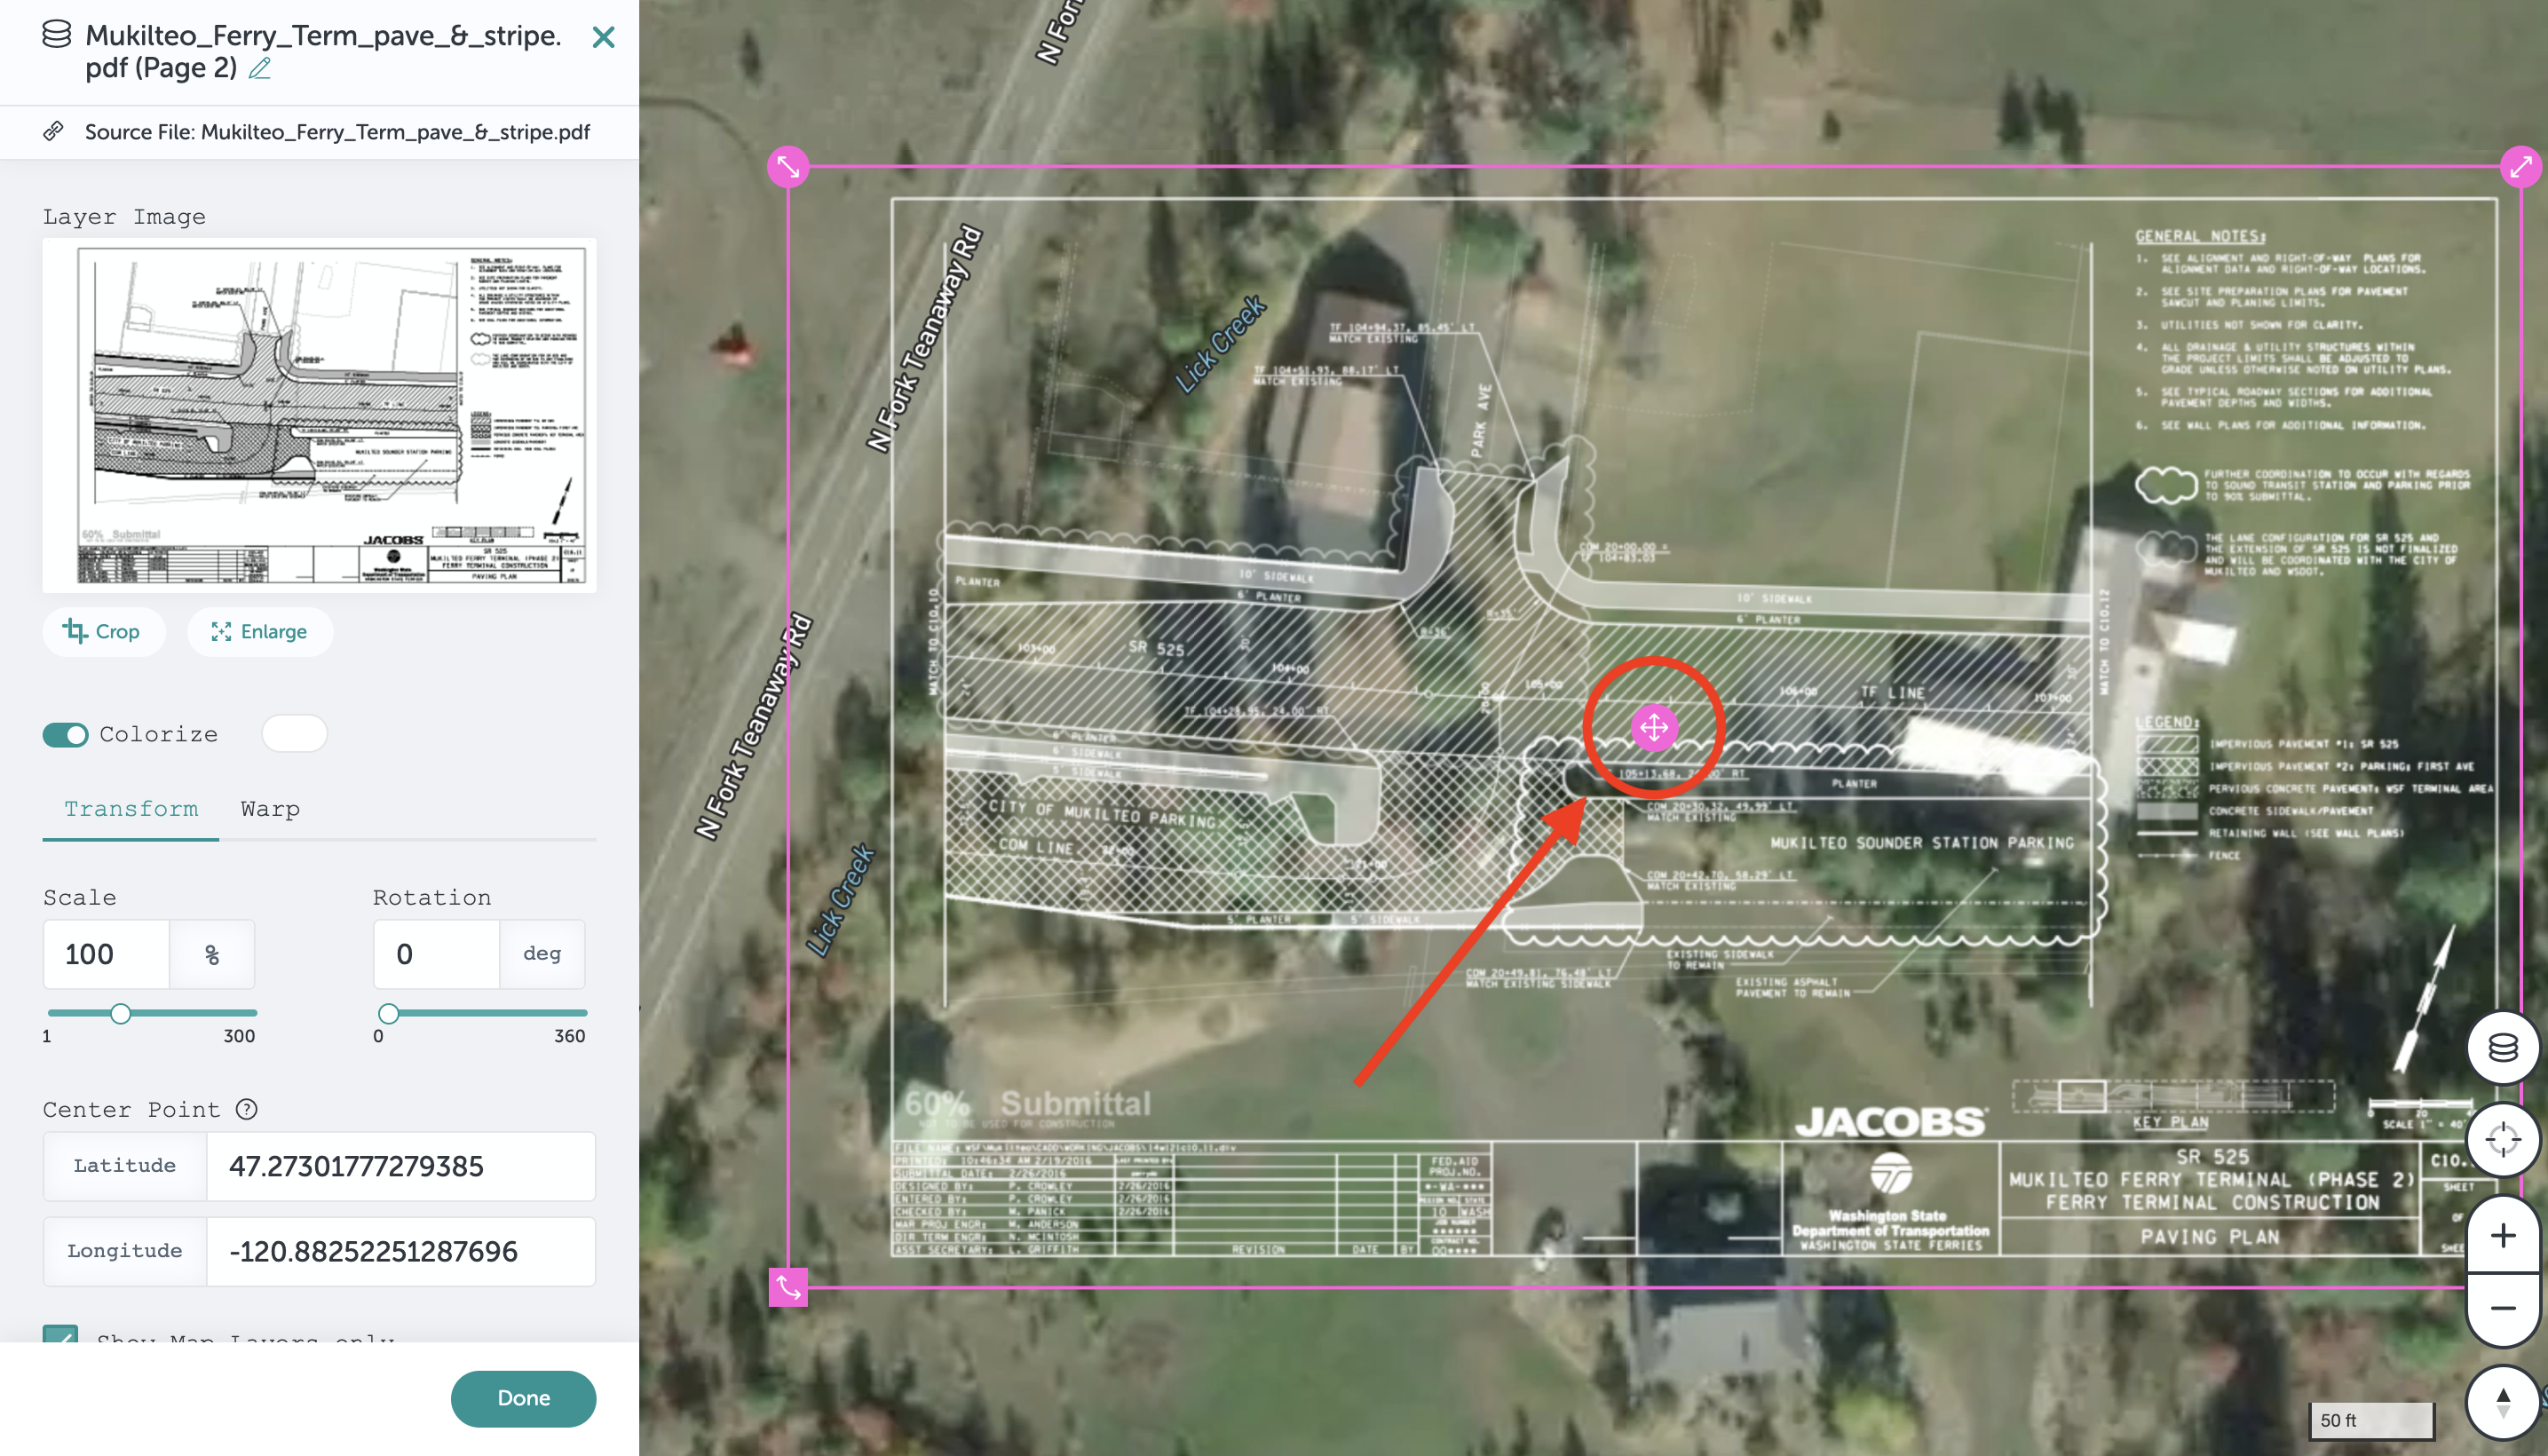
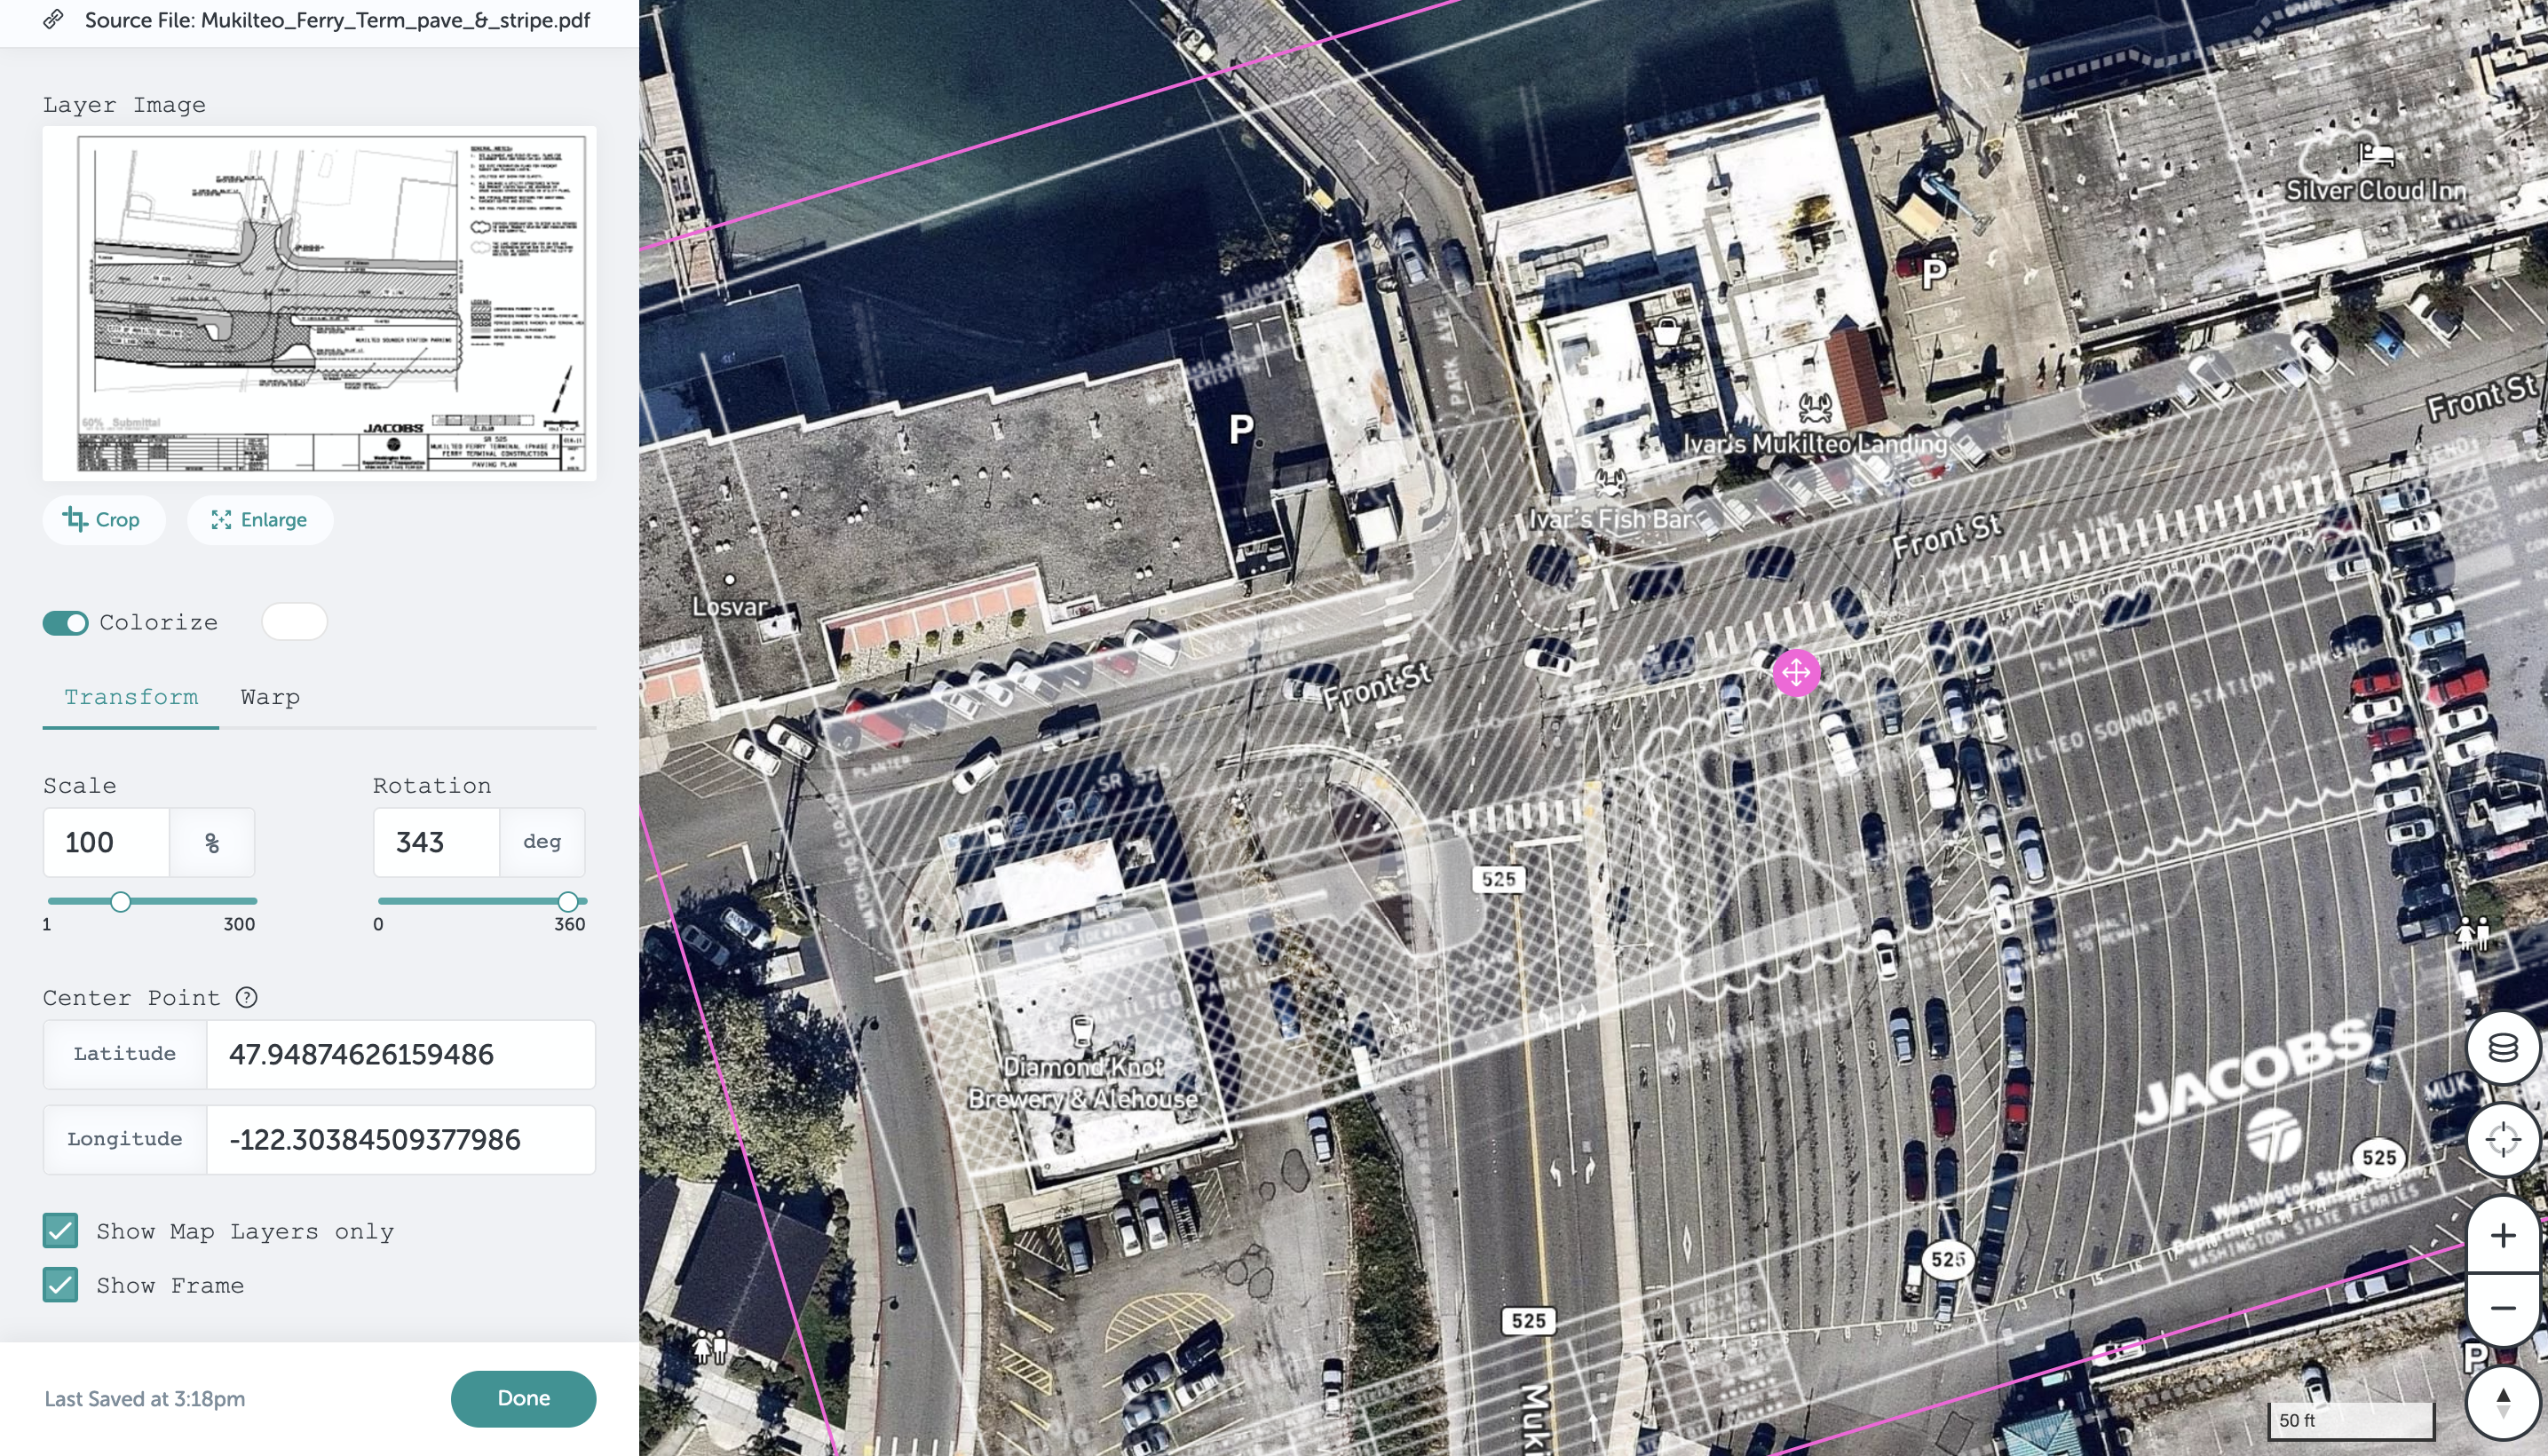
- Next you can refine your overlay placement by rotating (either using the drag bar in the form, or clicking the rotate corner of the layer preview), scaling if needed, and moving into place on the map by dragging or using your keyboard arrow keys to make micro adjustments.
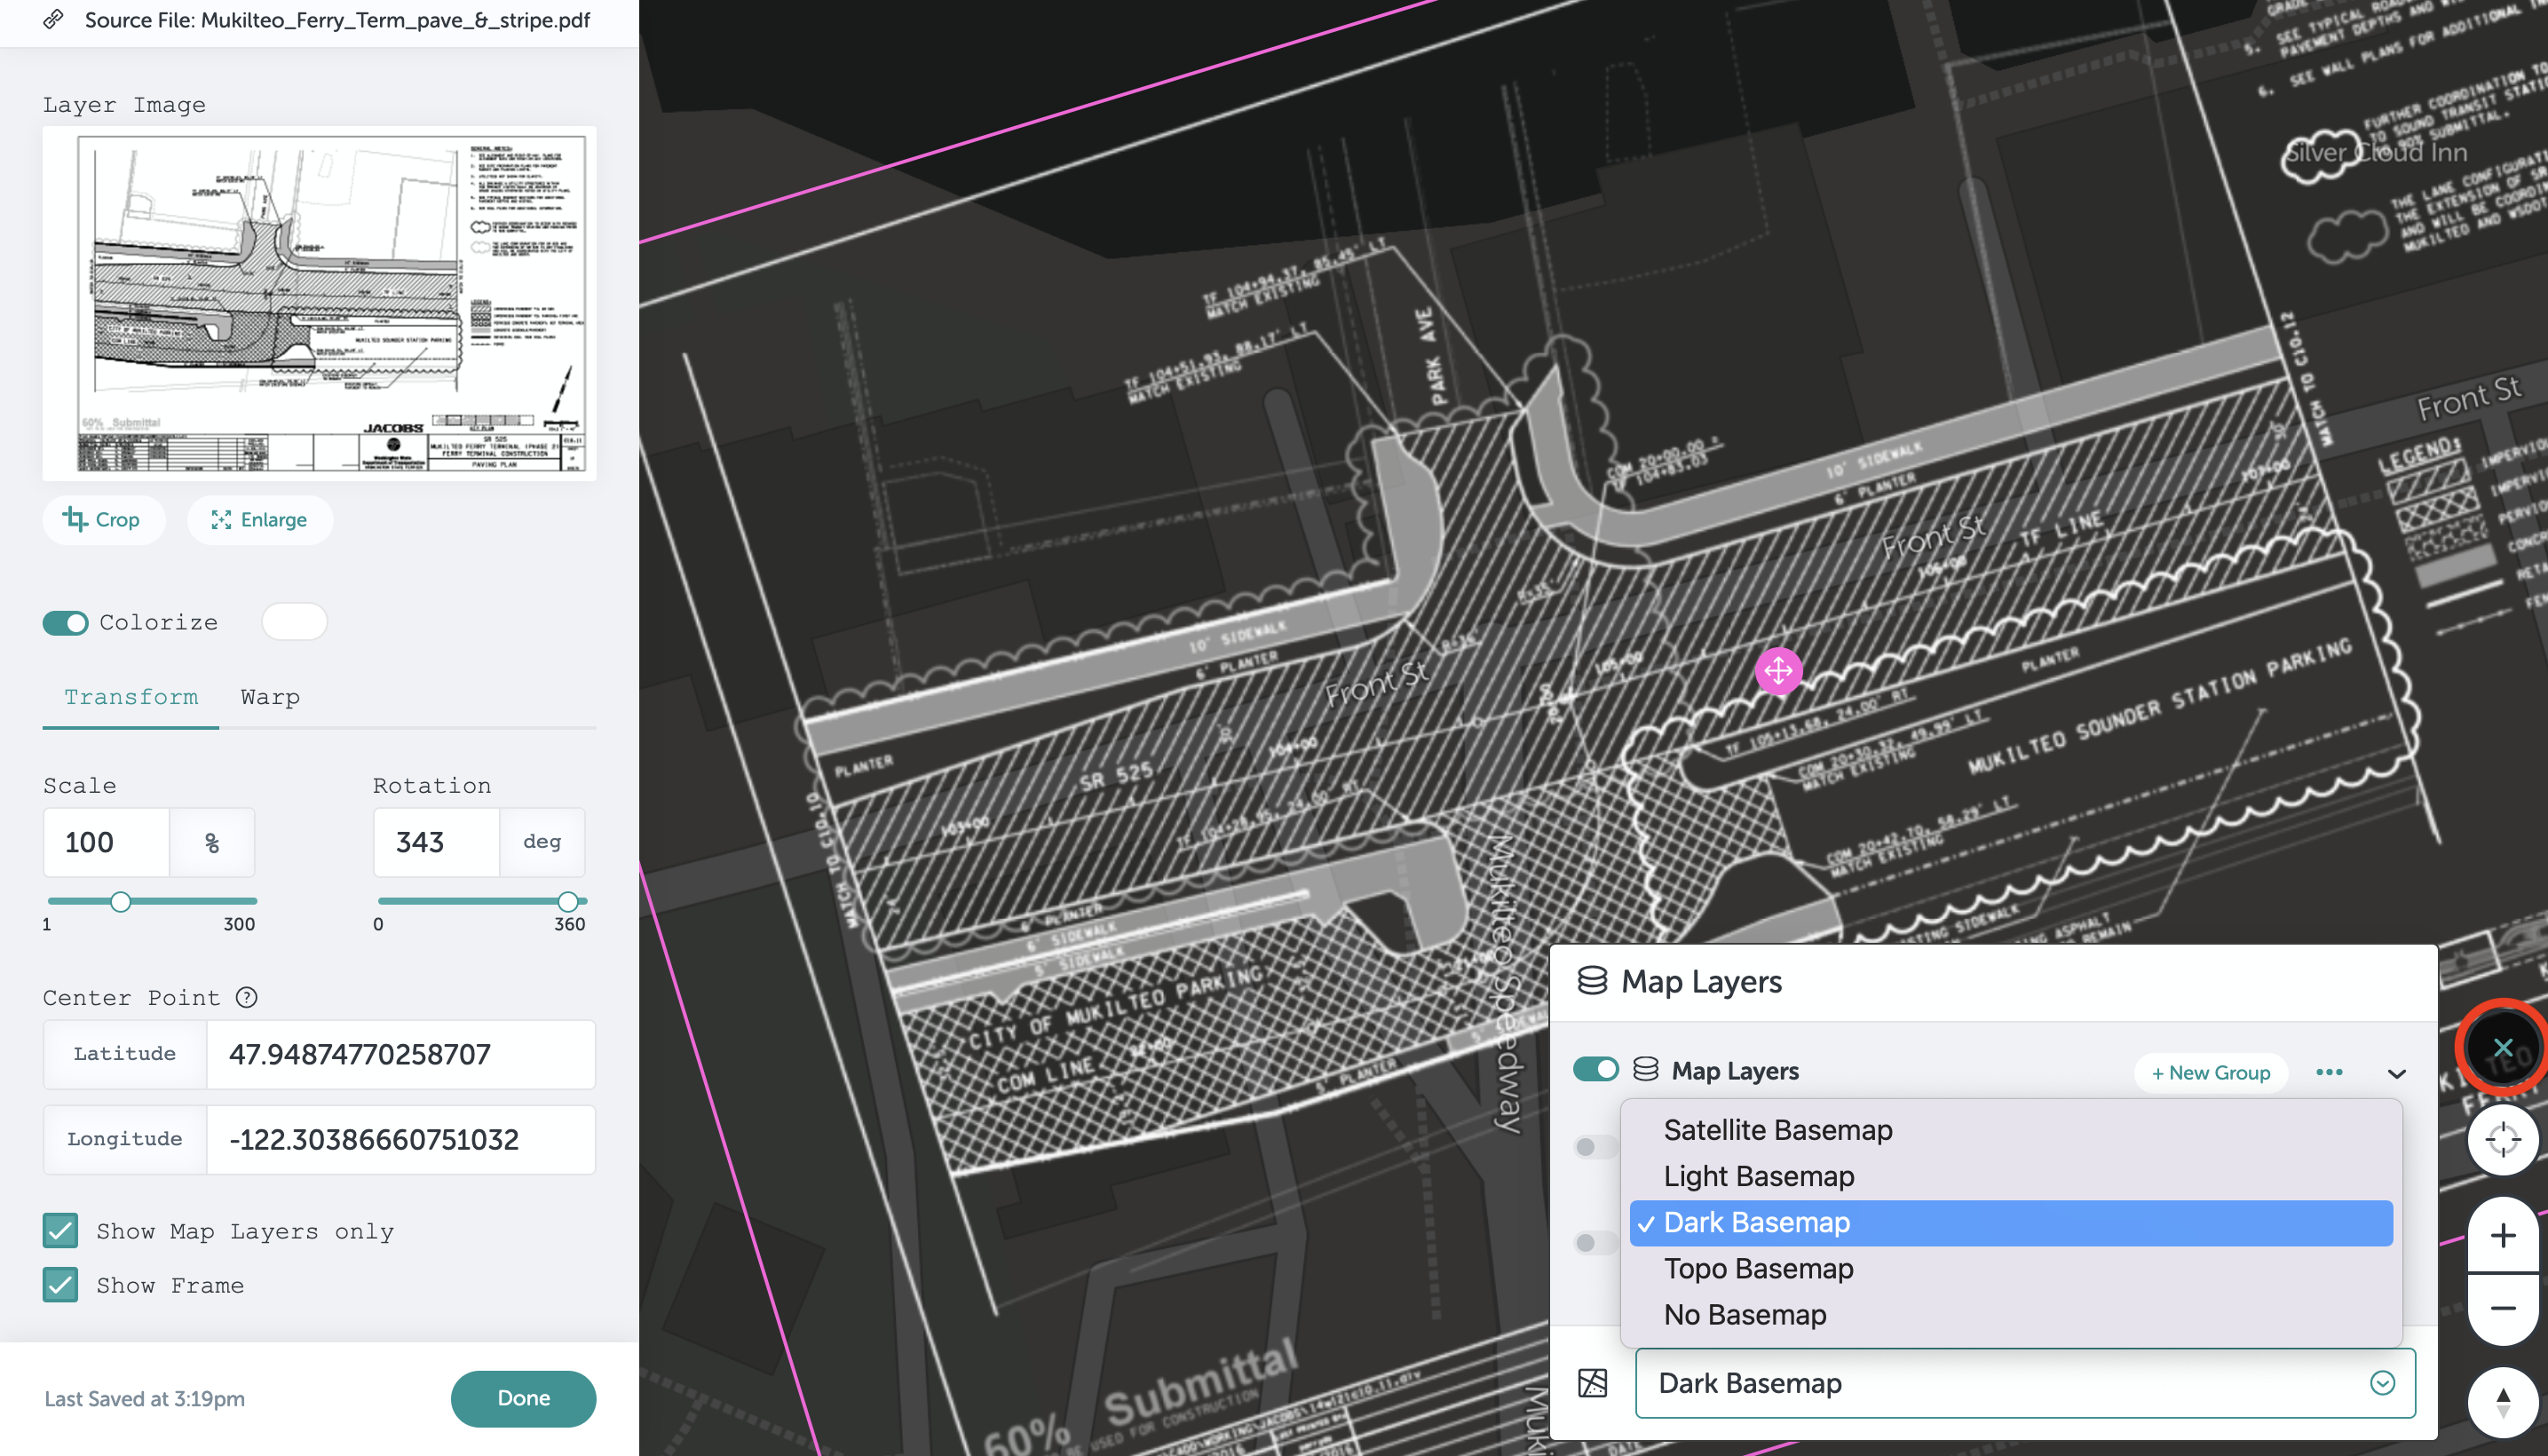
- Change the basemap if needed to visualize the landscape better
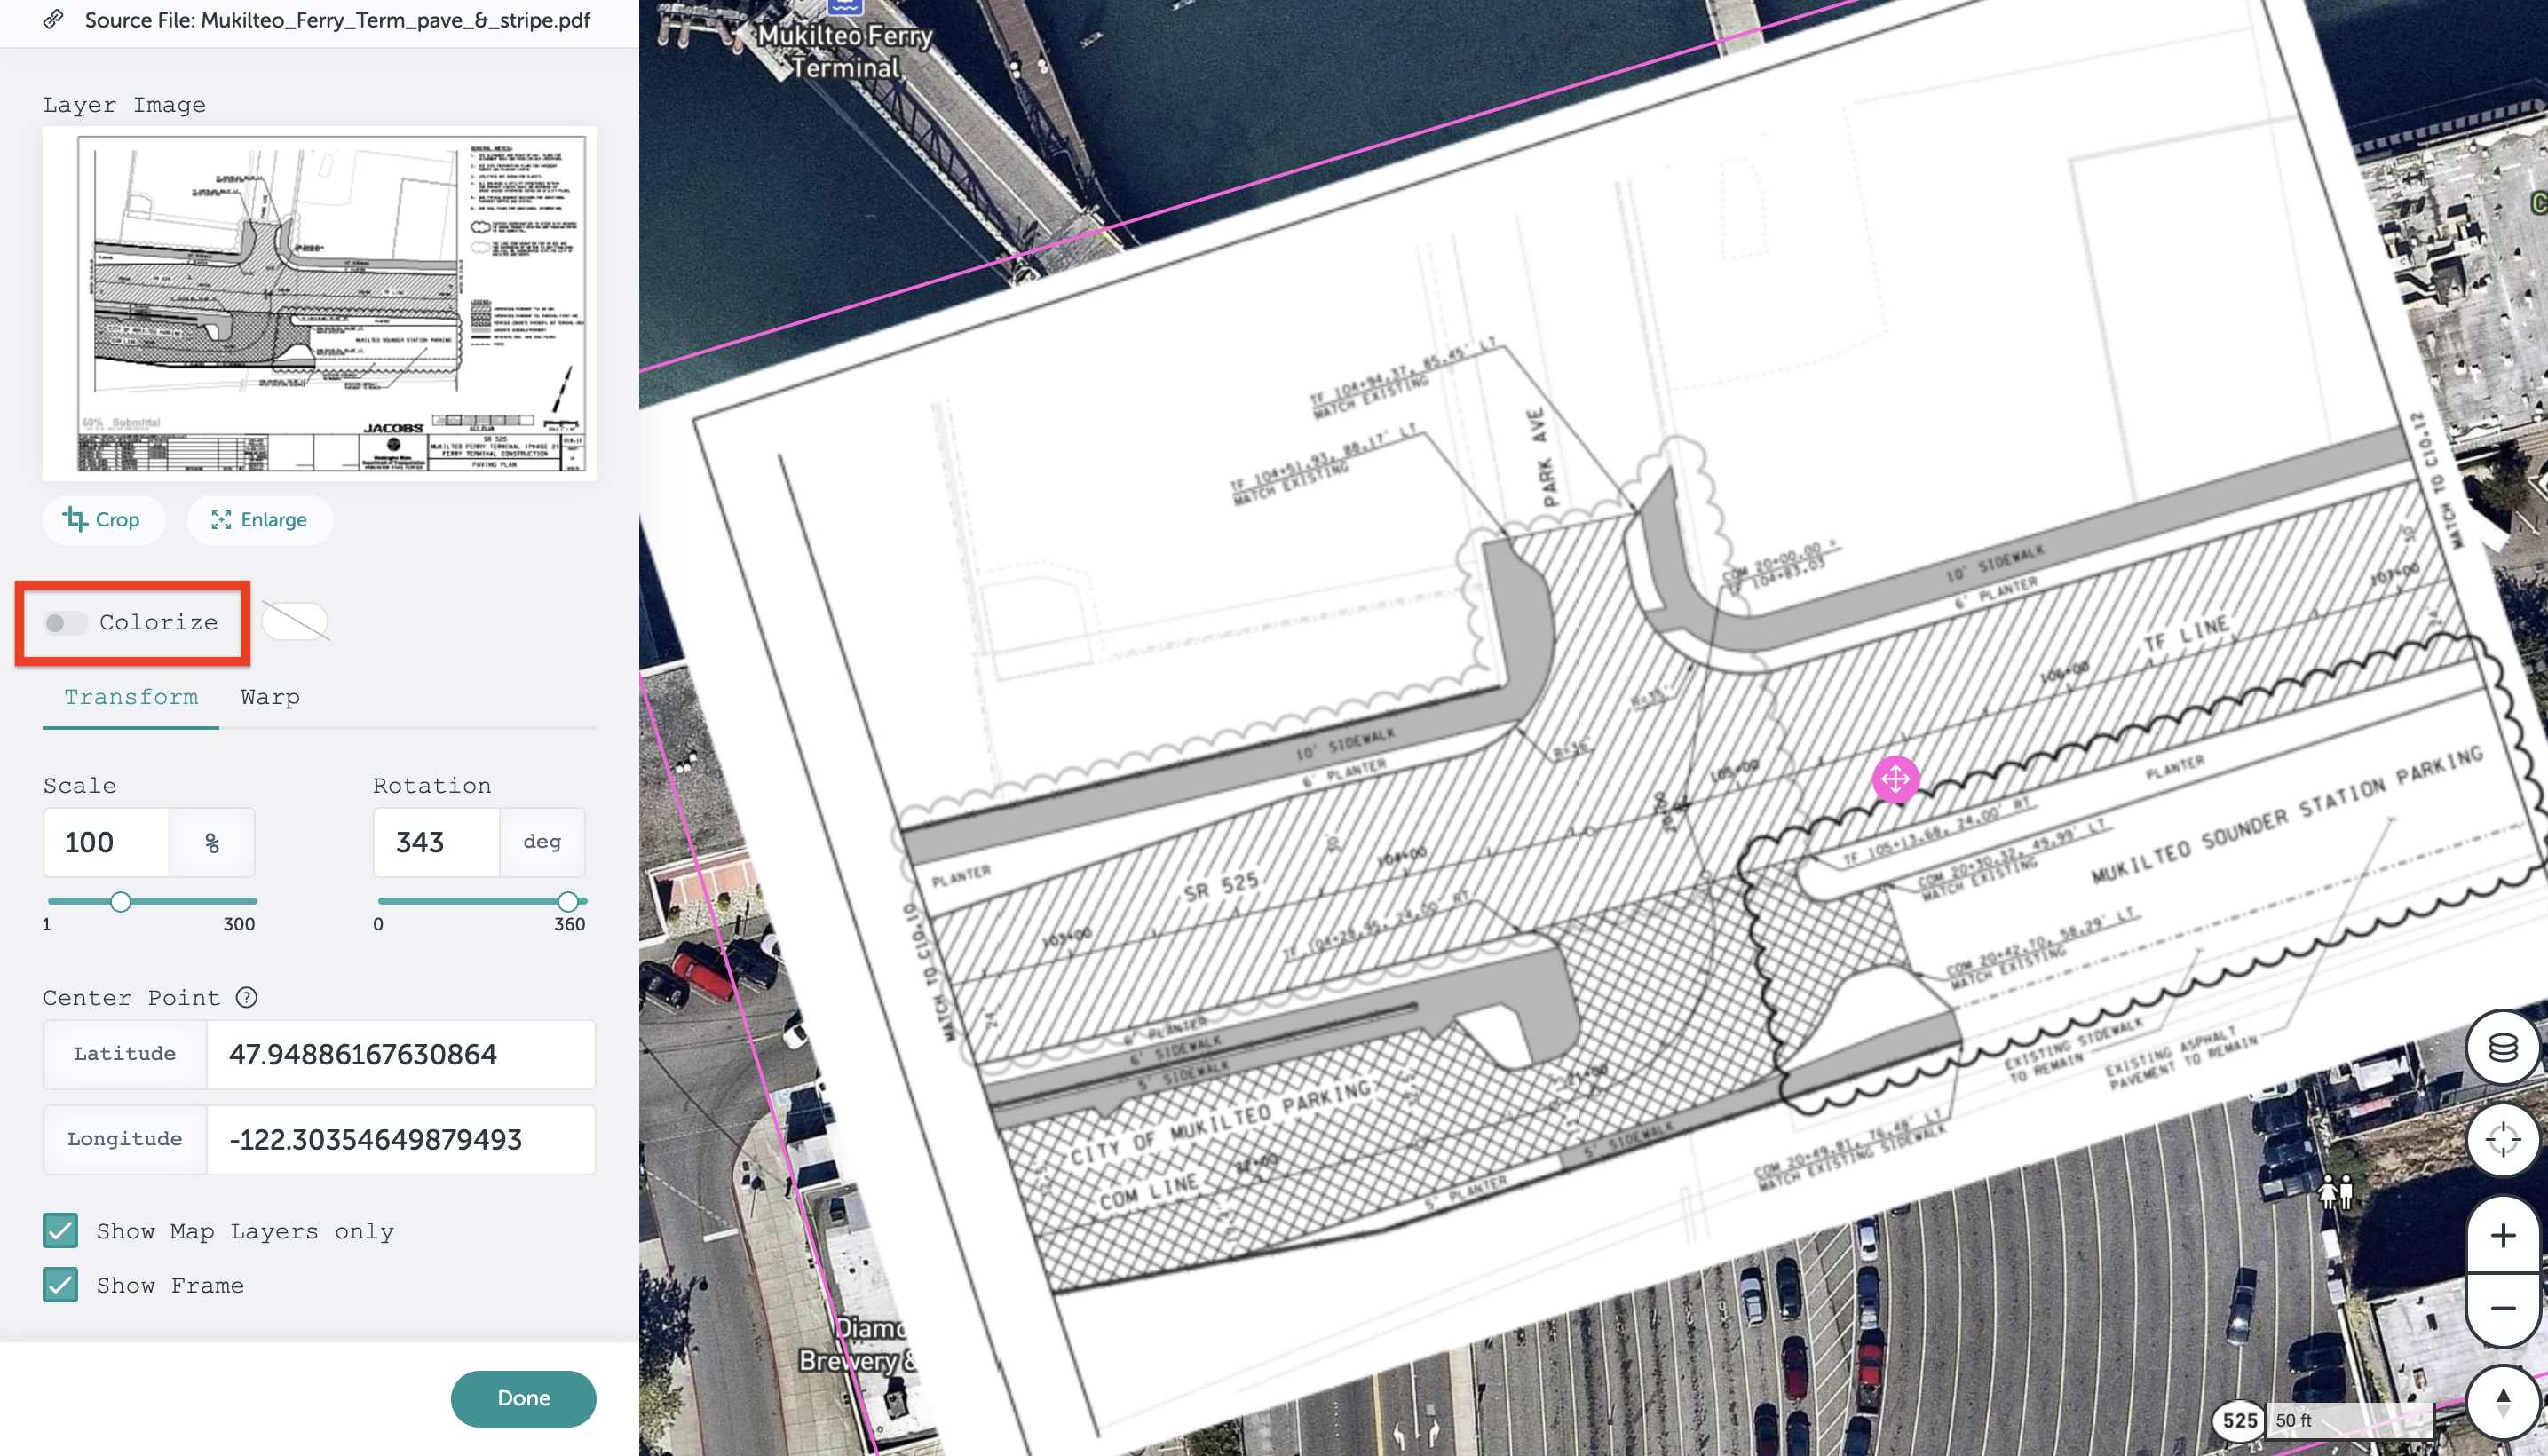
- Change the color of the layer preview if needed to view it best on your chosen basemap. Or, turn off the "Colorize" option to see the plan in its original format.

- Change the basemap if needed to visualize the landscape better
- For more fine tuning options:
- Click "crop" to crop the overlay, this can be helpful to cut off unneeded legends or information boxes.
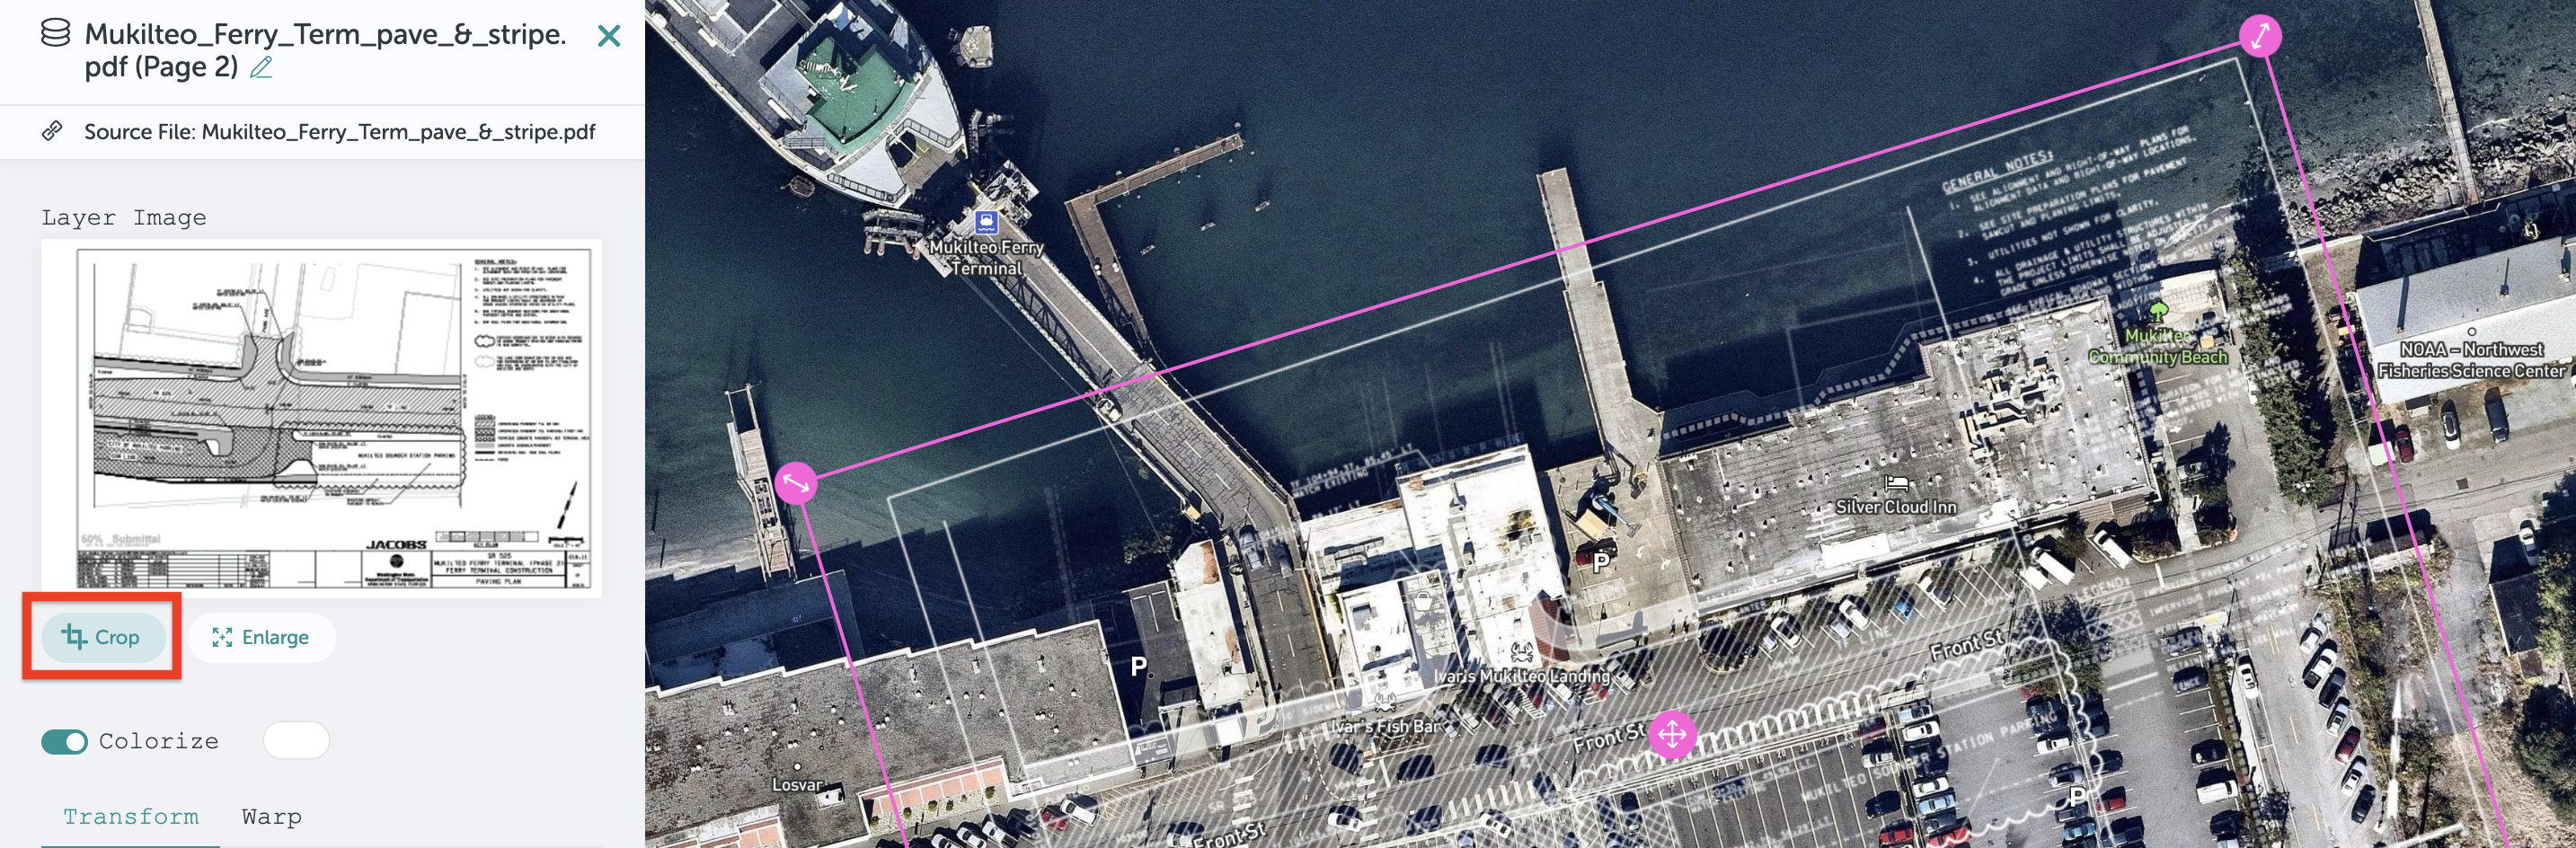
- Click "crop" to crop the overlay, this can be helpful to cut off unneeded legends or information boxes.
-
-
- Crop by drawing a shape around the area you want to keep - click to place points at each corner. Click "Done" to complete the cropping.

- Crop by drawing a shape around the area you want to keep - click to place points at each corner. Click "Done" to complete the cropping.
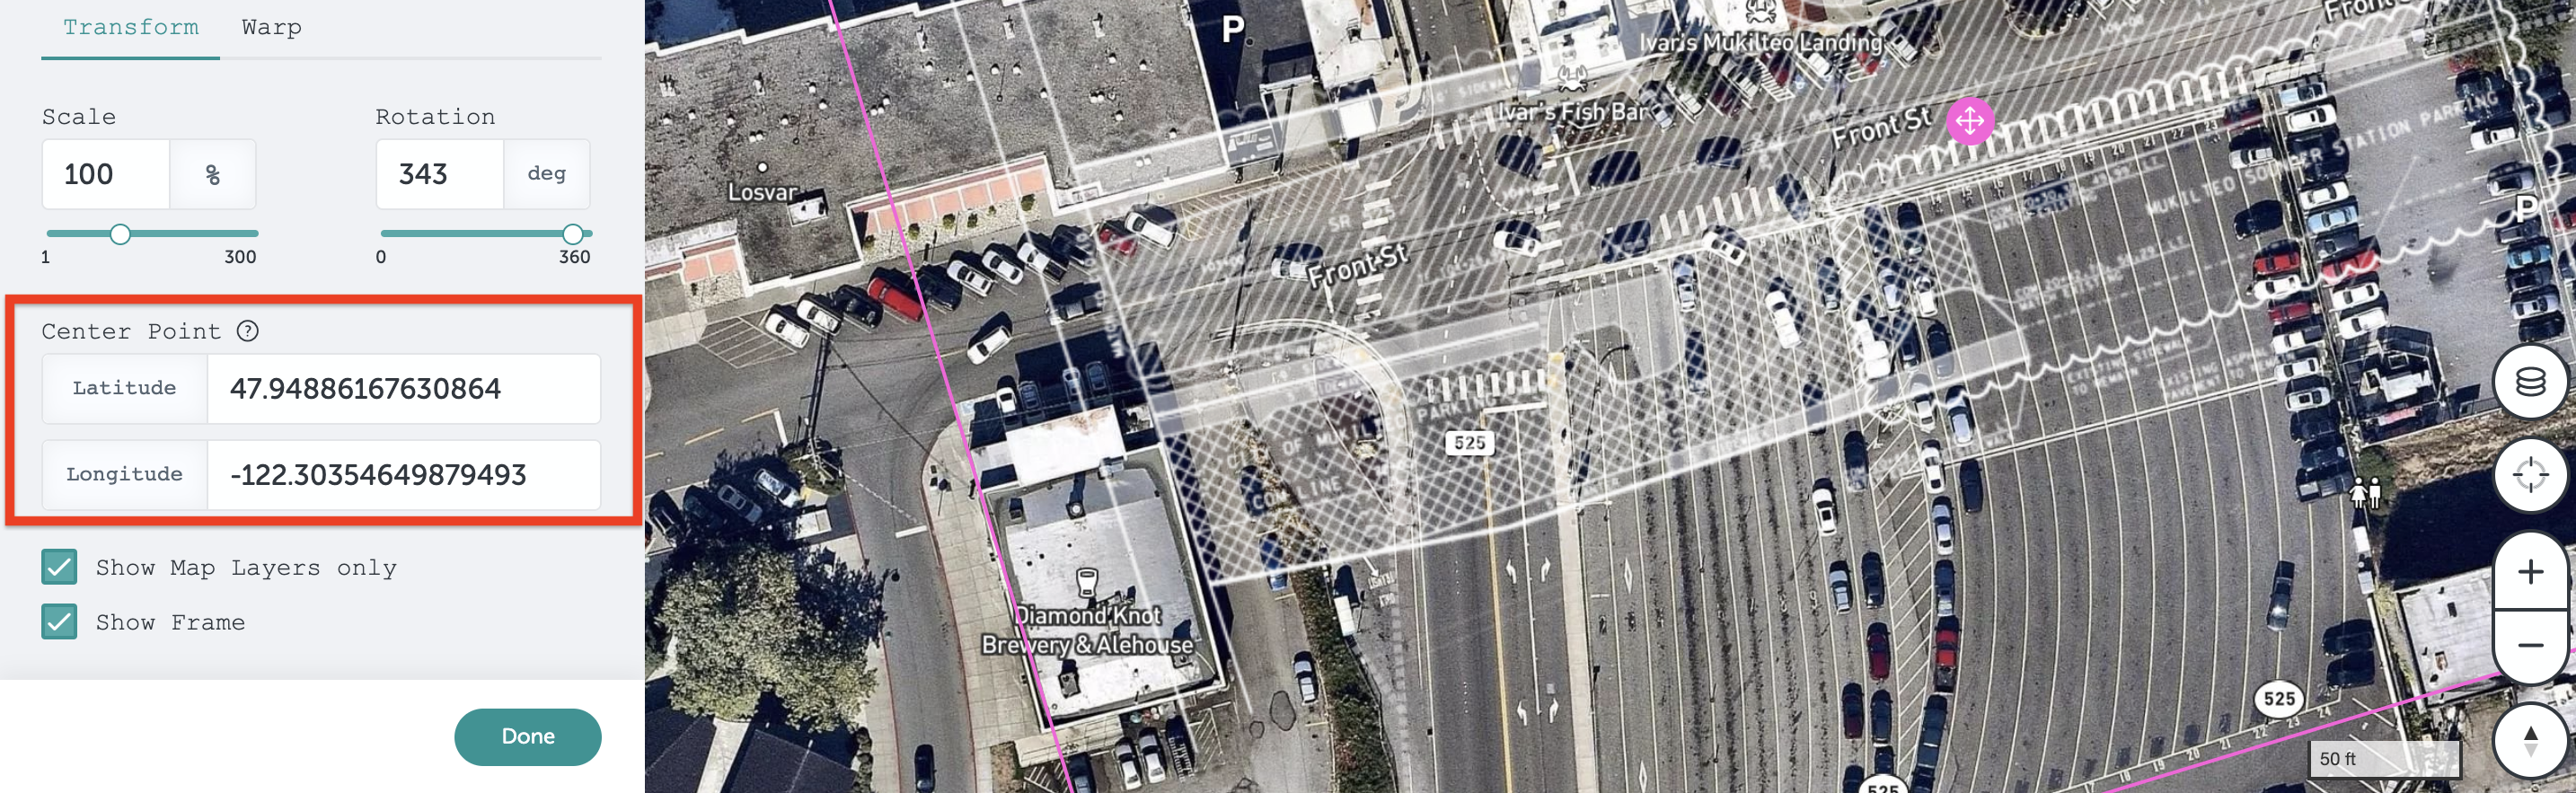
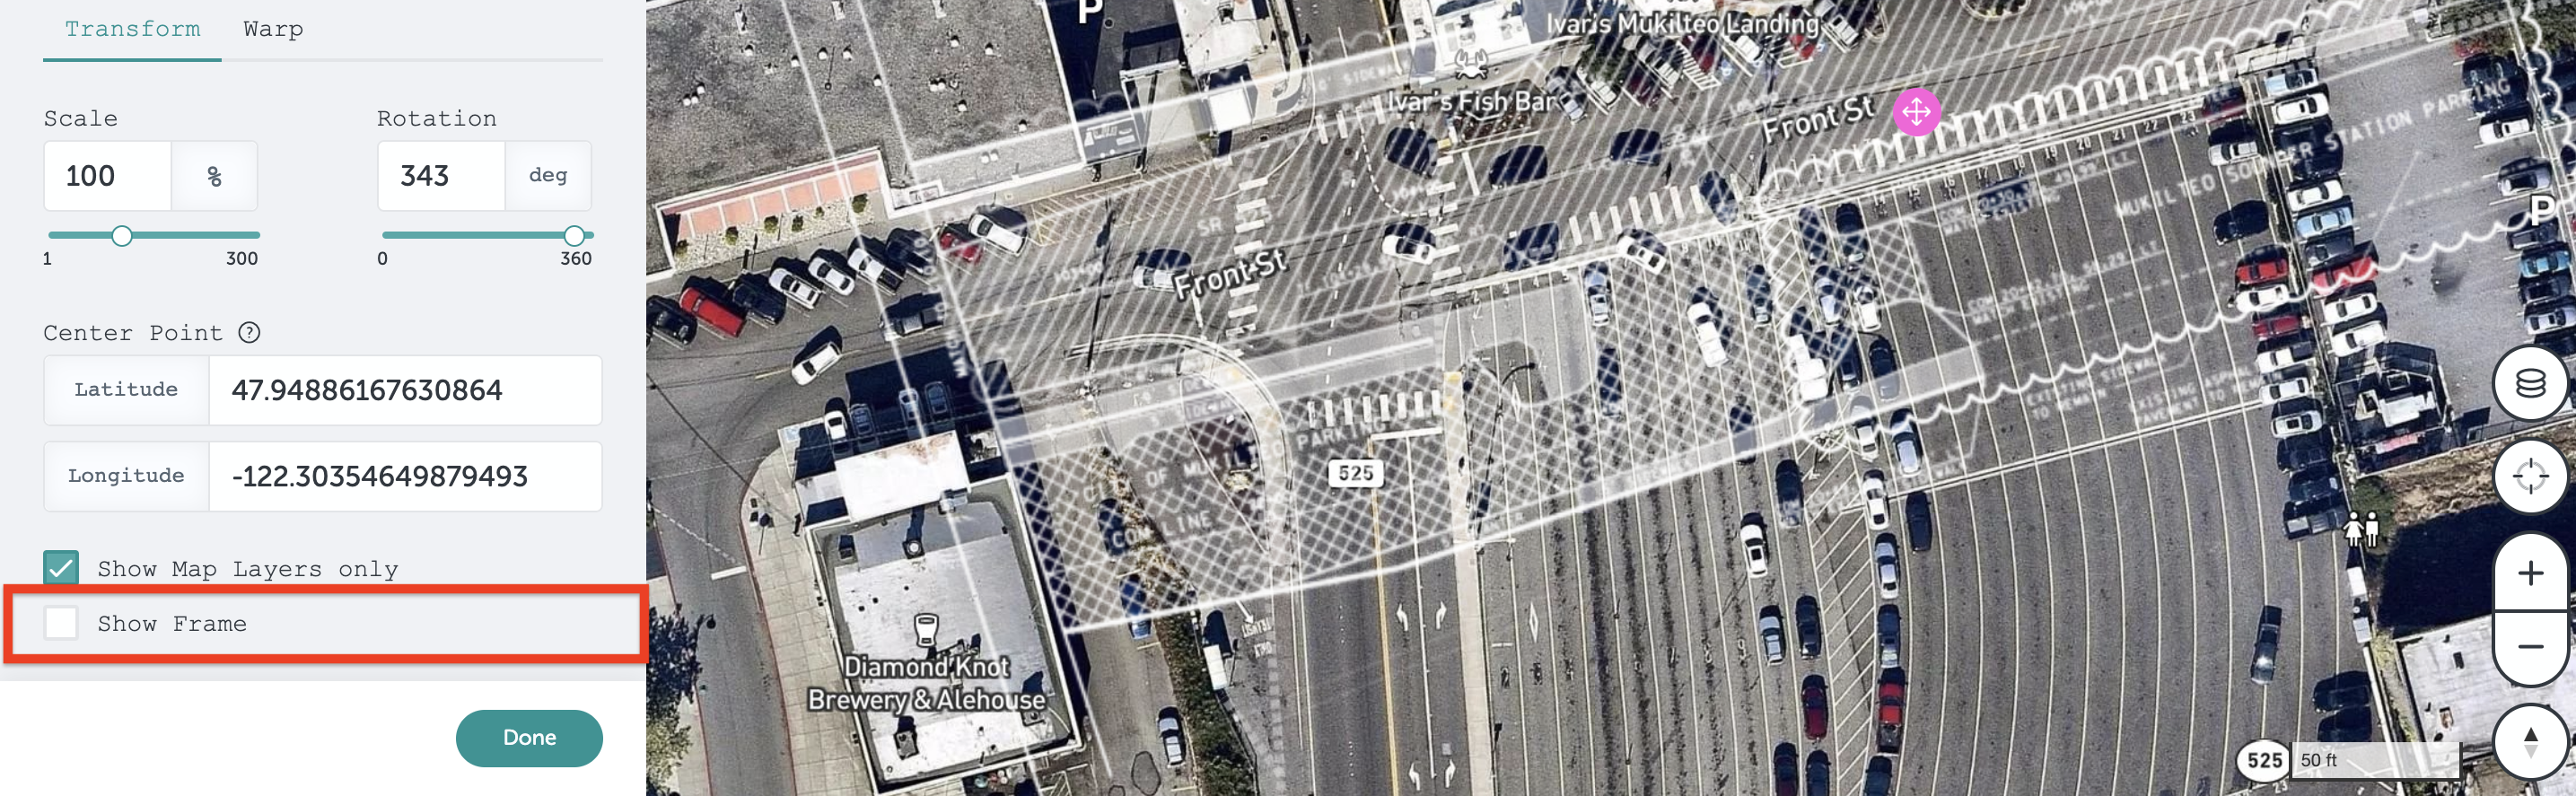
- Assign a center point if you know approximately, or exactly, the latitude and longitude of where the plan should be centered.
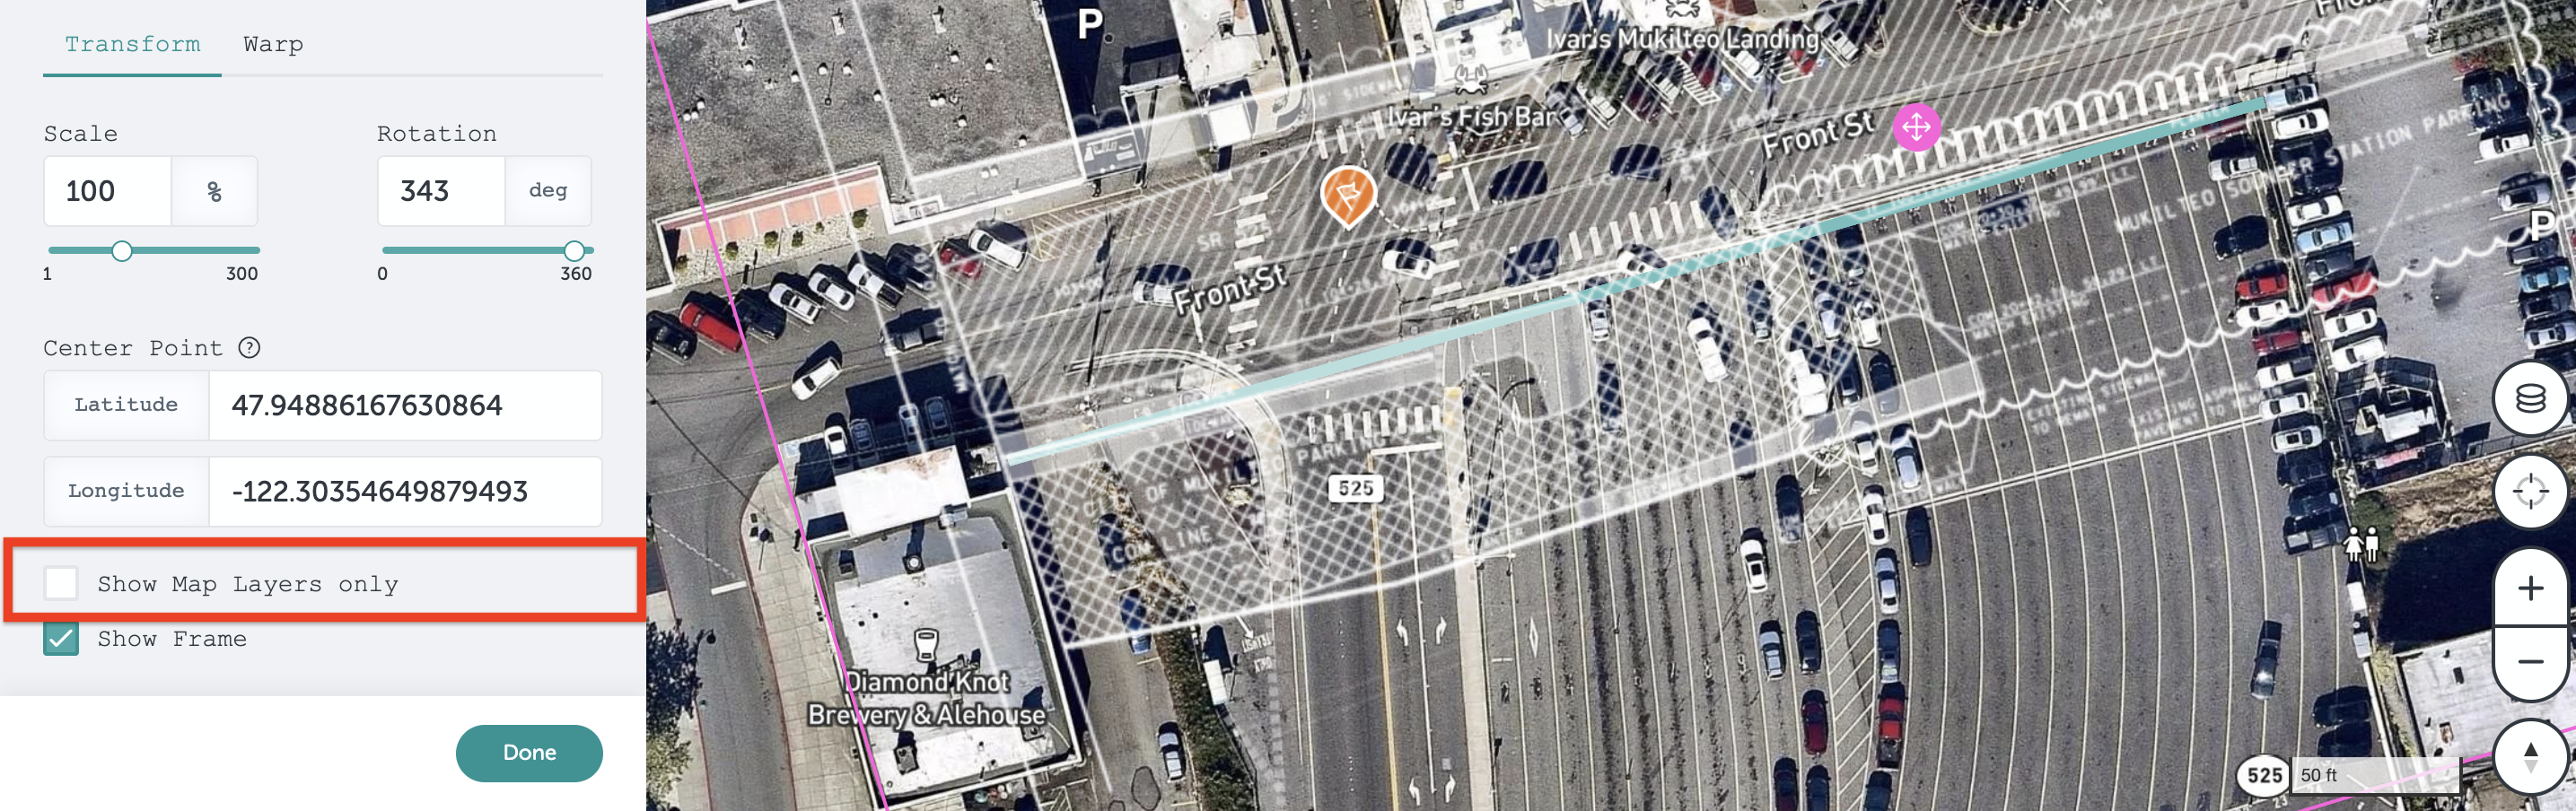
- Uncheck "Show Map Layers Only" to view assets that have been place on the map if you'd like to refer to them.
- Uncheck "Show Frame" to hide the pink layer border.
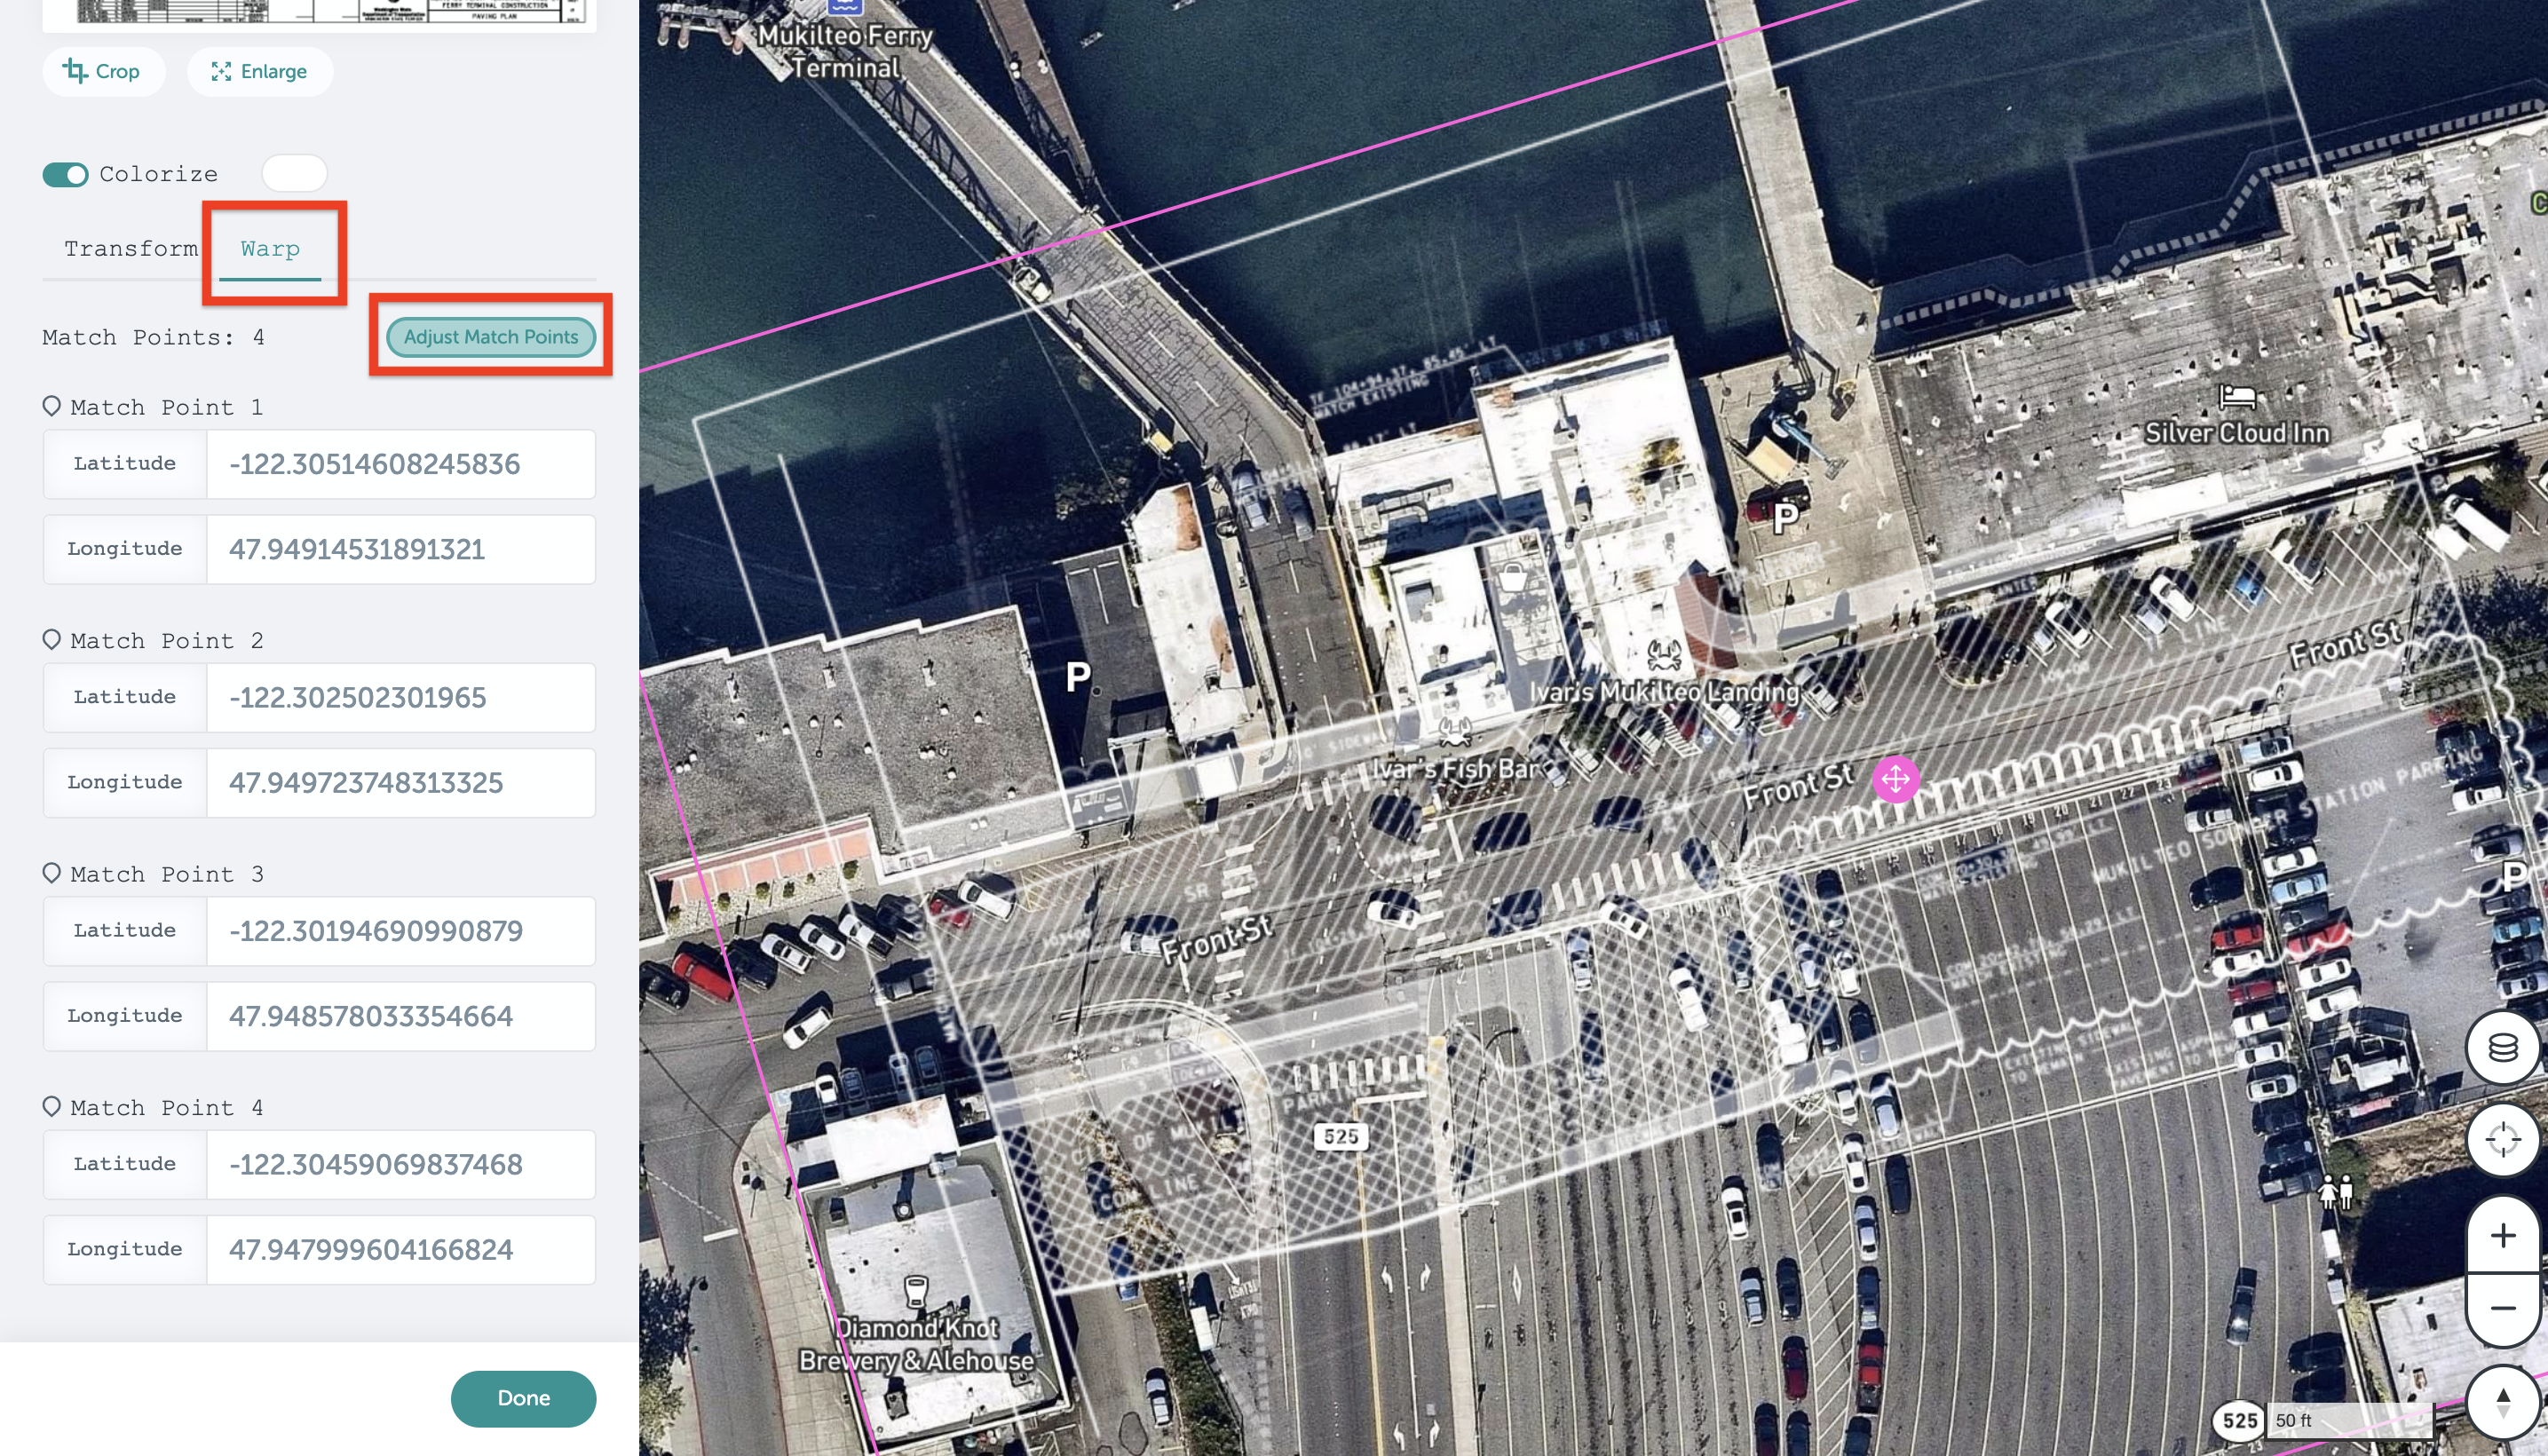
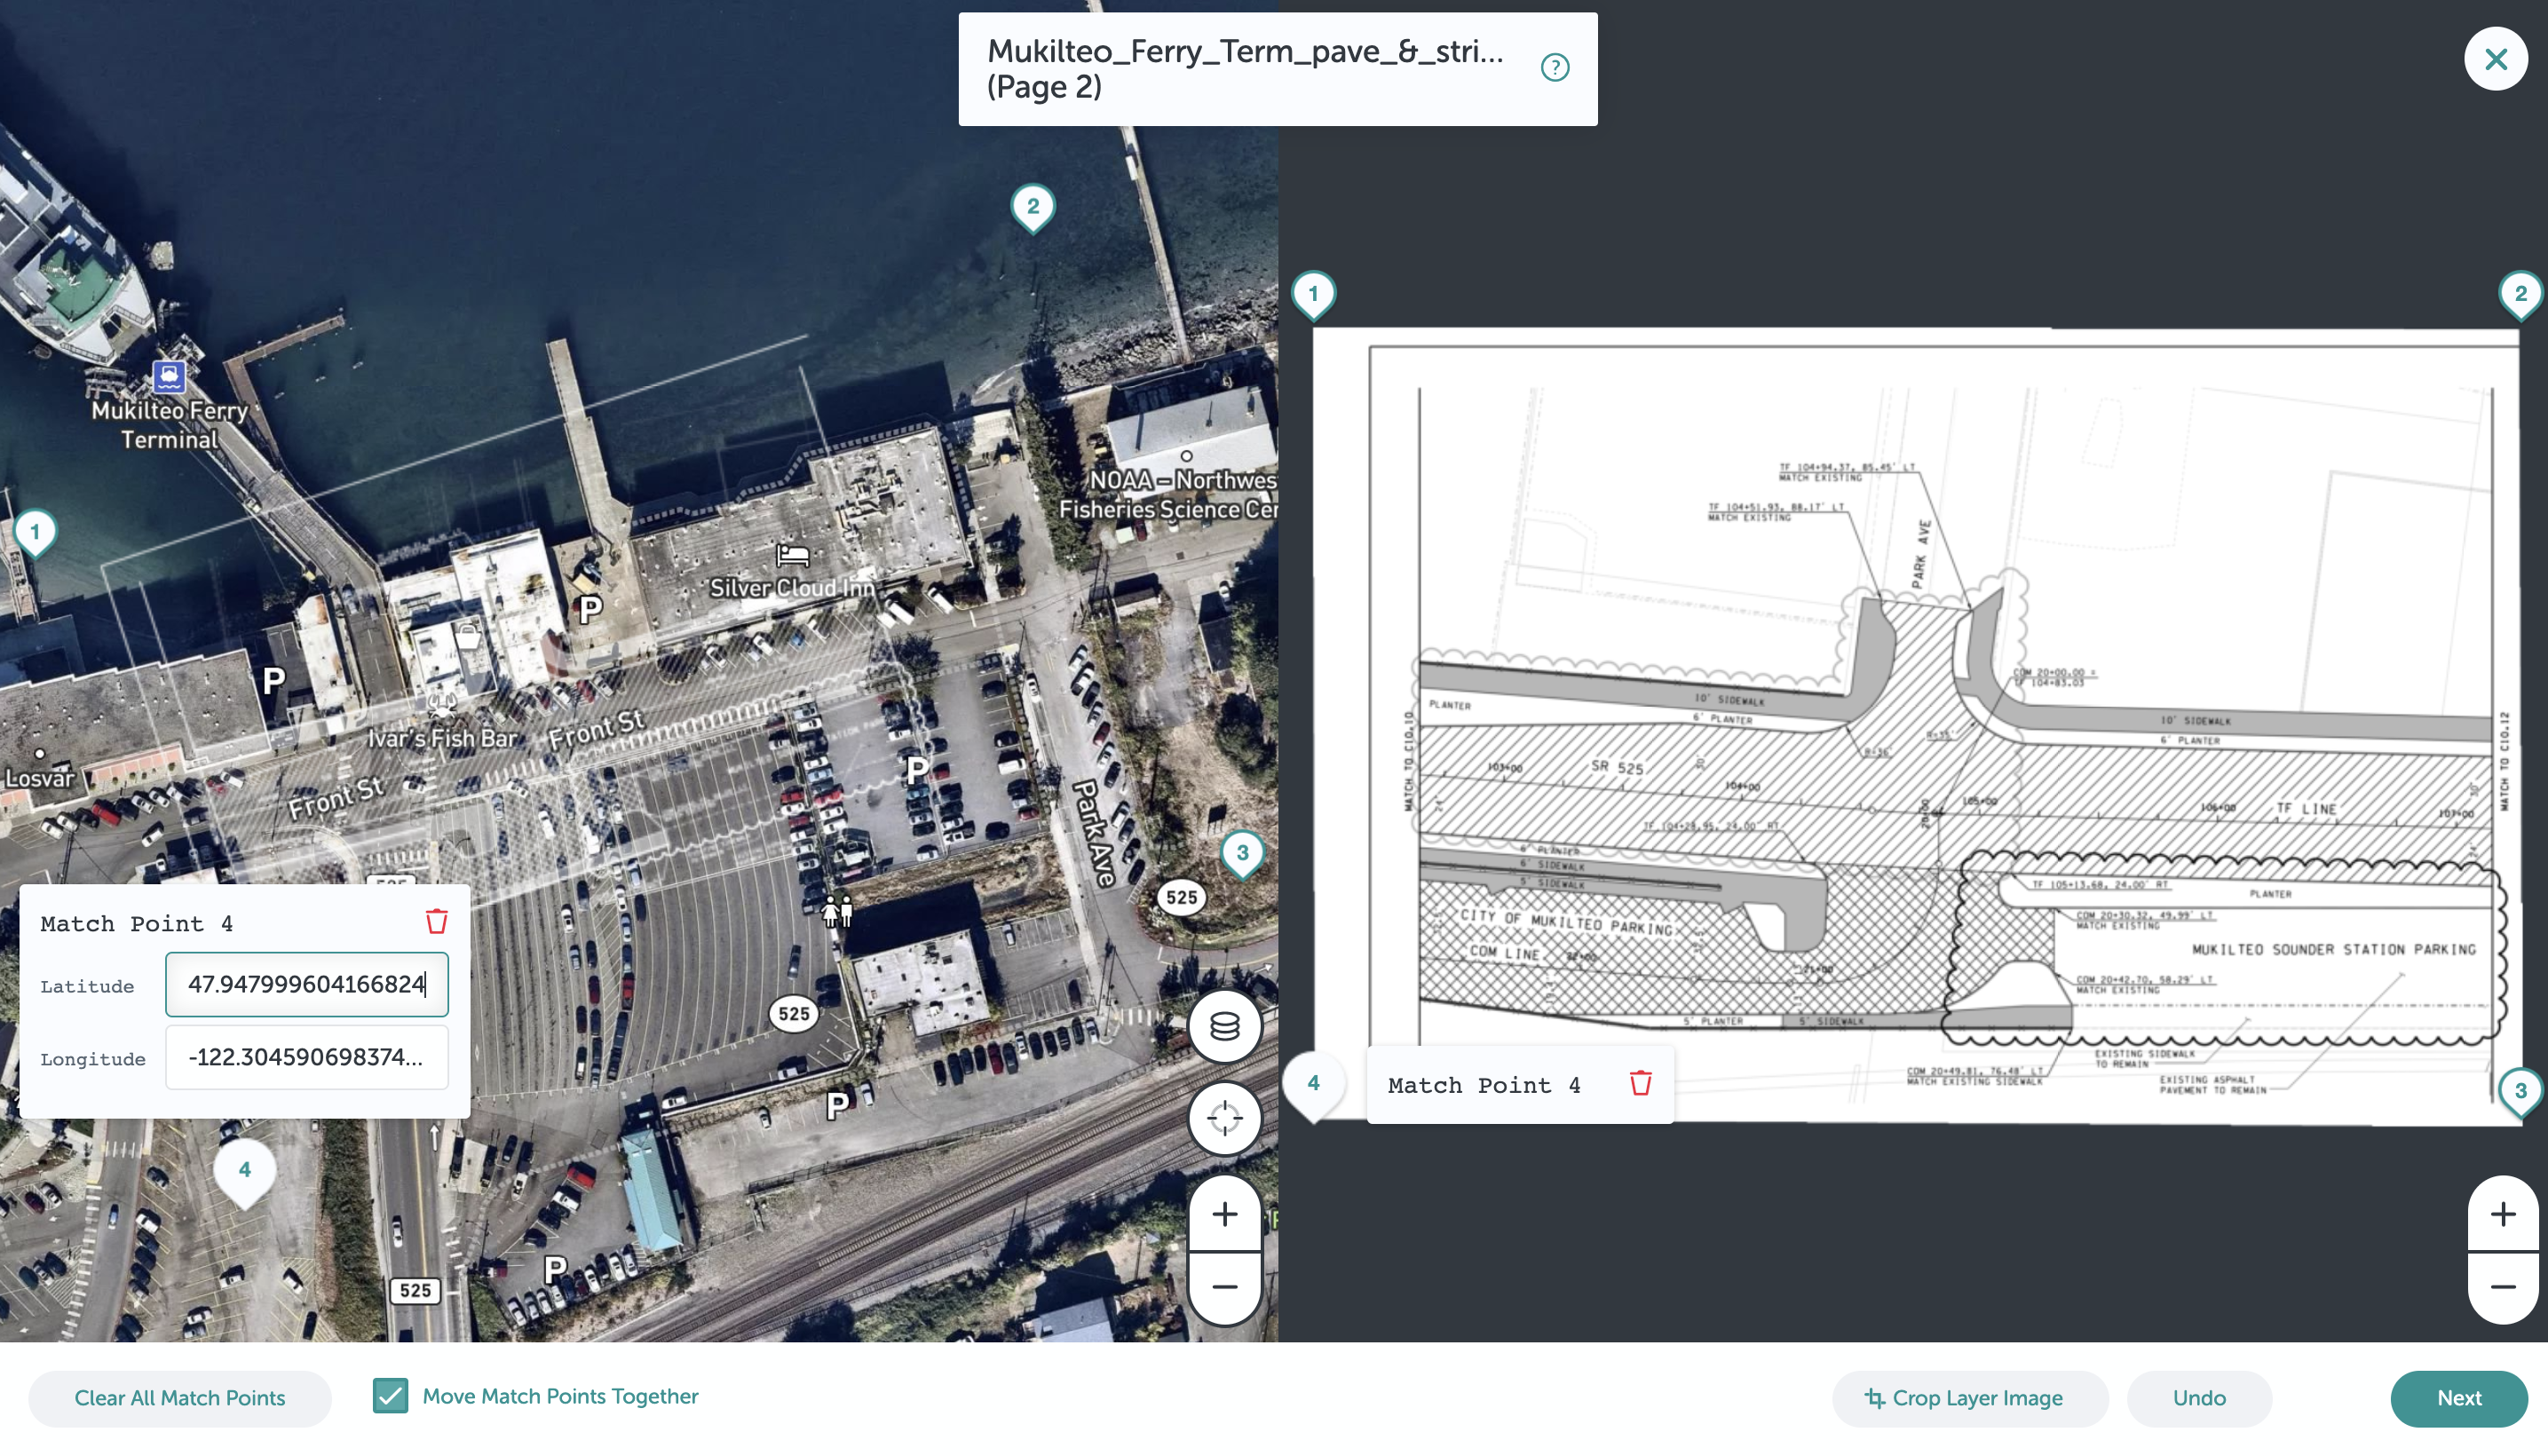
- Select "Warp" and then "Adjust Match Points" to change the shape of the layer - this allows you to move each corner of the image independently, allowing the plan to be warped to fit the map where needed.
-
Overlaying a KML/KMZ or Shapefile:
- Click to the "+" button on the left to open the toolkit.
- Scroll to the "Files" section, and click the desired "Plan" tool - some toolkits may have multiple versions of the plan tool, just pick the one that best matches your file.
- Select your KML/KMZ file, and click "Upload."

- Since KML/KMZ files have location data included in the file data, your data will be automatically create layers on the map once upload is completed.
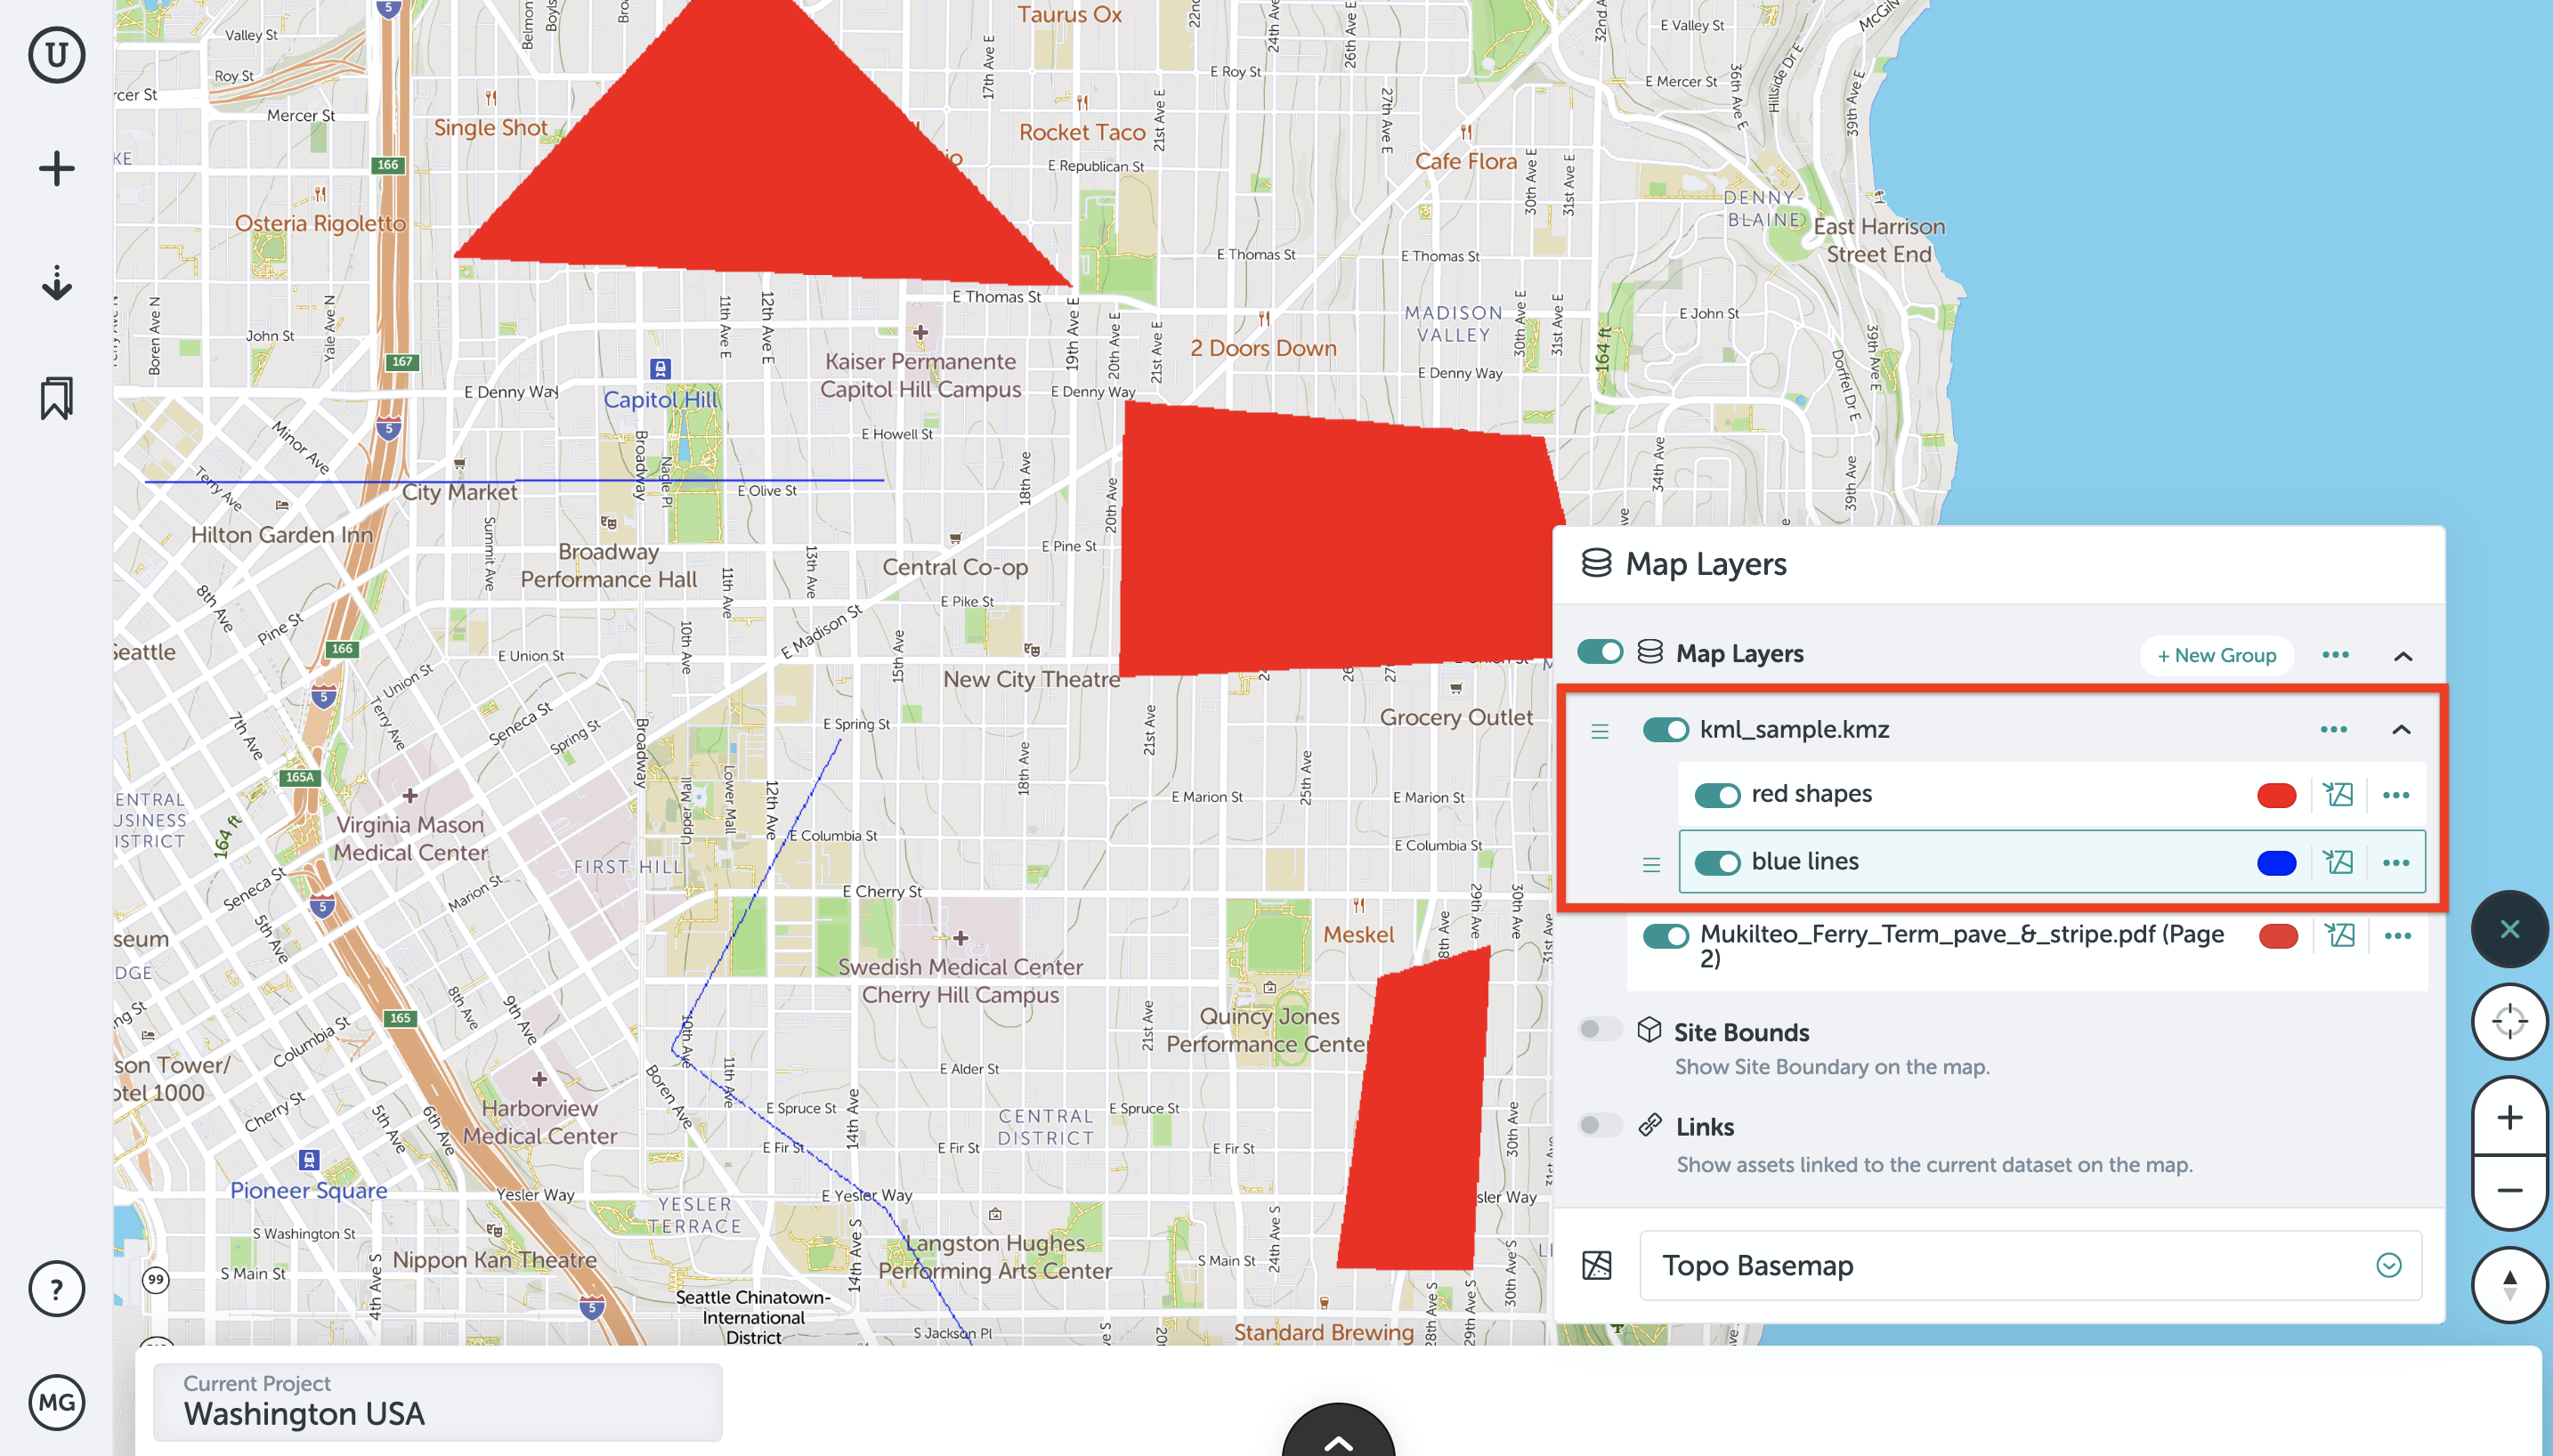
- If your file contains various layers of different asset types, each layer will be imported as an individual layer in Unearth - organized under the layers menu.
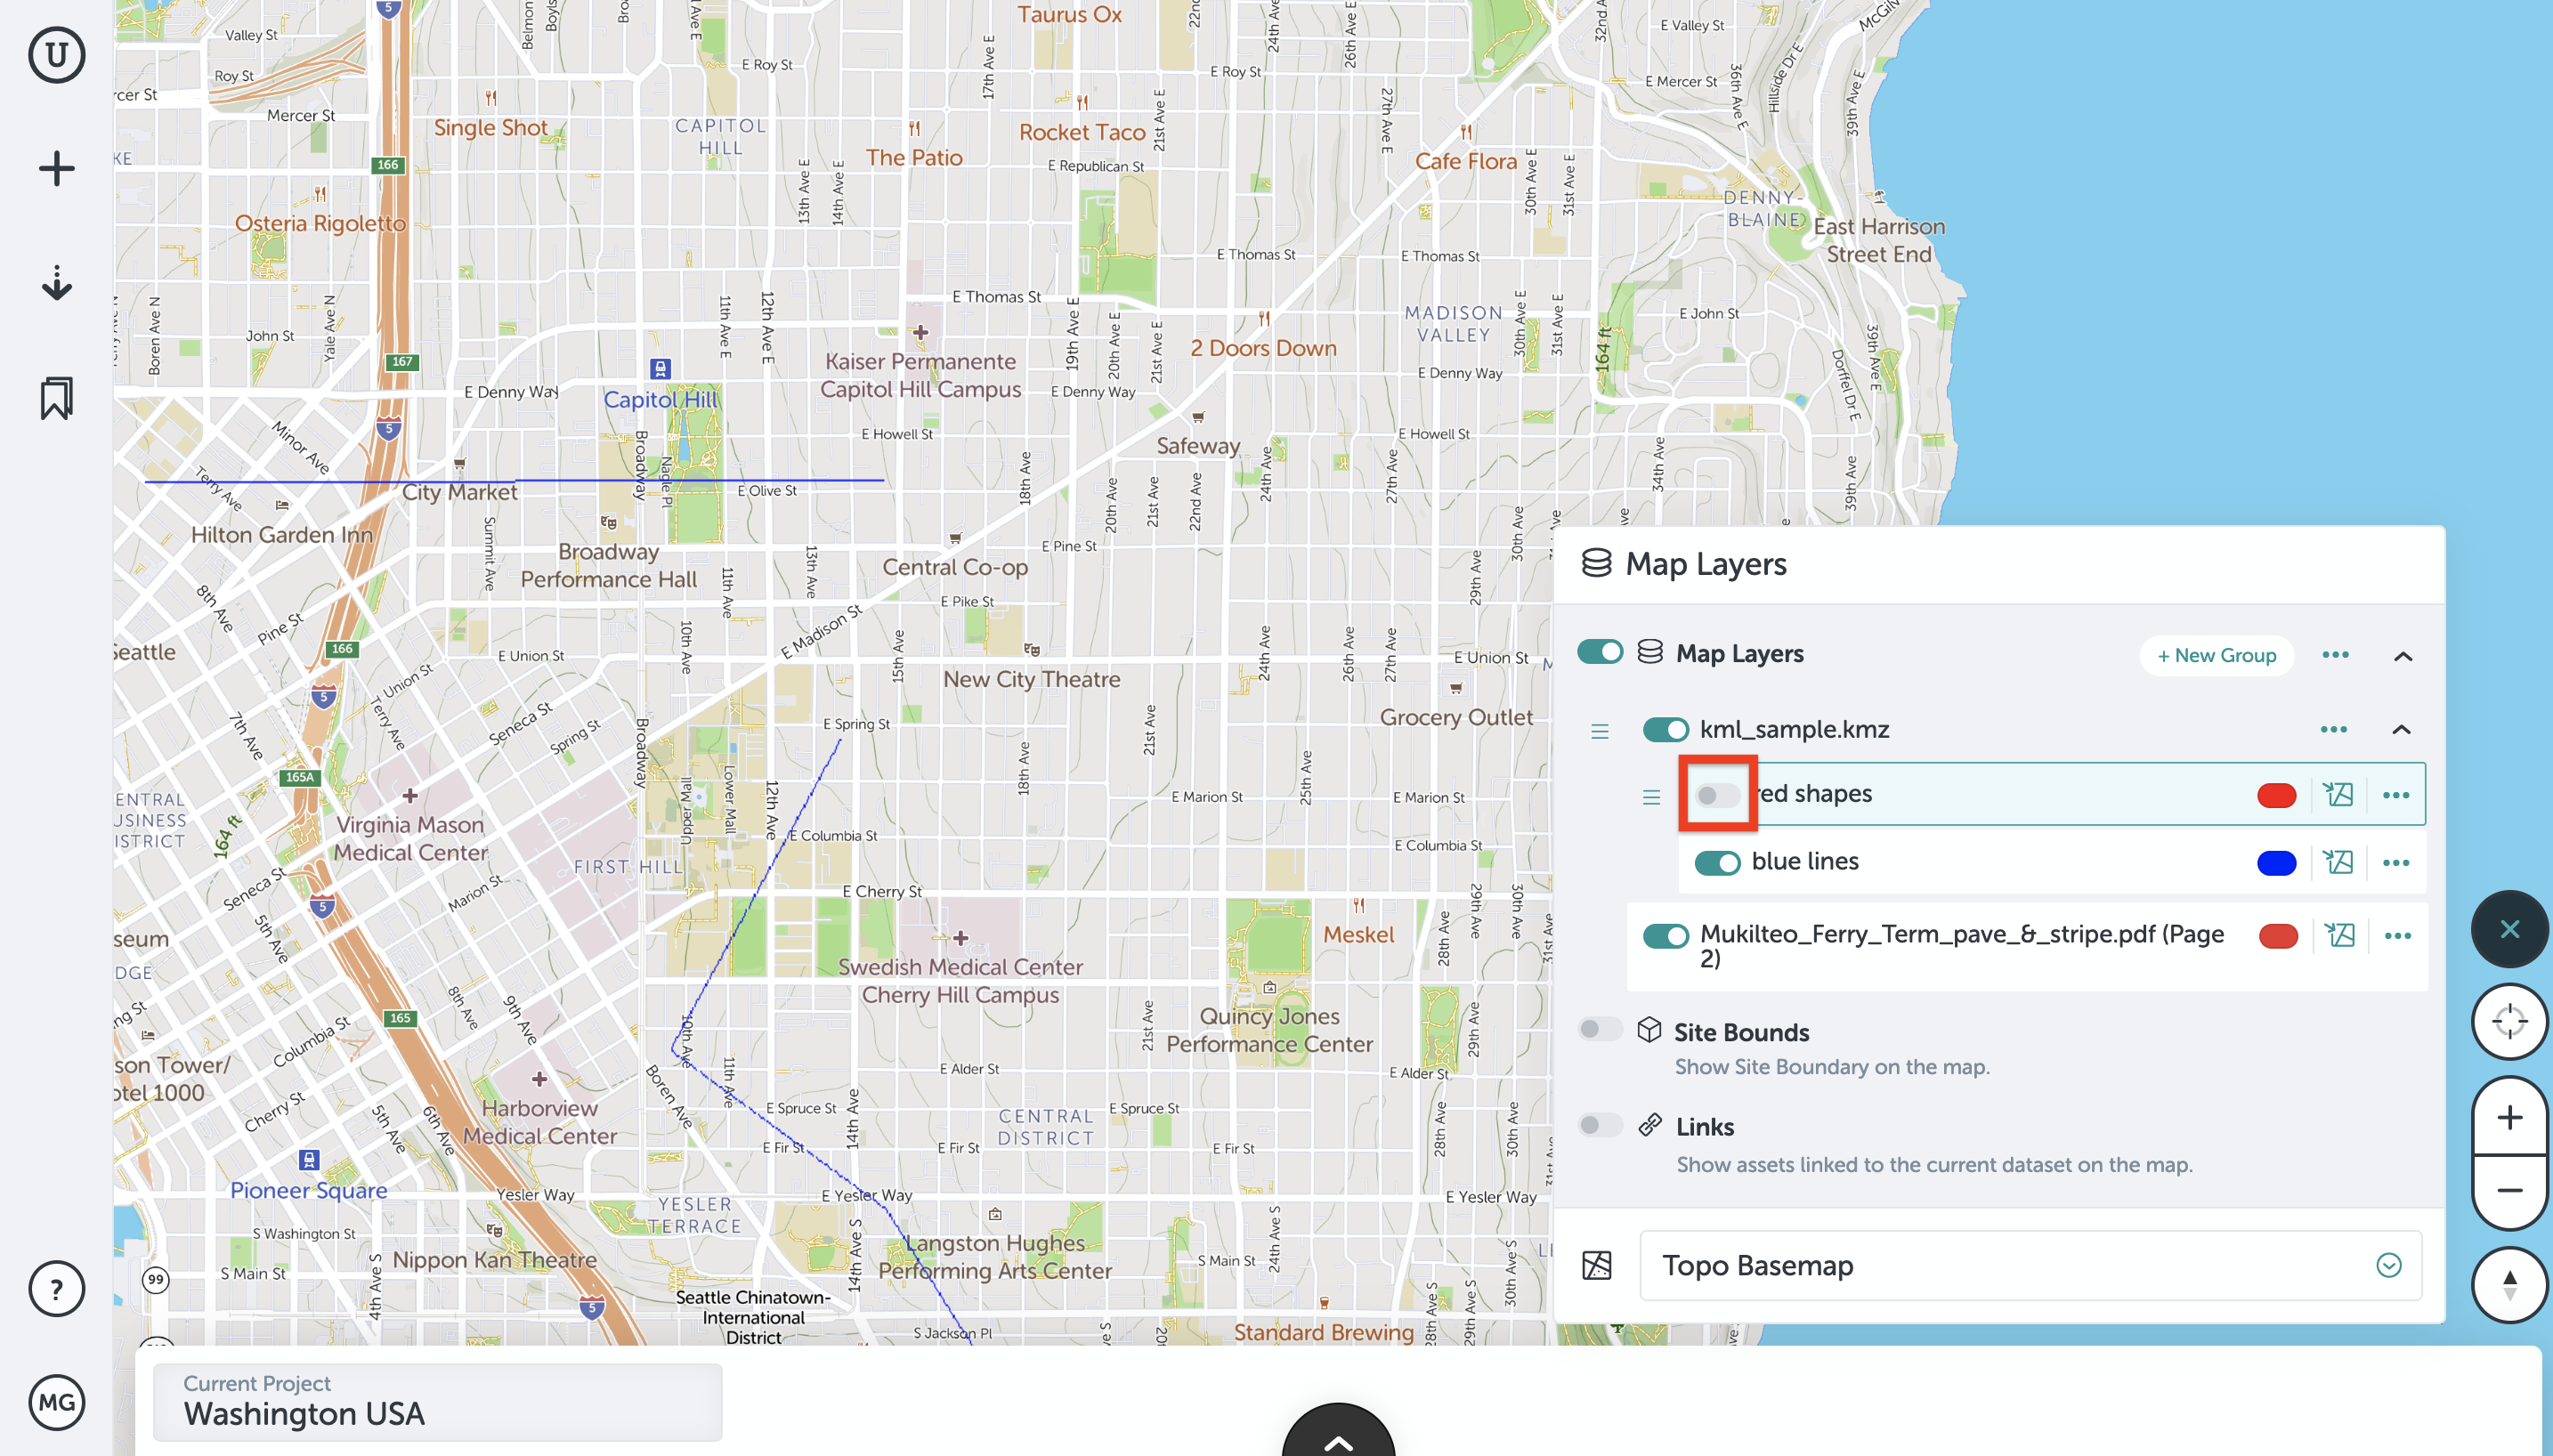
- Your KML/KMZ layer(s) can be toggled on/off in the layers menu on the right side of the screen.
Navigating the Map Layers Menu:
- Now that you've overlayed your plan to the map, you can control your layers in the Map Layers menu. The Map Layers menu is located on the right side of the screen. Here you can:

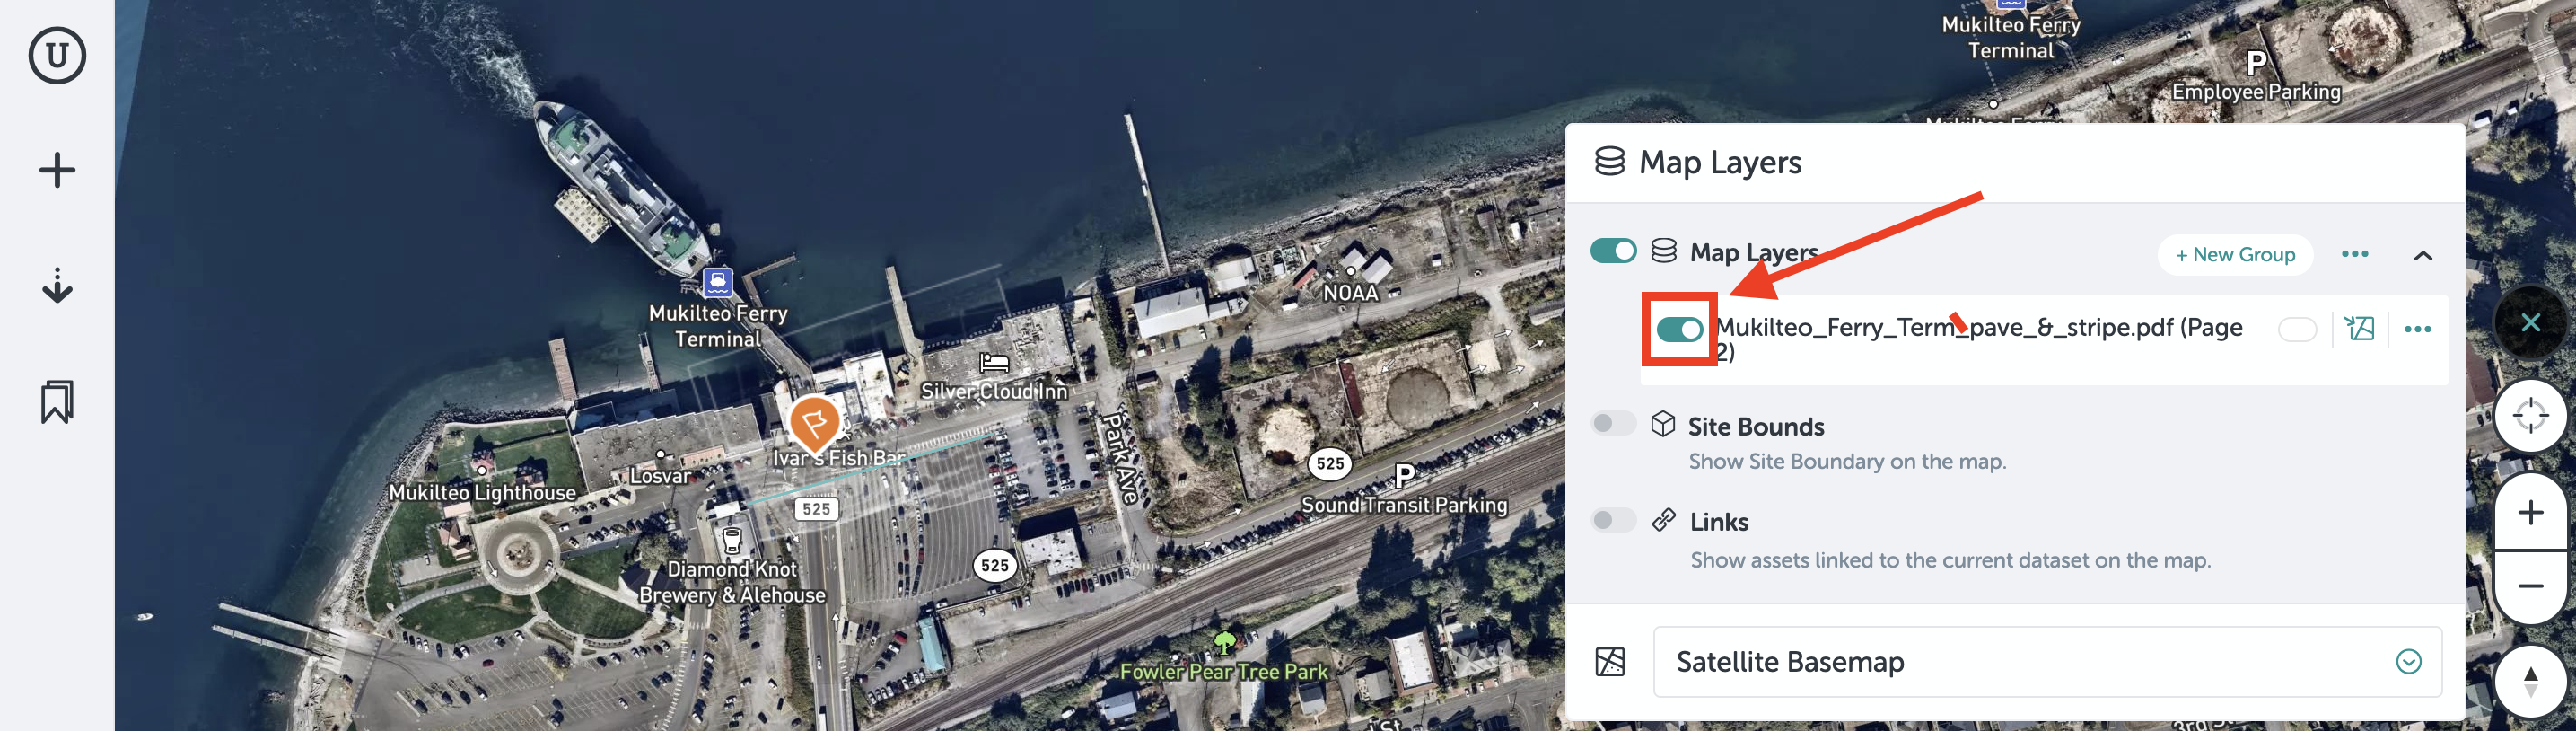
- Toggle the layers on/off - click the toggle on (green) to display the layer on the map, or off (gray) to hide the layer.
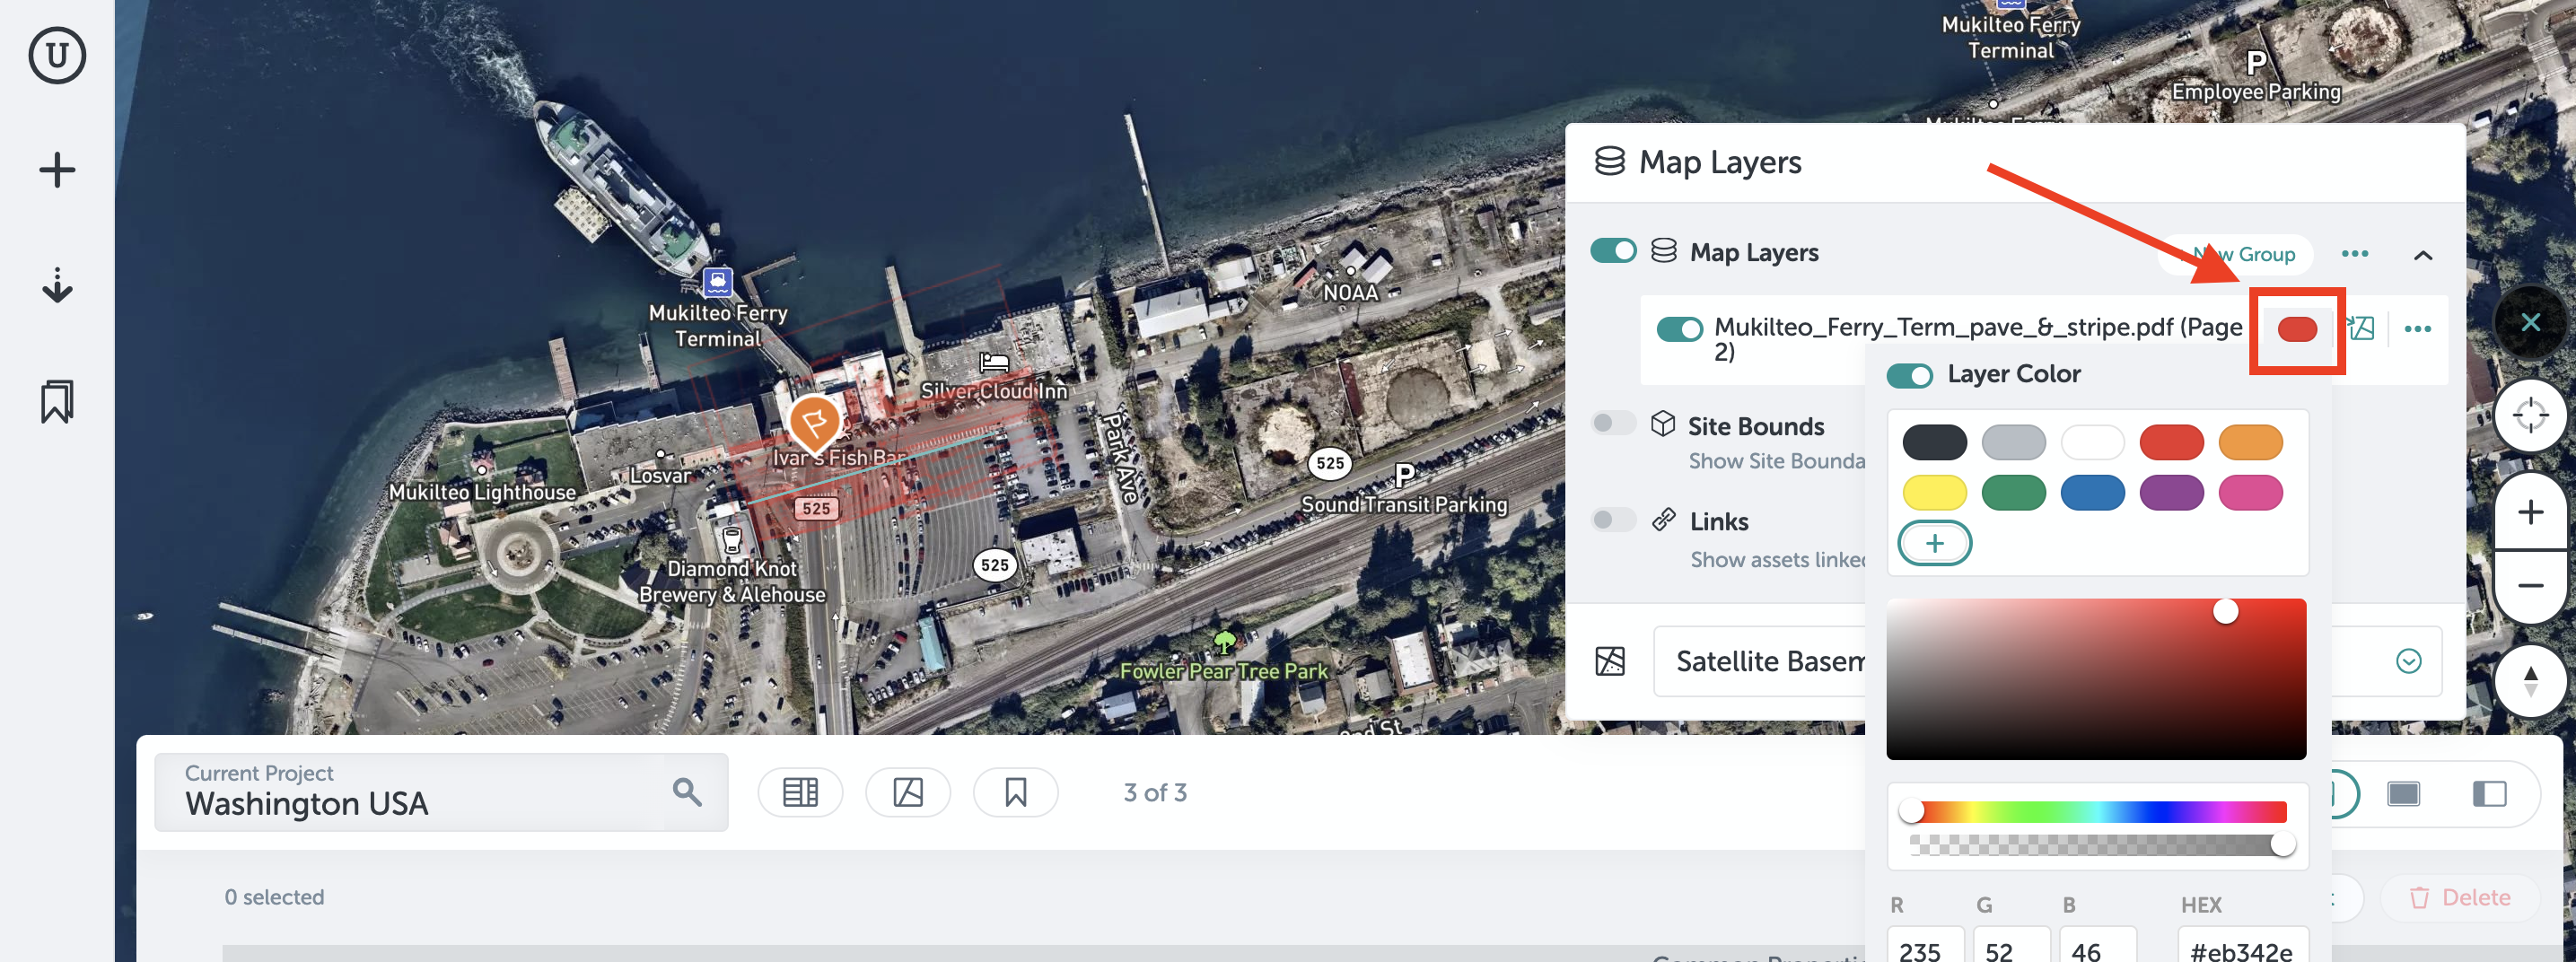
- Change the color of the layer - click the colored oval to open the color selection submenu, where you can choose from a default list of colors or customize your own.
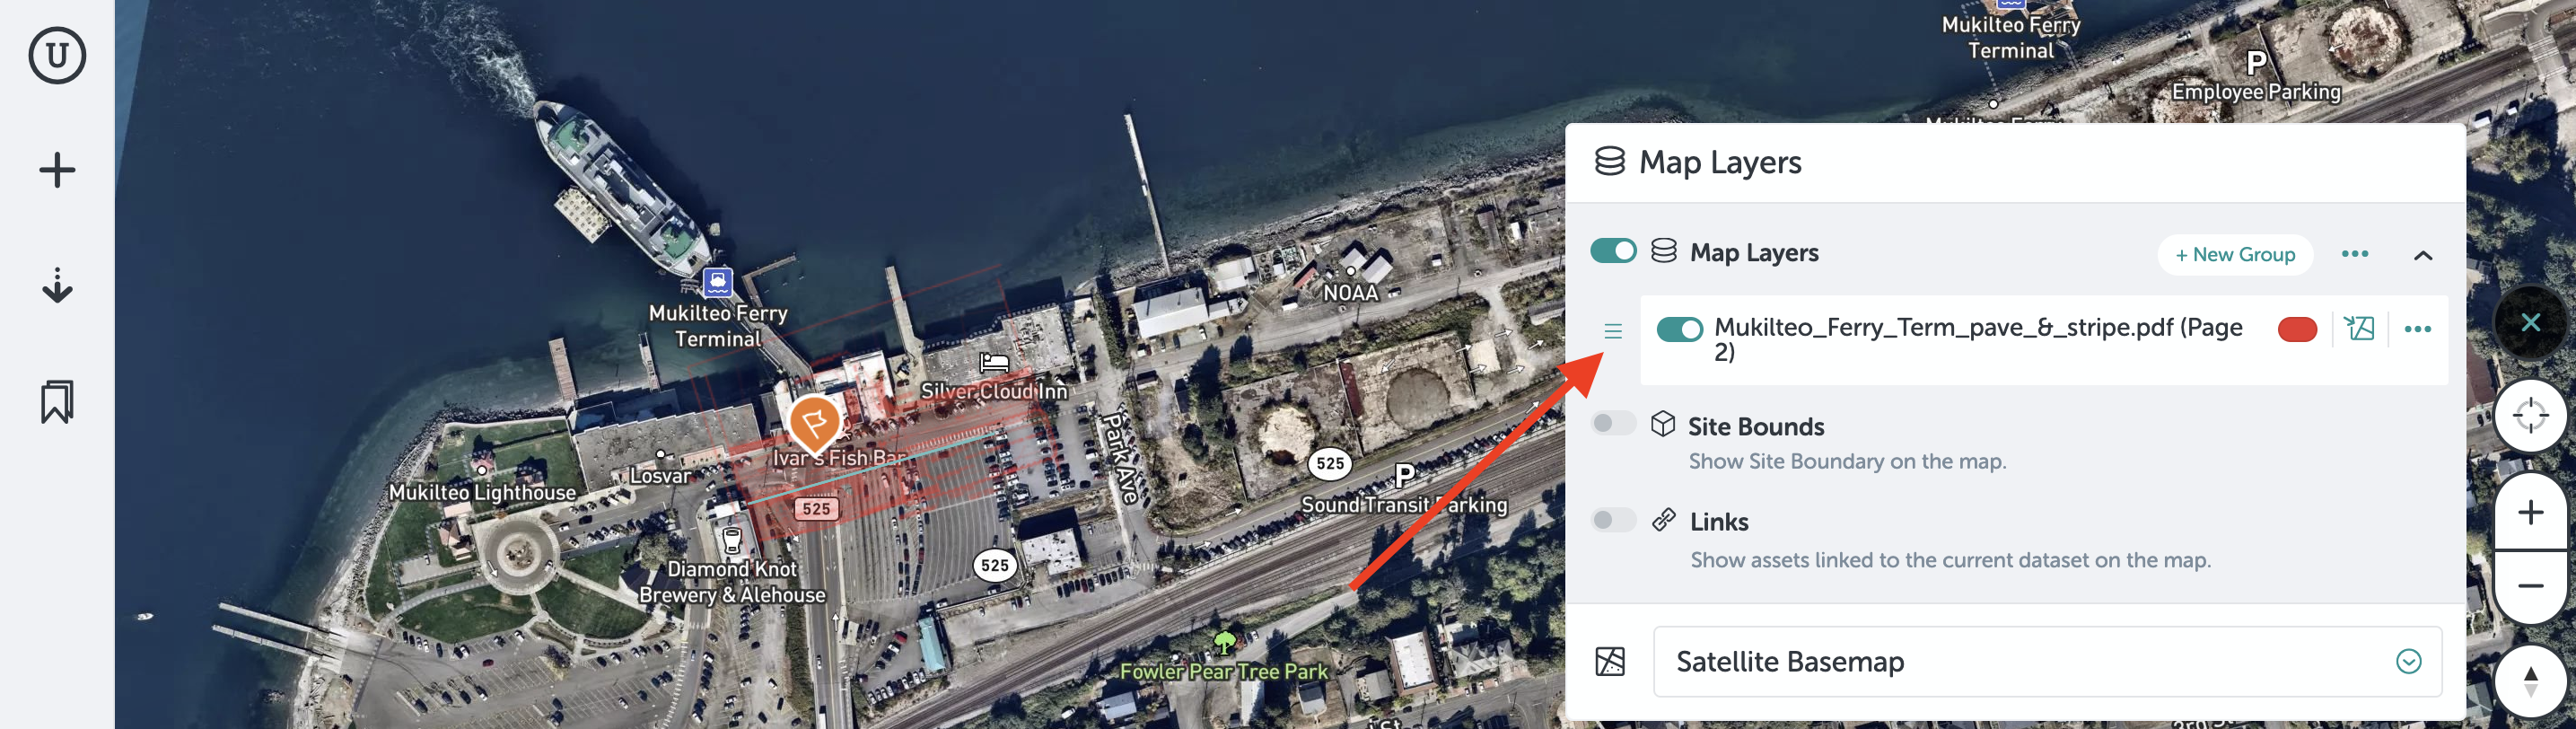
- Change the order the layers are listed in - hover over the left side of the layer to display an icon with 3 lines - click this and drag to move the layer to a different order.
- Go to the layer's location on the map - click the map icon to the right of the color picker to center your screen on the map layer.

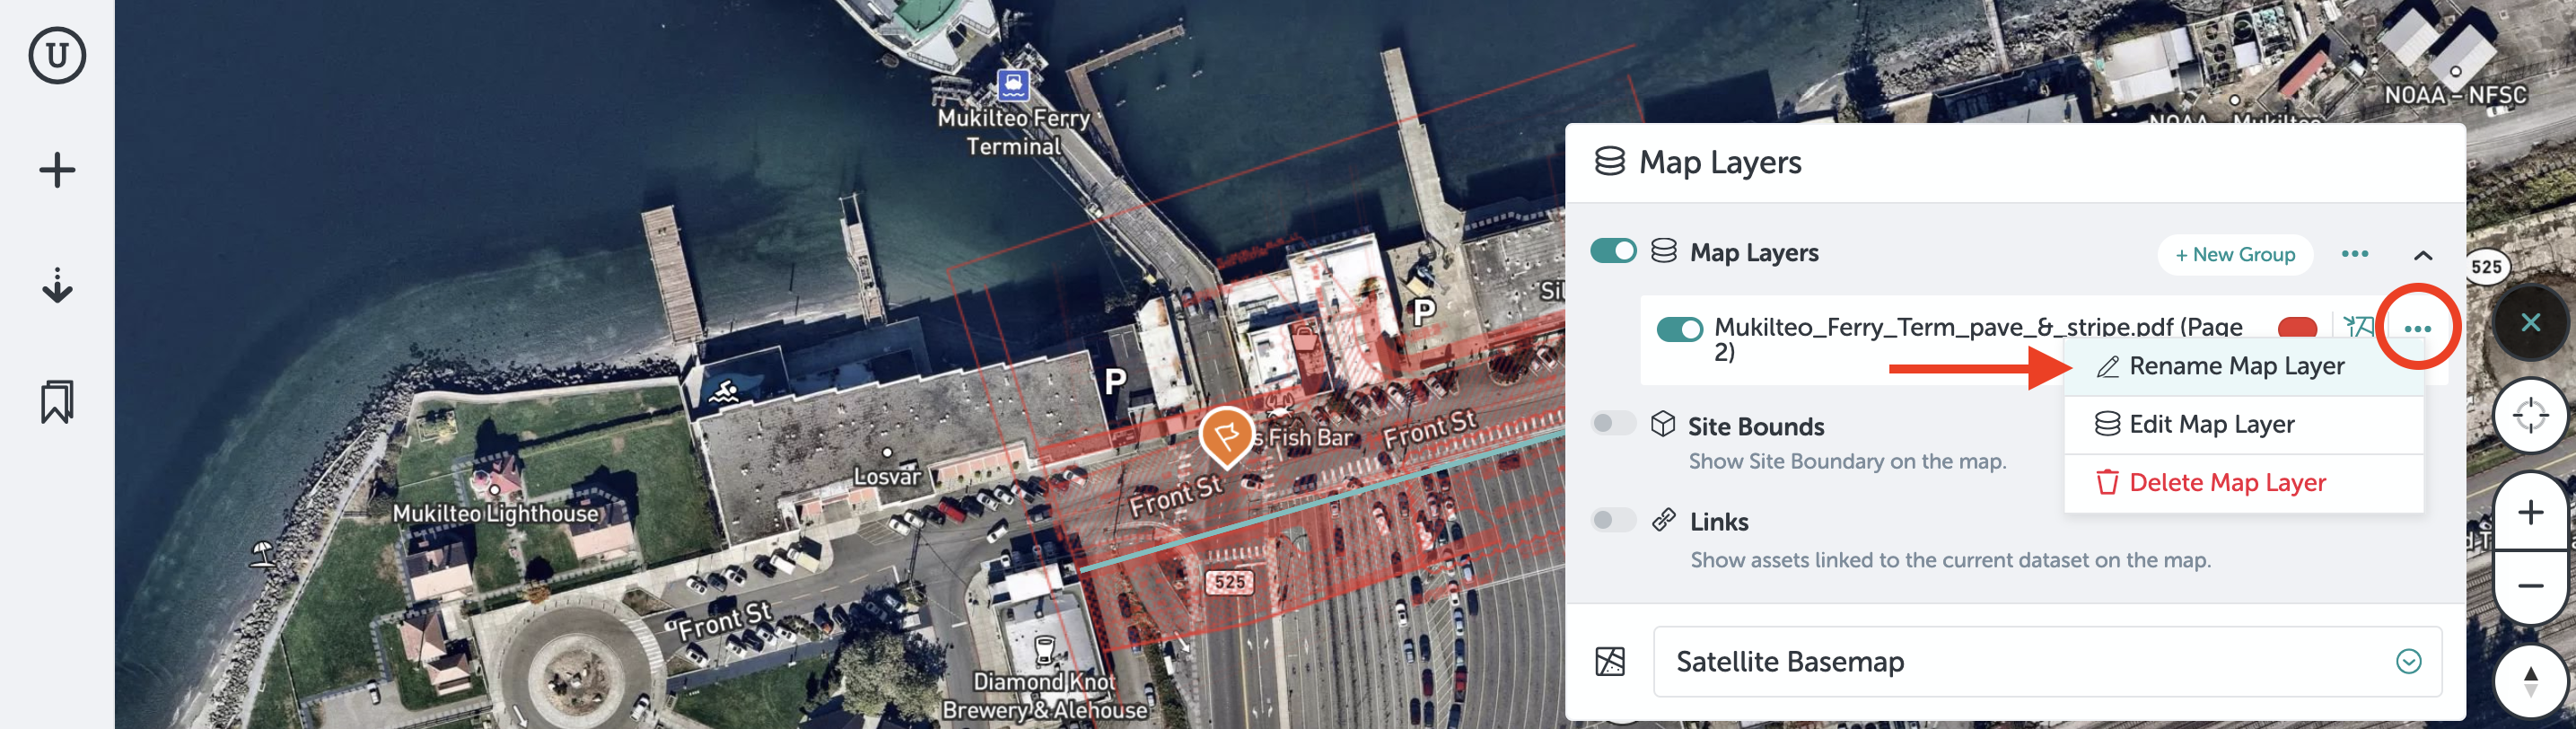
- Rename the layer - click the 3 dots menu, then click "Rename Map Layer" to type in a new name.
- Toggle the layers on/off - click the toggle on (green) to display the layer on the map, or off (gray) to hide the layer.
-
- Edit the layer's position on the map - click the 3 dots menu and then click "Edit Map Layer" to re-enter the editing flow, where you can make adjustments to the layer's location on the map.
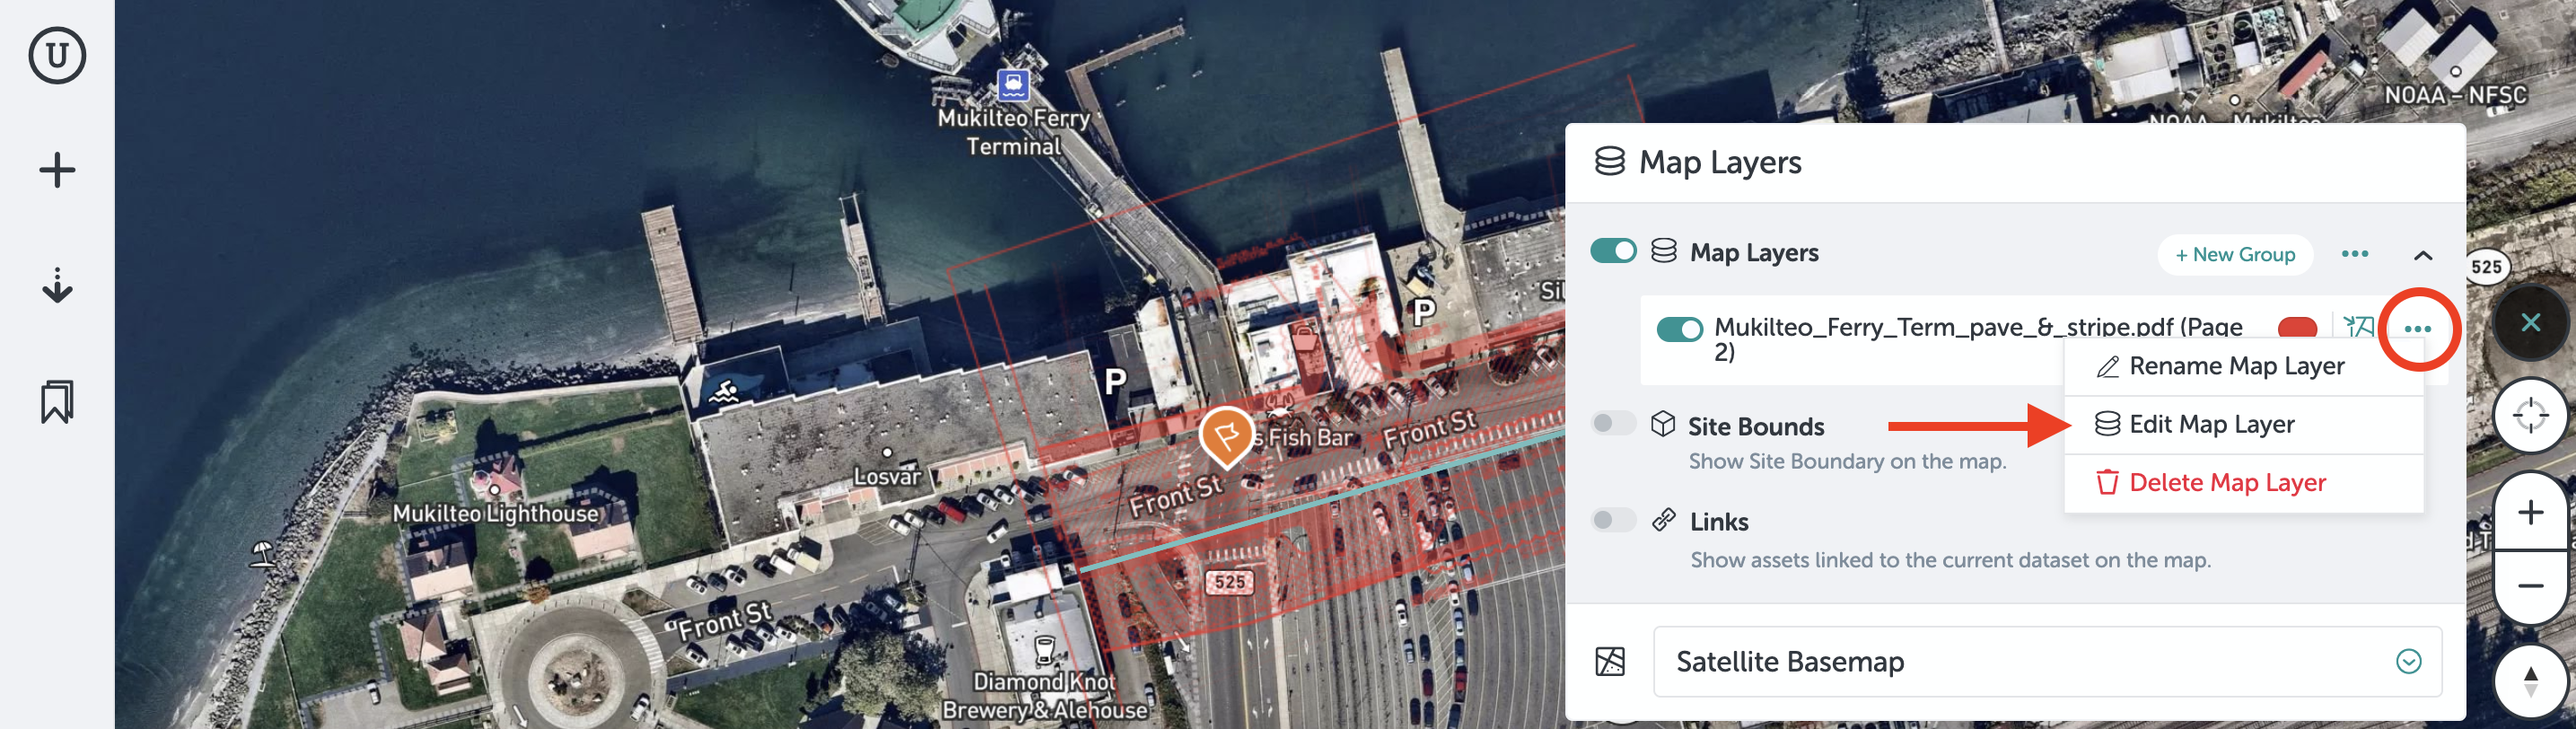
- Edit the layer's position on the map - click the 3 dots menu and then click "Edit Map Layer" to re-enter the editing flow, where you can make adjustments to the layer's location on the map.
-
- Delete the layer - click the 3 dots menu, then click "Delete Map Layer" to remove the layer.
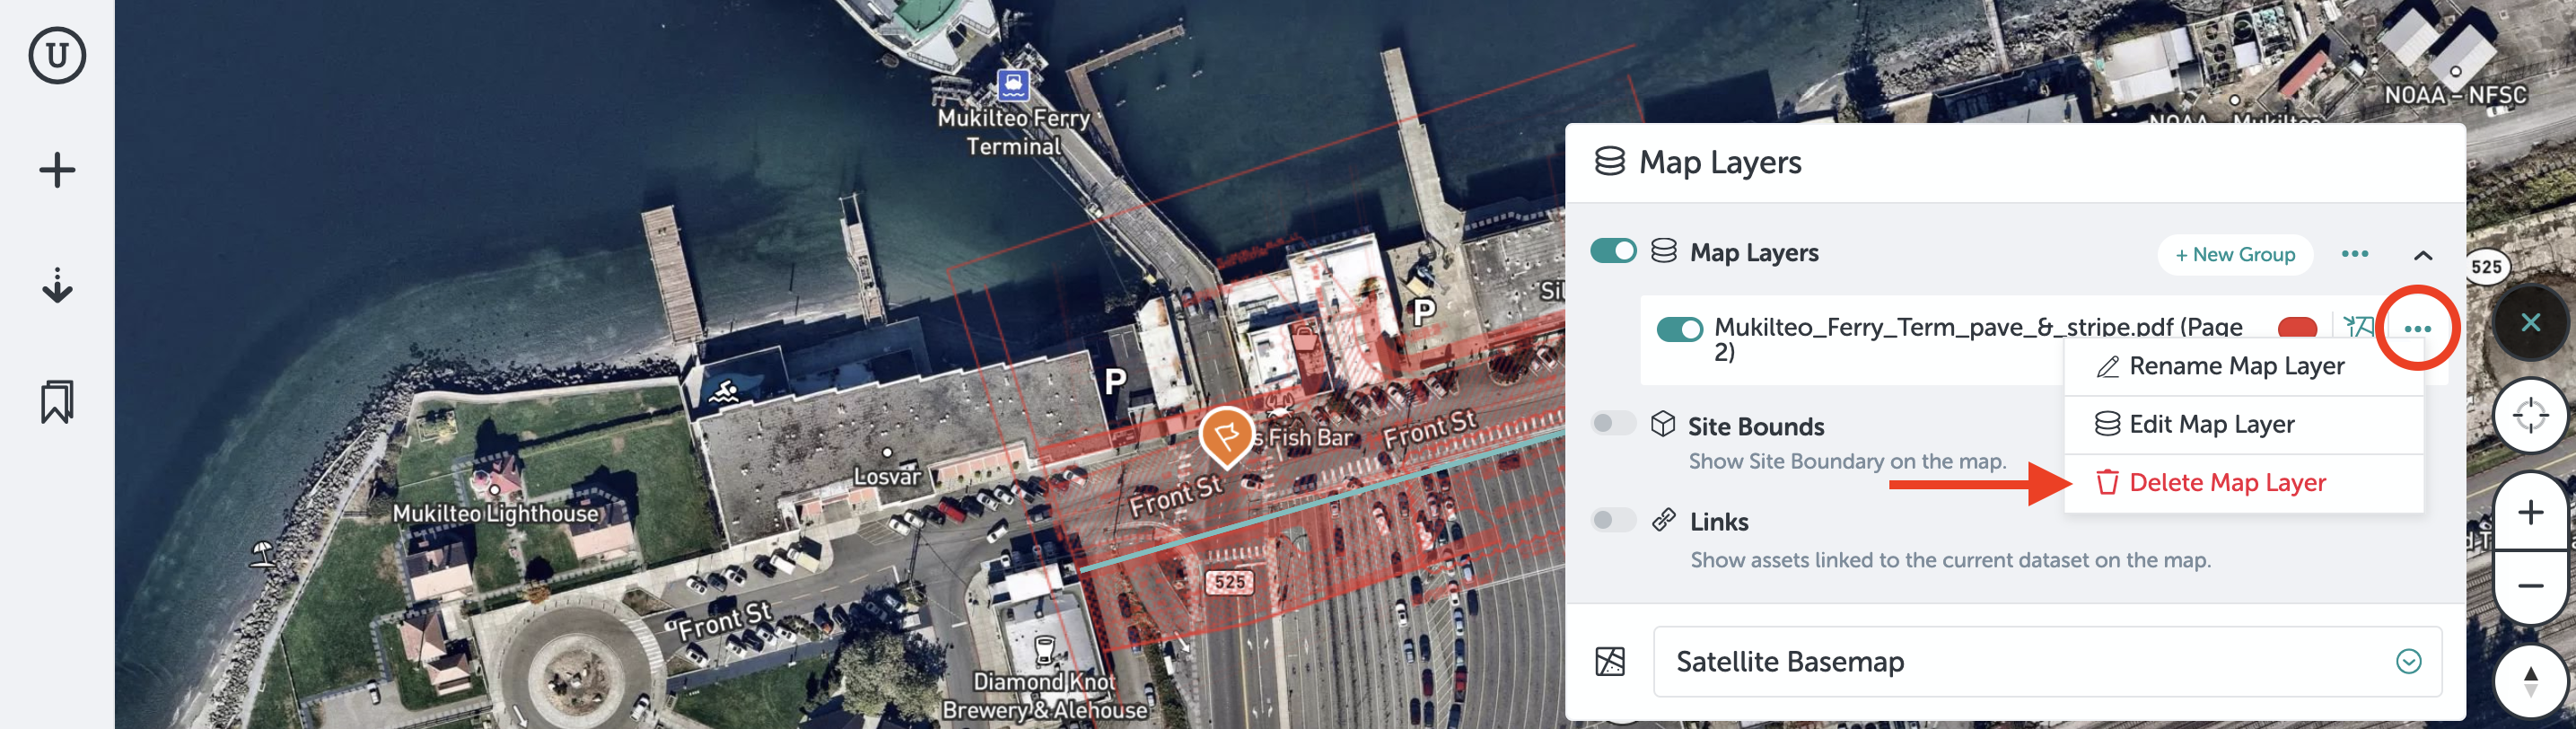
- Delete the layer - click the 3 dots menu, then click "Delete Map Layer" to remove the layer.
If you run into any issues or have any questions, please reach out to us at support@unearthlabs.com.
Revised May 2023