Batch Edit and Delete streamlines your workflow by enabling changes to multiple assets at a time.
Batch edit and delete allows you to select, edit, or delete multiple assets at a time, streamlining your workflow and making it faster and easier to make multiple changes with a single click.
Selecting Assets for Batch Edit or Delete
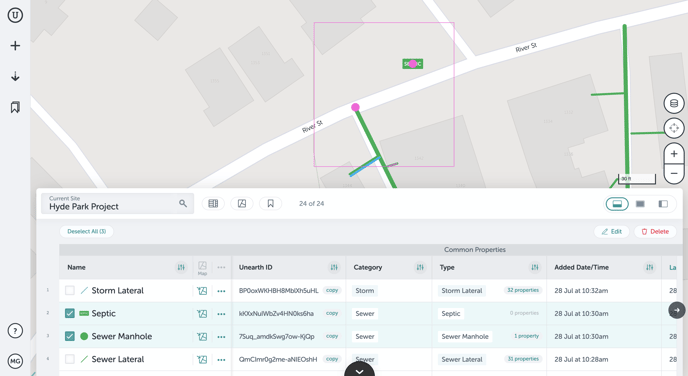
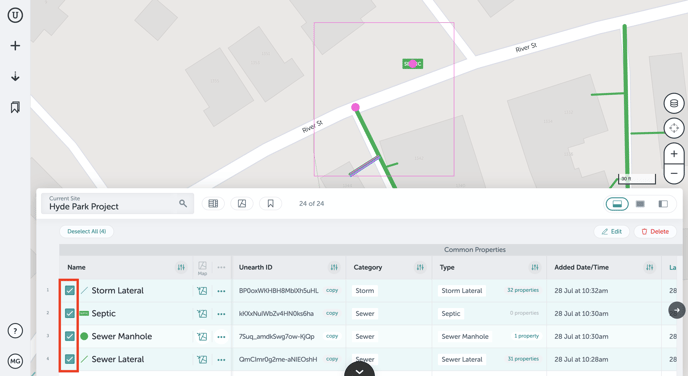
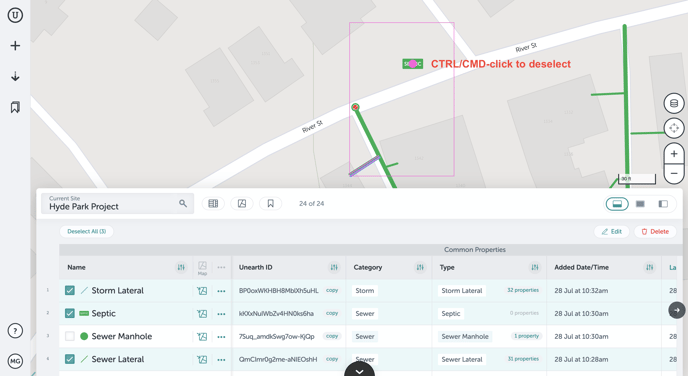
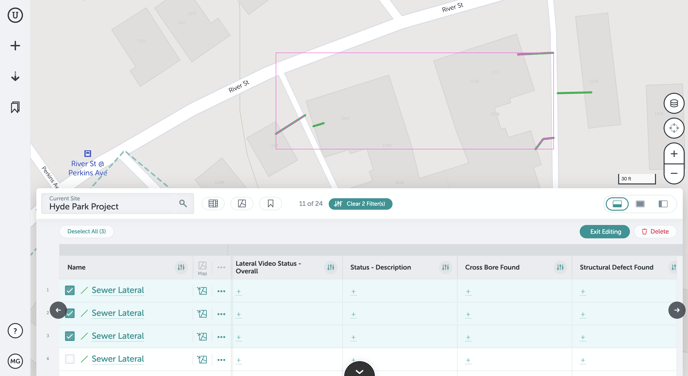
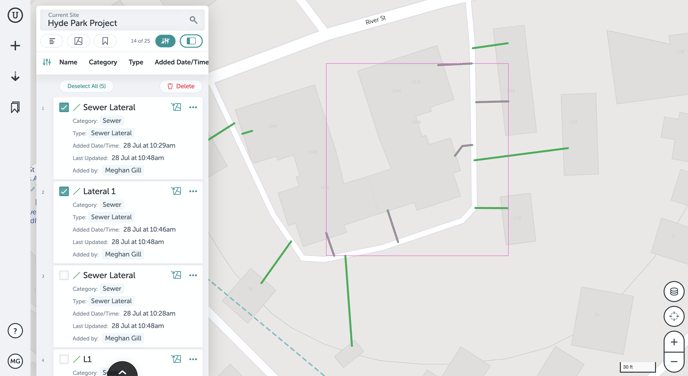
You can select assets on the map or in Table View. Selected assets on Table View will show a checked box to the left of the asset name. Selected assets on the map will show a pink indicator - a pink dot for point assets, or a highlighted pink box for line or polygon assets.
- Select on the map - Hold down the control (PC) or command (Mac) key and click one or more assets that you’d like to select.
- If there is more than one asset layered in the area that is clicked, a pop-up window will open showing all assets in that area. Check the box next to the desired asset to be deleted to select only that asset.
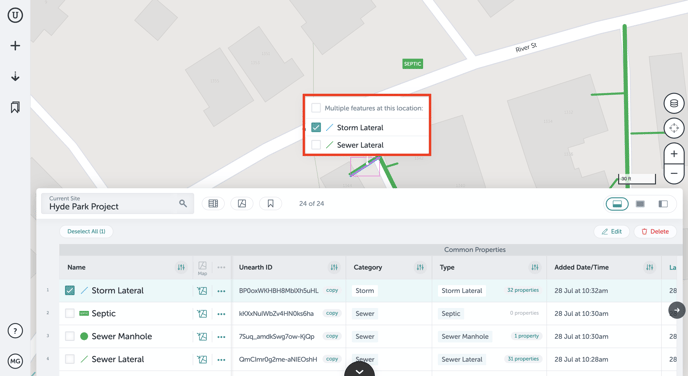
- If there is more than one asset layered in the area that is clicked, a pop-up window will open showing all assets in that area. Check the box next to the desired asset to be deleted to select only that asset.
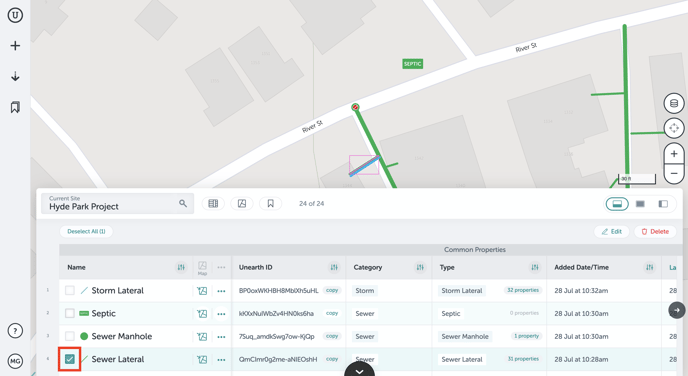
- Select on Table View - Click the checkbox on the left side of the asset(s) in Table View to select the asset. Click multiple checkboxes next to assets to select individual assets, or shift-hold and click to select a group of assets.
To deselect, you can click “Deselect All” at the top left of the Table View to clear all selected assets, or to individually deselect: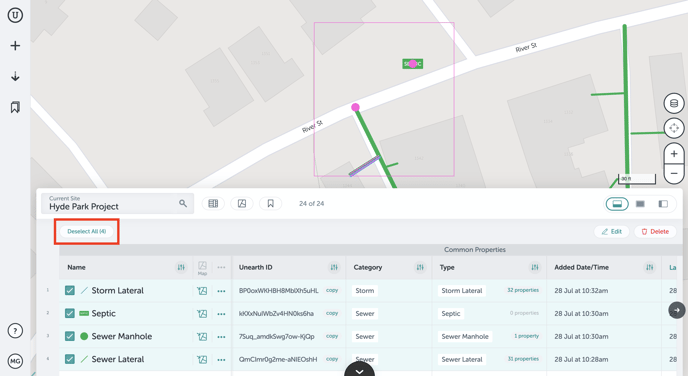
- On the map - hold down control/command and click again on a single asset on the map (the pink indicator will disappear to show deselection).
- On Table View - click again on the checkbox next to a single asset, clearing the checkmark.
Batch Edit
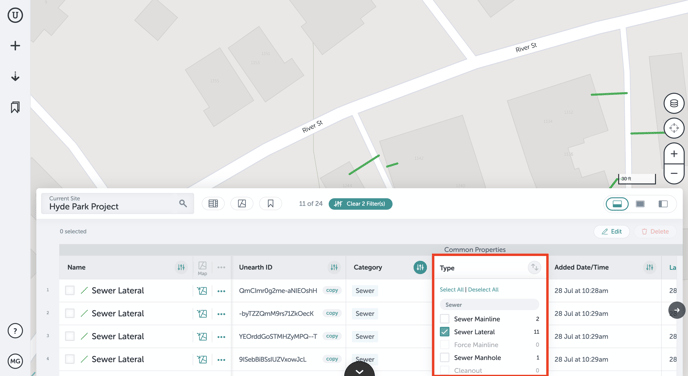
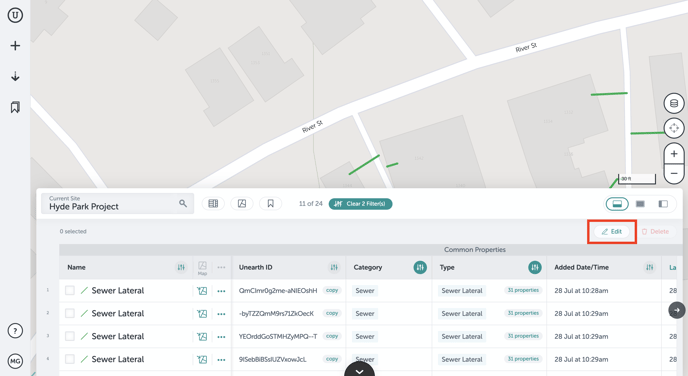
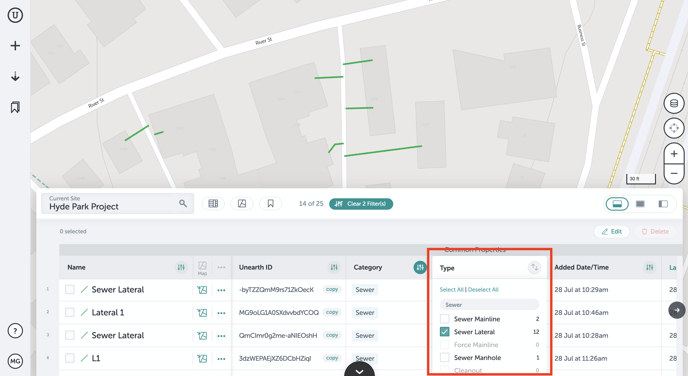
Batch editing enables you to quickly edit multiple assets of the same type at a time. You can apply filters to the Table View to only display the assets you need to edit. Batch edit must be done in Table View so that properties are visible. If you select assets in List View, changing to Table View will retain any selections already made.
- Apply any desired filters to the data using Table View.
- Select “Edit” in the right top corner of the Table View.
- Select the assets of the same type that you’d like to edit, either by clicking on the map or the table.
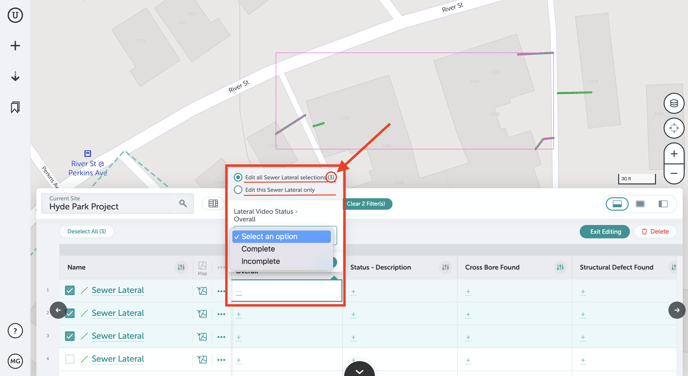
- Choose which property you want to edit, and select the change you’d like to make to all selected assets - this will only apply the changes to assets of the same type (this is noted above the property field - “Edit all (type) selections,” and will display the number of assets the change will be applied to. You can also choose to “Edit this (asset) only” to make change to only the asset clicked, not all selected.
- If you do not have permissions to edit a specific asset, you will only see the number of assets selected that are available to be edited by you in the edit pop-over (number of assets selected minus the number of assets not available to be edited). In this case, there are 4 assets selected but only 2 are permitted to be edited.

- Any changes made to the asset(s) will be automatically saved. If you’d like to undo the changes you just made, click “Revert” at the bottom of the pop-over window BEFORE you close out. Reverting cannot be done once you leave the editing window. You’ll see the selected assets’ values revert back to the value from before the edit.

- Clicking “Done” closes the pop-over window, but is not required for saving the changes.
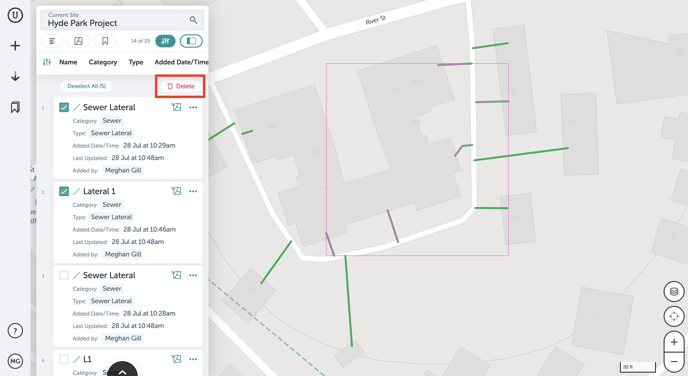
Batch Delete
Batch deleting increases efficiency by enabling you to delete multiple assets at a time. You can apply filters to the Table View to narrow results to the assets you’d like to delete. Batch delete can be done either in Table View or in List View.
- Apply any desired filters to the data using Table View.
- Select the assets that you’d like to delete, either by clicking on the map or the table.
- Once you have all selected that you’d like to delete, click “Delete” in the right upper corner of the Table/List View or click delete on your keyboard.
- If you do not have permissions to delete a specific asset, you will only see the number of assets selected that are available to be deleted by you in the pop-up confirmation box (number of assets selected minus the number of assets not available to be deleted). In this case, there are 4 assets selected but only 2 are permitted to be deleted.
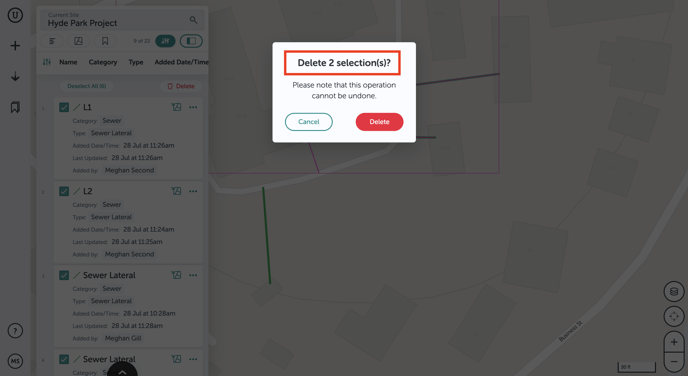
- Confirm that you’d like to delete the selected assets clicking “Delete,” or click “Cancel” to stop the deletion. Verify that the number of records shown is correct where it states “Delete (#) Record(s).” Take caution when confirming as this cannot be undone.

If you run into any issues or have any questions, please reach out to us at support@unearthlabs.com.
Revised July 2022