iOS Mobile App
Unearth’s mobile application allows for data gathering in the field - assets can be added, forms filled out, and information recorded on mobile devices whether online or offline.
The Unearth mobile app on iOS is the perfect pairing to the Unearth web app, and provides many benefits:
- Optimized for mobile devices - the Unearth app refines work on mobile devices, allowing you to precisely draw and place assets on the map using a mobile device.
- Use GPS to your advantage - directly navigate to an asset, connect to GPS devices such as Trimble to gather data with precise accuracy, or use the Quick Capture feature to immediately take a photo and have it geolocated to the place it was taken.
- Collect data even when there is no internet connection using Offline Mode - Offline mode is activated when an internet connection is not available. Data can still be gathered, and as soon as the internet connection is restored, all changes and additions will be synced to the cloud and visible on all devices.
In this article, you'll learn how to download and navigate the Unearth App, add assets and information, use offline mode, and optimize use with our tips and tricks.
Download and Navigate the Unearth App:
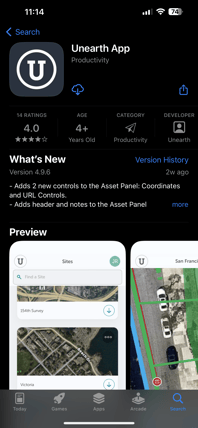
- Search in the iOS App Store for "Unearth App," and then download it to your device.
|
 |
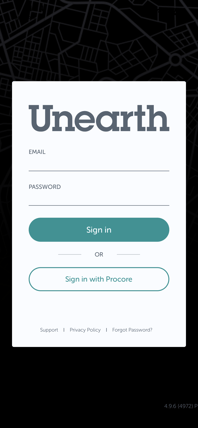
- Open the app and login using your Unearth login credentials, or, if you are a Procore user, you can select the "Sign in with Procore" option to login using your Procore credentials.
- If you've forgotten your password, select "Forgot Password?" at the bottom of the screen to be sent a password reset email.
|
 |
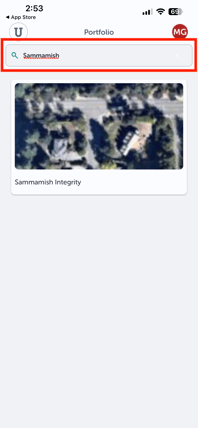
- You will be first taken to the “Portfolio” page where you will see a list of all the projects you have access to. Use the search bar at the top to find a particular project.
- If you don't immediately see the project you are looking for, give the app a moment to load in all the projects - if you have access to many projects, it can sometimes take a moment to load the full list. Then, try searching again.
|
 |
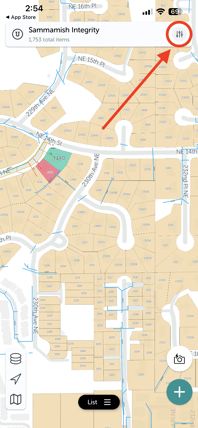
- Tap a project to open it.
- The map will appear at the top half of the screen, and the “List” will appear at the lower half.
The list is the mobile equivalent to Table View, where you can display all the assets currently in the project. Minimize it by swiping down, or fill the screen by swiping up. After minimizing, click “List” to reopen.
|
 |
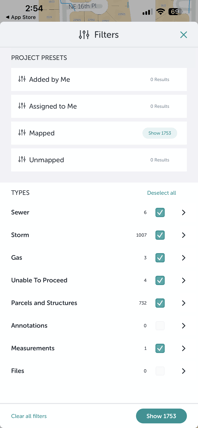
- Apply filters to your assets using the filter button in the top right corner - next to the project name - to refine what is visible on the map and in the list.
The web app offers more extensive filtering options optimized for quality control work, while the app is geared towards simple filtering in the field.
|
 |
- Filtering options include:
- Project Presets: filter based on commonly used properties, such as assets that have been "Assigned to Me."
- Filter based on asset type - click the arrow to expand an asset category and see all types within that category. Check/uncheck specific categories and types to narrow your results.
|
 |
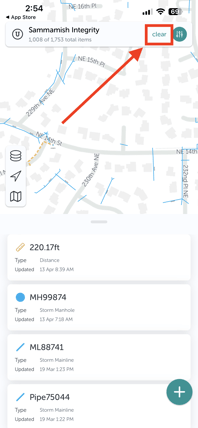
- Clear filters by clicking “clear” to the immediate left of the filter button.
- If you ever feel that you're not seeing assets you expect to see, verify you have no filters added that may be hiding assets from view. Clear the filters if needed.
|
 |
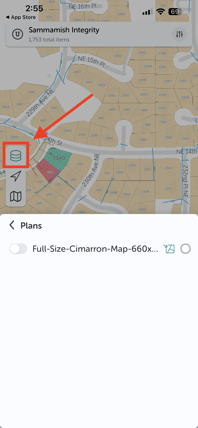
- Display plan layers by clicking the “layers” button in the left menu bar.
|
 |
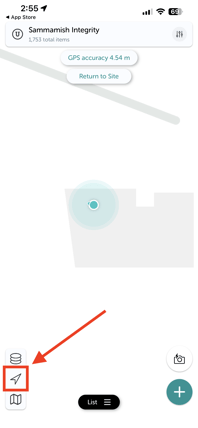
- “Go to Current Location” by clicking the arrow icon in the left menu bar (you may need to approve enabling GPS on your device).
The "Go to Current Location" button allows quick navigation on the map to where you are currently working in the field.
|
 |
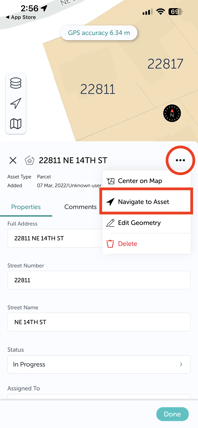
- Navigate to an asset using Apple Maps by clicking an asset, tapping the 3 dots menu, and selecting "Navigate to Asset."
- Apple Maps will automatically open, ready to start directions.
|
 |
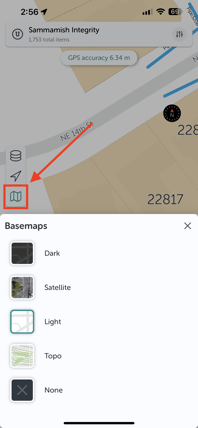
- Change the basemap using the map icon in the left menu bar.
Typically the satellite basemap is the easiest for use in the field, however, the topo basemap can be useful in areas with extensive tree cover or limited visibility to better identify structures on the map.
|
 |
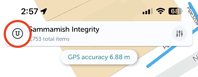
- Open the menu using the Unearth logo in the lower left corner. From this menu, you can:
- Navigate back to the Portfolio
- Access settings
- Connect to a GPS device (see the dedicated Trimble article for detailed instructions on connecting a Trimble device).
- Sign out of your account
- Or, contact support via phone call or email.
|
  |
Adding Assets and Information:
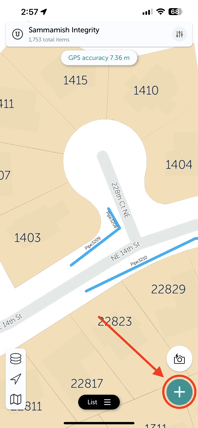
- Click the “+” menu in the center of the lower menu bar
|
 |
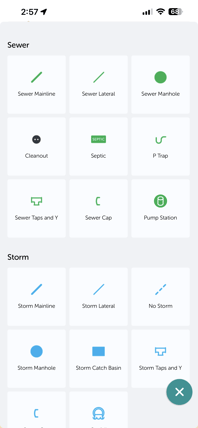
- Then, select the tool you’d like to add the the map.
|
 |
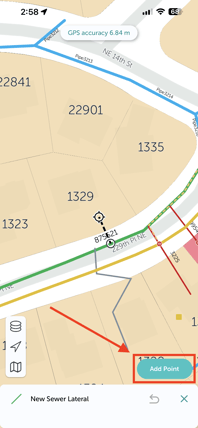
- A target circle will appear in the center of the screen. Pan the map or zoom with a two finger pinch to the area you’d like to add the asset. Once the target circle is where you’d like to place the point, click “Add Point.”
|
 |
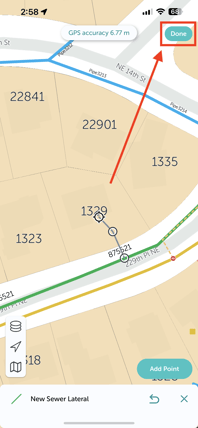
- If it’s a line or polygon tool, you will be prompted to place additional points to complete your shape. Click “done” once all points have been placed to complete the line or polygon.
|
 |
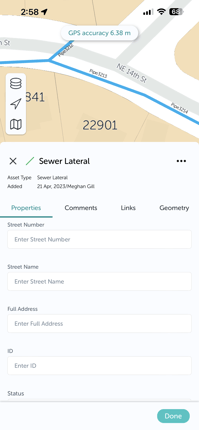
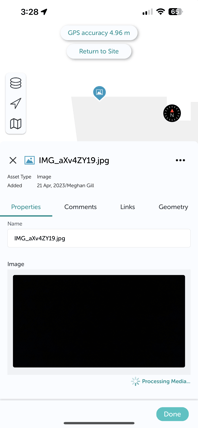
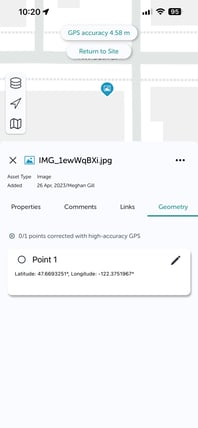
- The asset form will open where you can then fill out the form, add comments, view linked assets, or evaluate the asset geometry.
|
 |
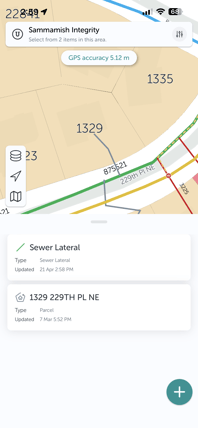
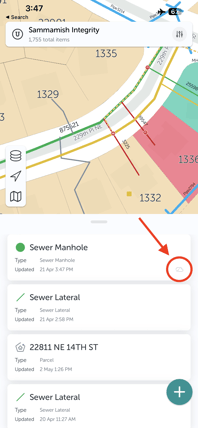
- After the asset has been added, you can click on an asset from the list to pan the screen to that asset’s location and open up the form. The asset forms can also be opened by tapping the icon on the map.
- If there’s two assets overlapping on the map, both options will pop up and you can select which of the two you’d like to view the form for.
|
 |
Adding Photos:
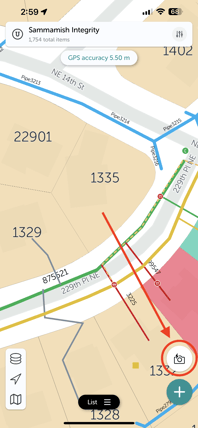
- Quick capture a photo using the camera icon in the lower right corner.
- The camera app will automatically open. Take a photo.
- Click "Use Photo" to confirm, or retake the photo.
- Connect to GPS if needed - either instruct it to use your iPhone GPS, or connect to an external GPS device.
- Your photo will immediately appear as an image icon on the map where it was taken.
|
|
Offline Mode
- If you're in an area with poor cellular reception, the Unearth Mobile App will move you into Offline Mode. This mode allows data to be collected without an internet connection and synced with the project once a connection is restored.
- When offline mode is active, assets added will show in the list with a small gray cloud icon - indicating they have not yet synced to the project. Once online, these assets will sync.
- Keep in mind that there may be a slight delay between connection being regained and the cloud icon disappearing.
|
 |
Mobile App Tips and Tricks
- When uploading photos: iOS has additional security measures that strips the location data from photos when adding from within a browser. For this reason, we highly recommend using the iOS Unearth Mobile App when adding photos, as it will always retain its location data - whether taken from quick capture or uploaded as an asset or to an asset form.
If you must work from an iOS mobile browser, there is a workaround: First, "share" the photo from your camera roll and "Save to Files." Then, when adding the photo in Unearth, click "Choose Files" rather than "Photo Library" and select it from the files - this will retain the location data.
|
 |
If you run into any issues or have any questions, please reach out to us at support@unearthlabs.com.
Revised April 2023