Portfolios serve as the account homepage for locating, creating, and managing projects.
After you login to Unearth, the Account Portfolio will appear with a map and a list of your current projects. You can quickly differentiate the Portfolio View from the Project View by the color of the menu bars - Portfolio View is dark gray, and Project View is light gray.
- At the top: you see all of your project sites as polygons on your map (this is the site bounds polygon that you draw when you create a new project site).
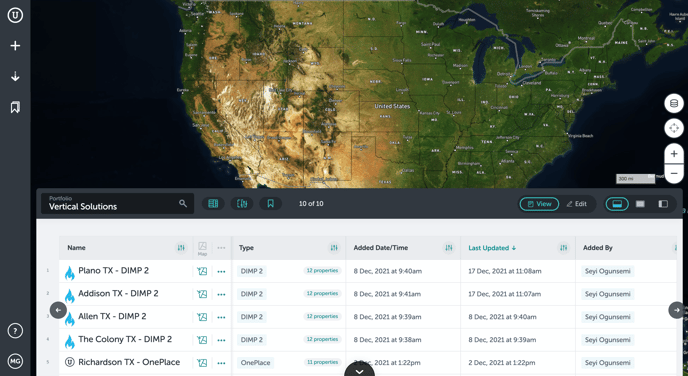
- At the bottom: you have a list of all of your projects:
- Each project has individual properties that you can note and search.
- The 'type' of a project depends on the toolkit you decide to use when creating that project.
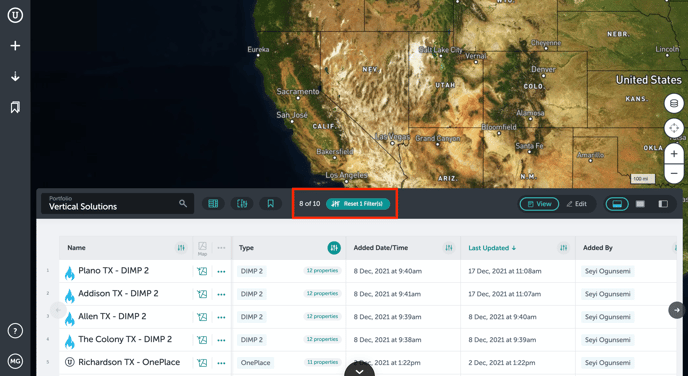
- You can filter the table view of projects the same way you can filter within a project. If you ever have difficulty finding a project, check if you can reset the filters since that may be blocking the visibility of a project.
- On the right-hand side, you can change your basemap, find your current location, and zoom in/out on your map.
- On the left-hand side of the Portfolio:
-
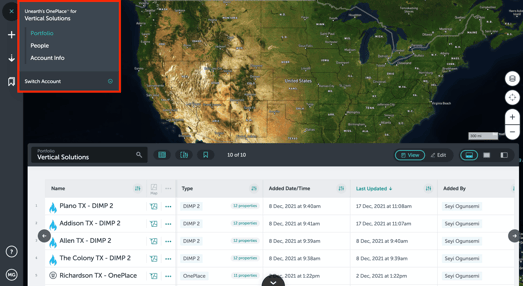
- The Unearth logo is the home for your account settings and info:
- The Unearth logo is the home for your account settings and info:
-
-
- Portfolio = the account homepage (the view of the map and the list of current project sites).
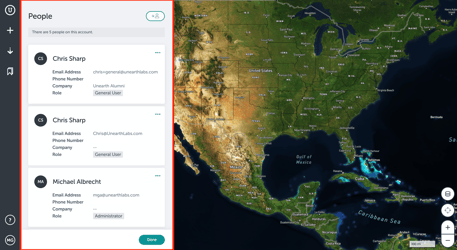
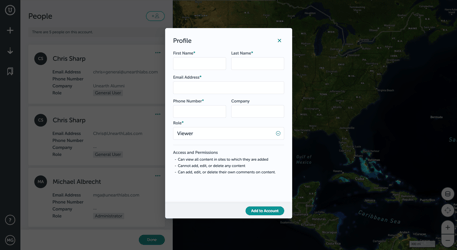
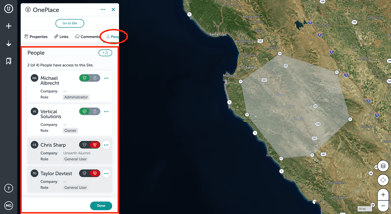
- People = the complete list of users that are on this account and where you can add new users if you are an account owner or administrator.
- Account Info = a quick overview of the account name, number of user seats, and when it was created.
- Switch Account = if you have been added to multiple accounts, you can find the others in a dropdown menu.
-
-
- 'Plus' Icon - Create a new project
- Create a new project by clicking on the 'plus' icon (done by Owners, Administrators, and Managers).
- Create a new project by clicking on the 'plus' icon (done by Owners, Administrators, and Managers).
- 'Plus' Icon - Create a new project
-
-
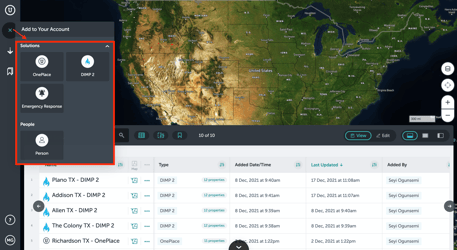
- The 'Projects' window opens and you will find your custom toolkits that have been added to your account. Select one and begin creating your new Project.
- You will be prompted to locate and draw your site bounds.
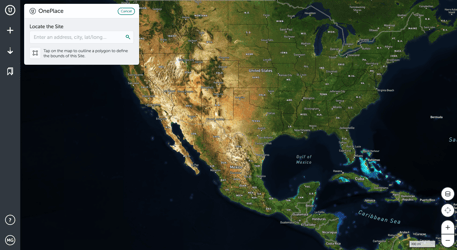
- Draw your polygon and click the last point twice to complete it. Then you will see the Project's properties form.
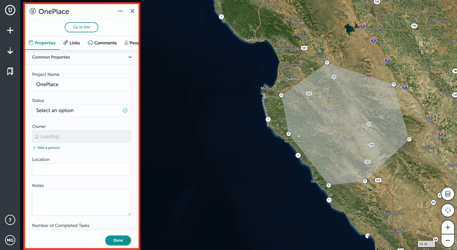
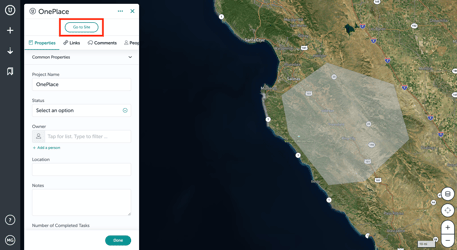
- Edit the Project properties here (number, name, status, and comments). Included in the properties form are tabs:
- Links - upload any files to the Project.
-
-
-
-
- Comments - keep a running conversation going about the project and send notifications to specific users using the @mention function.
-
-
-
-
-
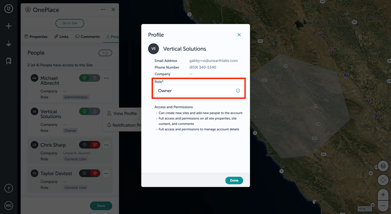
- People - manage users on the specific Project and their roles (Owners and Administrators).
- Places/Levels - view the Project's site bounds and add additional places within the bounds to link assets that are within the Project.
- Now, click "Go to Site" to start adding data and assets to your new Project site.
- People - manage users on the specific Project and their roles (Owners and Administrators).
-
-
"Go to Site" opens the Project site and is where you start adding assets, data, and any files/information to that particular project.
-
- Export Arrow:
- You can export a document (XLS, CSV, geoJSON, PDF, Shapefile, or KML) that includes all of your Project Sites to keep for your own records.
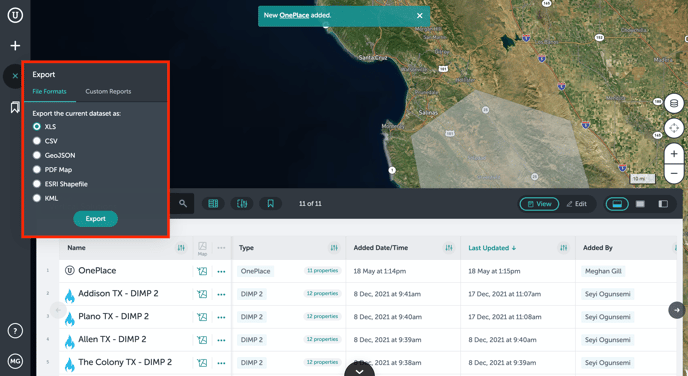
- You can export a document (XLS, CSV, geoJSON, PDF, Shapefile, or KML) that includes all of your Project Sites to keep for your own records.
- Saved Views bookmark:
- You can create a Saved View to quickly filter your data according to your project needs.
- To save a filtered view, first assign the desired filters, then click the bookmark on the Table View:
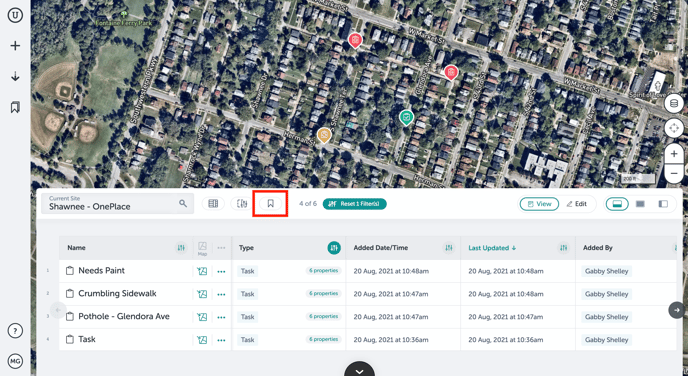
- To save a filtered view, first assign the desired filters, then click the bookmark on the Table View:
- You can create a Saved View to quickly filter your data according to your project needs.
- Export Arrow:
-
-
-
- Name and save your Saved View:
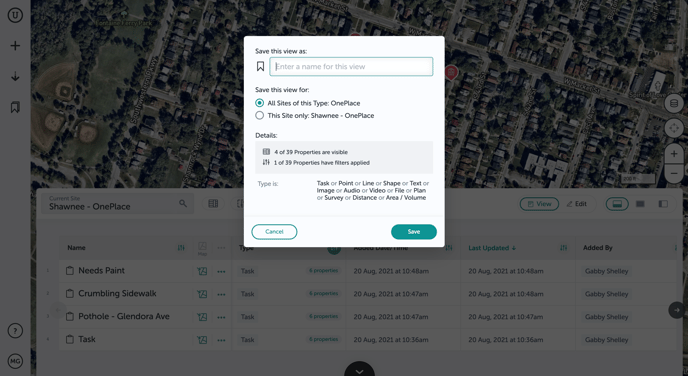
- Now, even when filters are cleared, you can click the bookmark on the left menu to select saved views:

- Name and save your Saved View:
-
-
As always, if you run into any issues or have any questions, please reach out to us at support@unearthlabs.com.
Revised May 2022